Instructions
|
 |
This is a pic of all the parts you should get with the TeraFlex 4″ Flex Arm Lift Kit. Take some time to make sure you have all the parts shown as well as all the tools listed on the left prior to starting this project. |
 |
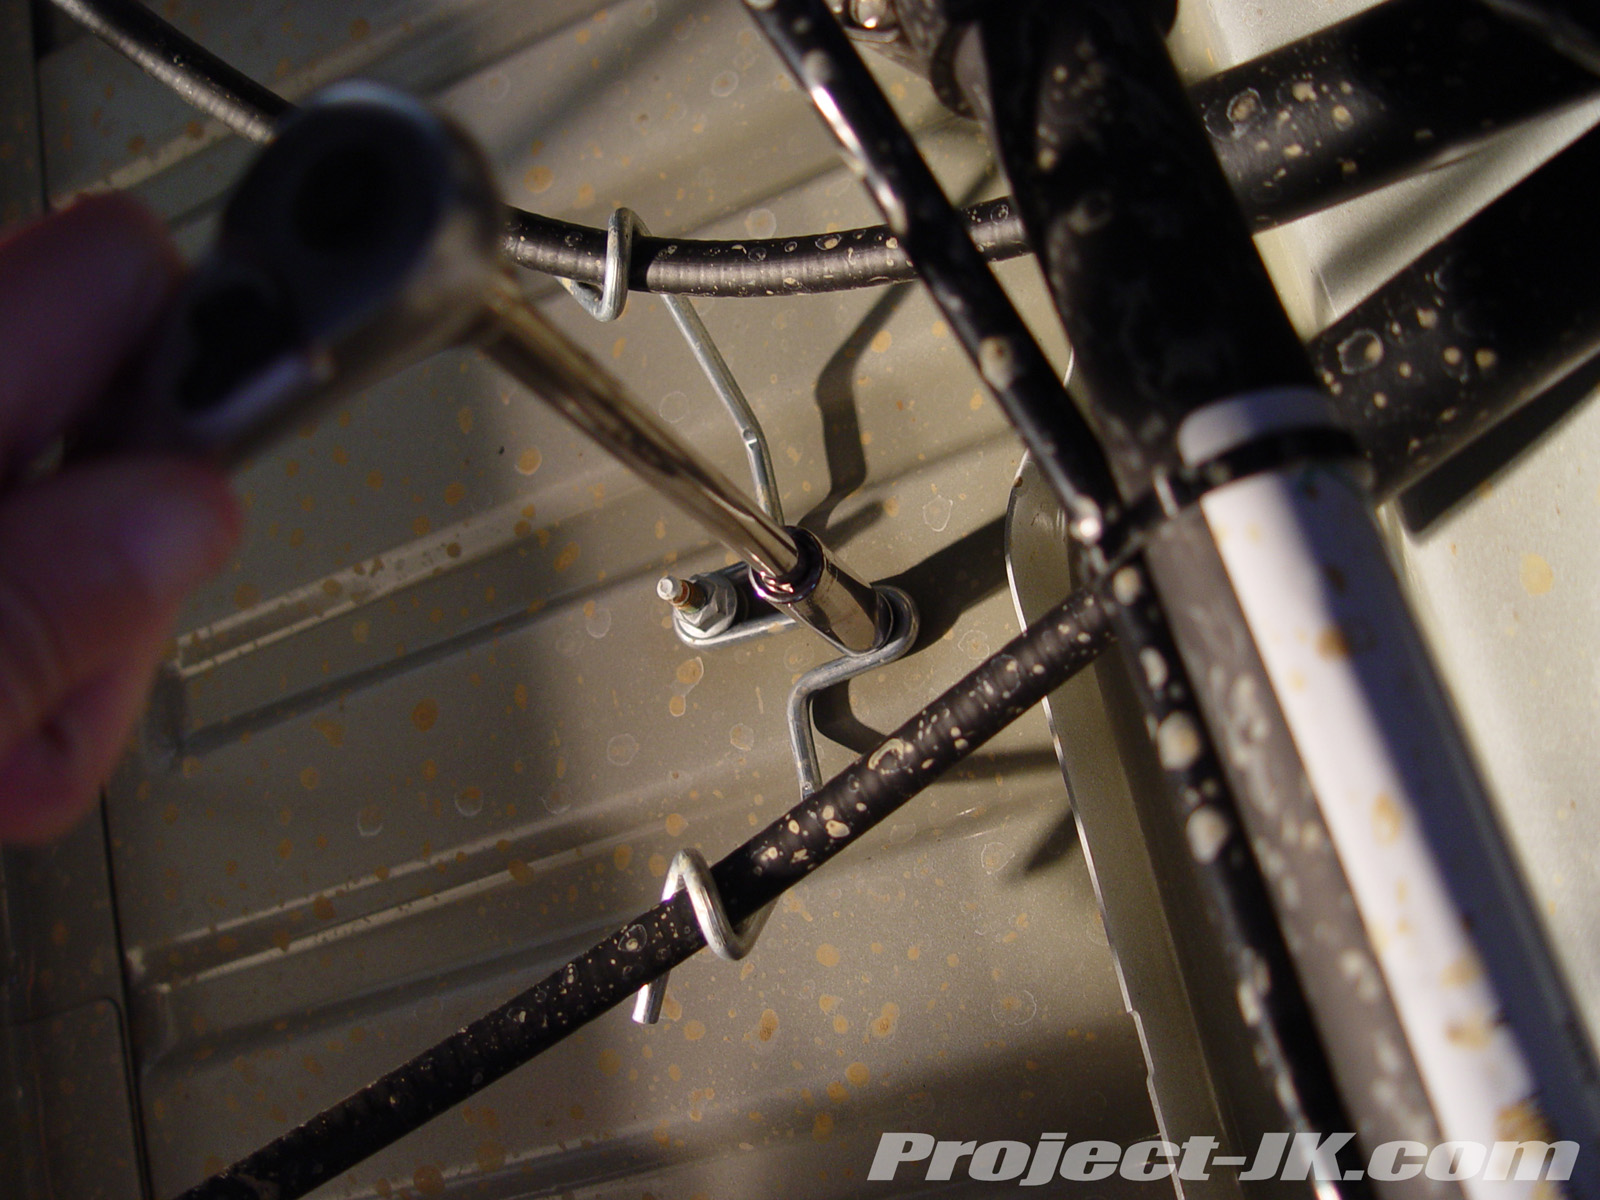
1. Park your Jeep JK Wrangler on a level surface and chock your rear tires. Using an 18mm socket and wrench, remove the bolts and nuts securing your front sway bar links to the lower axle mounts. Then, slip a 19mm wrench in between the sway bar link and swaybar itself to secure the ball joint stud in place and remove the nut securing it in place with an 18mm wrench. Completely remove the links from the sway bar itself. (NOTE: If you have a manual transmission, skip to step #4). |
 |
2. If you have an automatic transmission, use an 18mm socket to remove the 3 bolts (one on each frame rail and one on the cross member) securing the skid plate to the frame of your Jeep JK Wrangler. Remove the skid plate and set it aside for now. |
 |
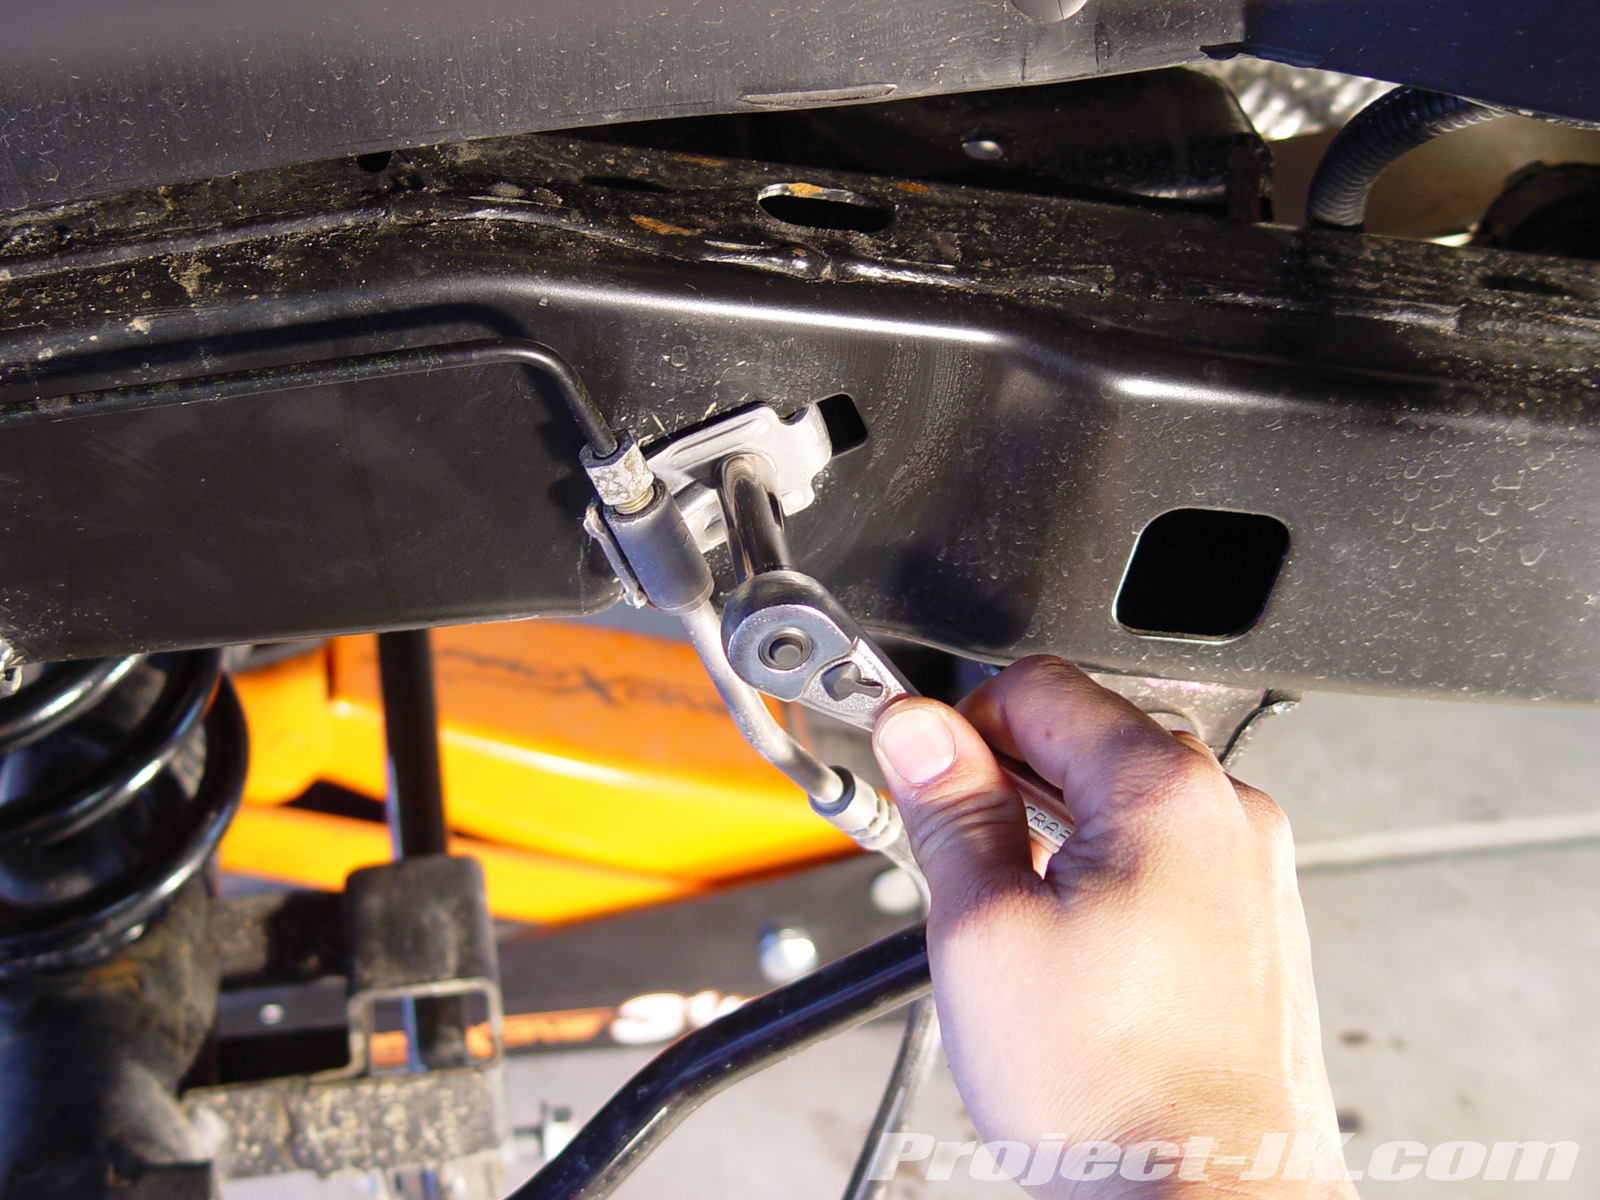
3. Remove the bolt securing your Jeep JK Wrangler’s front track bar to the front axle mount using a 21mm socket. This can be a tough bolt to remove and an impact wrench or breaker bar will help to make this job easier. |
 |
4. Using a 21mm socket and wrench (or crescent wrench), remove the bolt and nut securing the factory front track bar onto the frame mount of your Jeep JK Wrangler. Again, this can be a tough bolt to remove and an impact wrench or breaker bar will help to make this job easier. |
 |
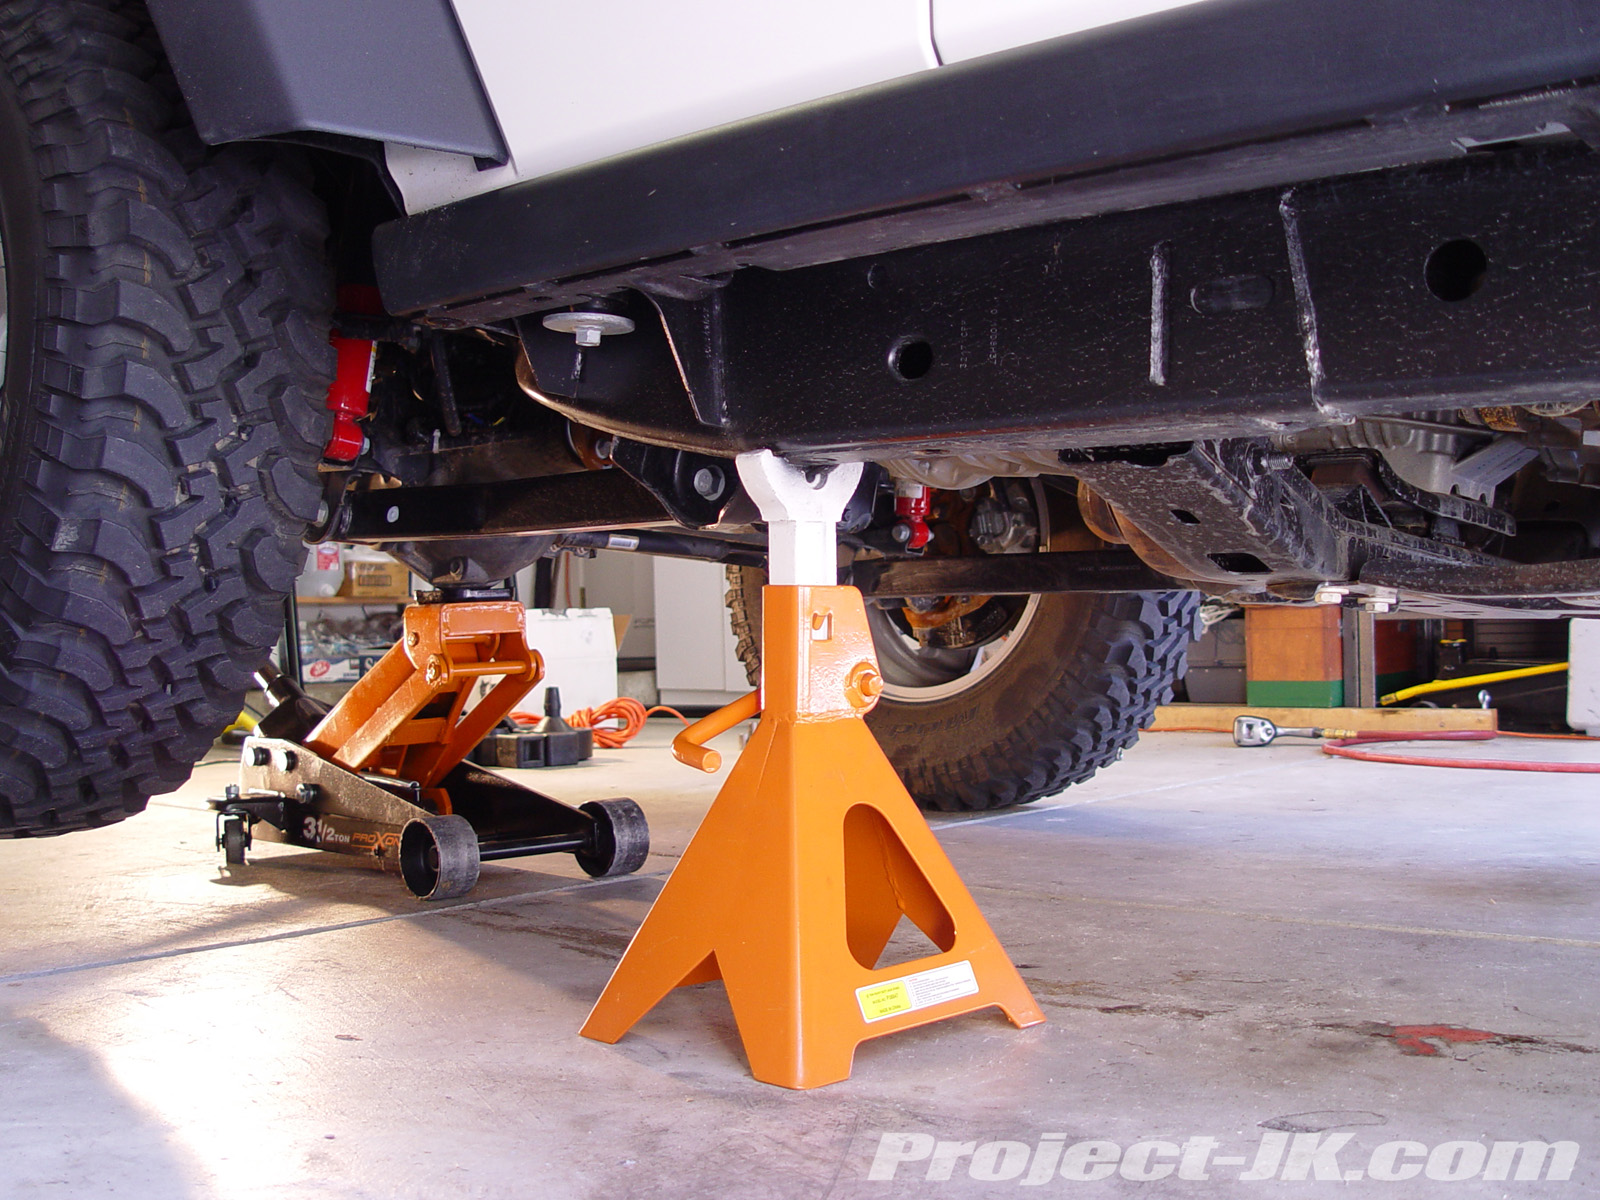
5. Loosen (but do not remove) the lug nuts on your front wheels, raise the front end of your Jeep JK Wrangler one side at a time from the axle using a tall floor jack and then set it back down onto (2) jack stands, each placed just behind the lower control arm frame mounts as shown in this pic. |
 |
 |
 |
| 6. Remove the wheels off your Jeep JK Wrangler using a 19mm lug wrench or socket and then place them under the frame rails for added security. Leave the floor jack under the front axle to help support it. |
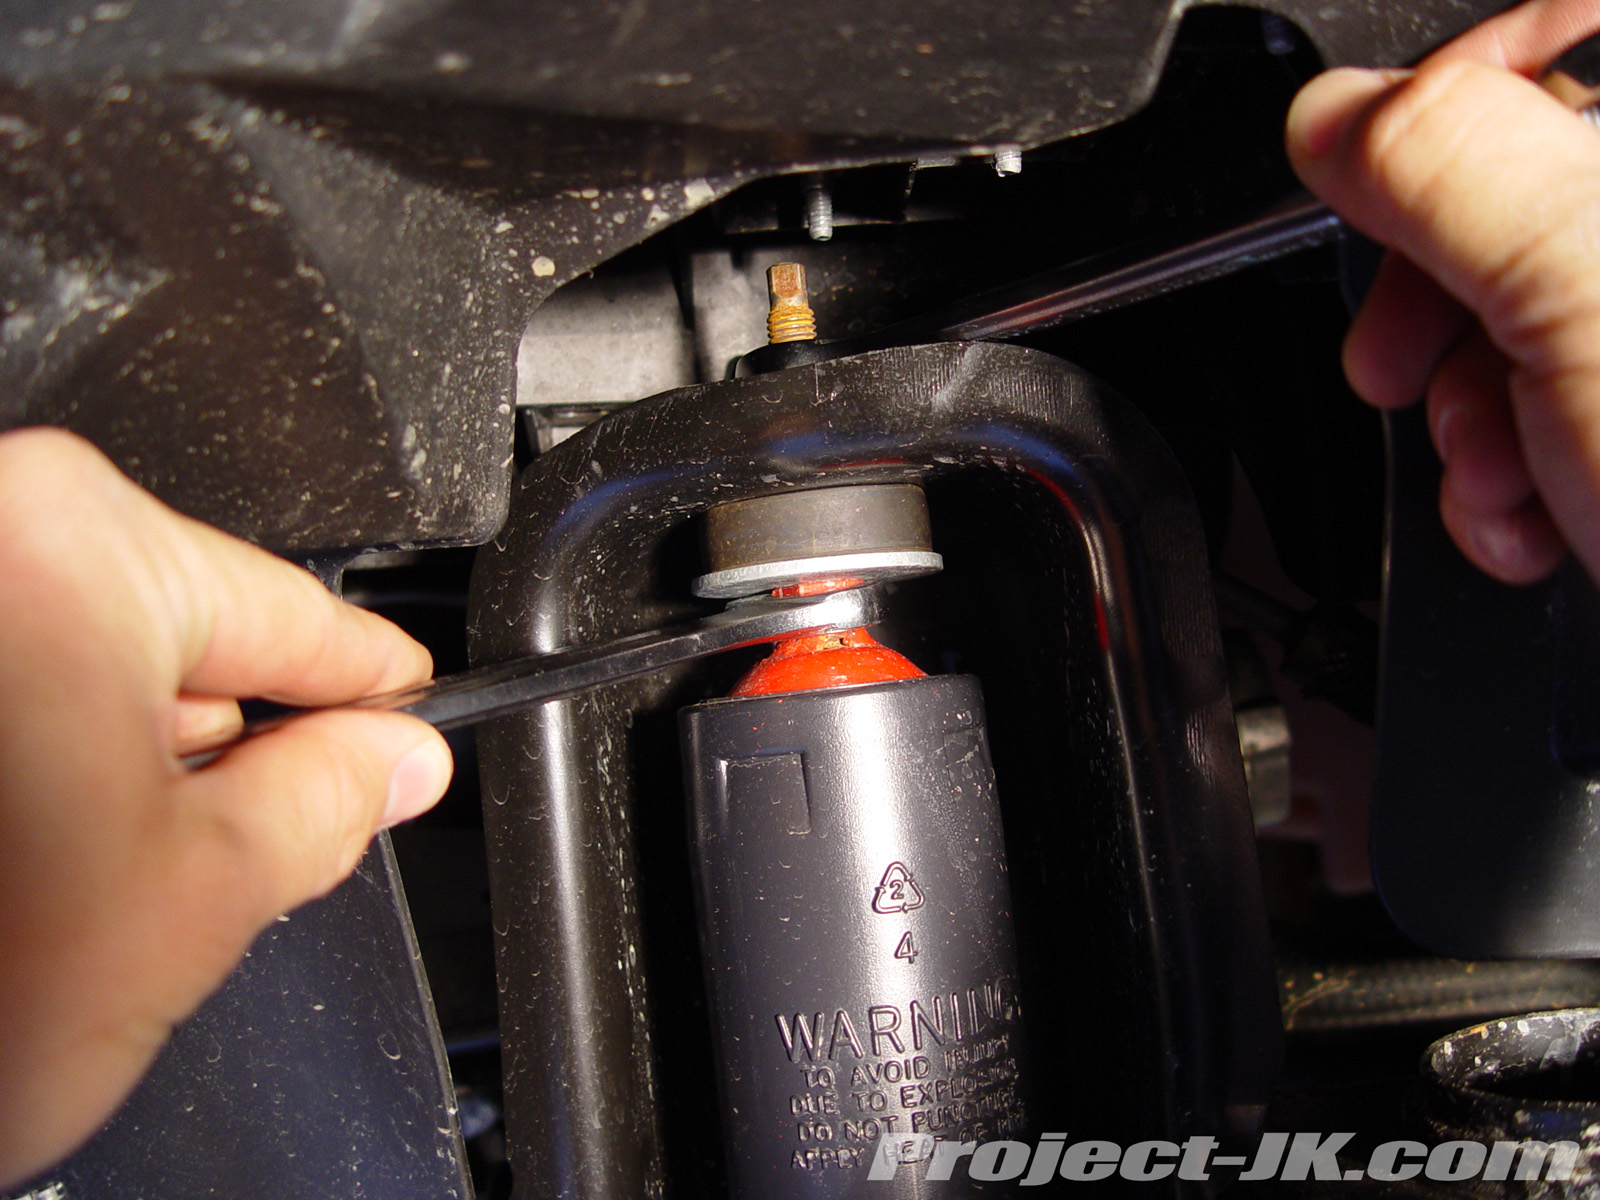
7. Using a 5/8″ wrench, hold your Jeep JK Wrangler’s front shock can in place just below the upper shock mount to keep it from spinning. Then, remove the stud mount nut above using a 16mm wrench. |
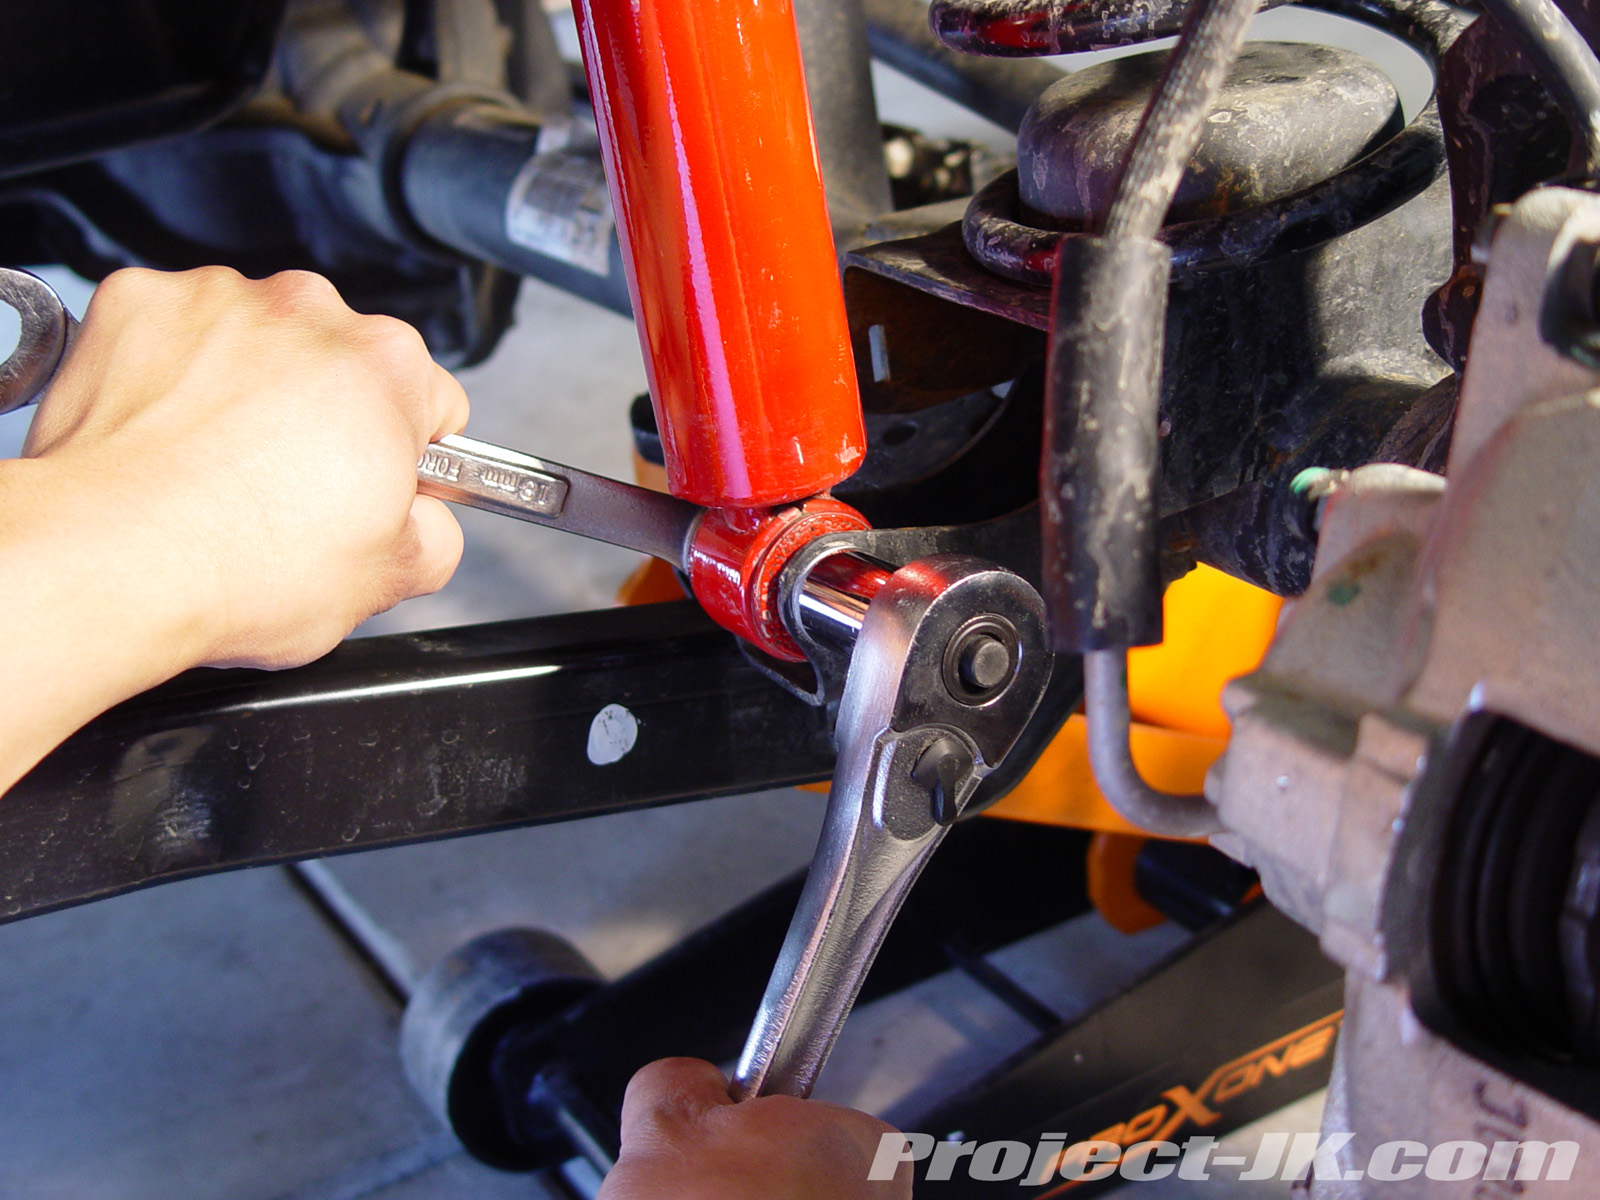
8. Using an 18mm socket and wrench, remove the bolt and nut securing your Jeep JK Wrangler’s front shock to the lower axle mount. Pull out the entire shock assembly and set aside the factory rubber bushings and washers as they will be reused. |
 |
 |
 |
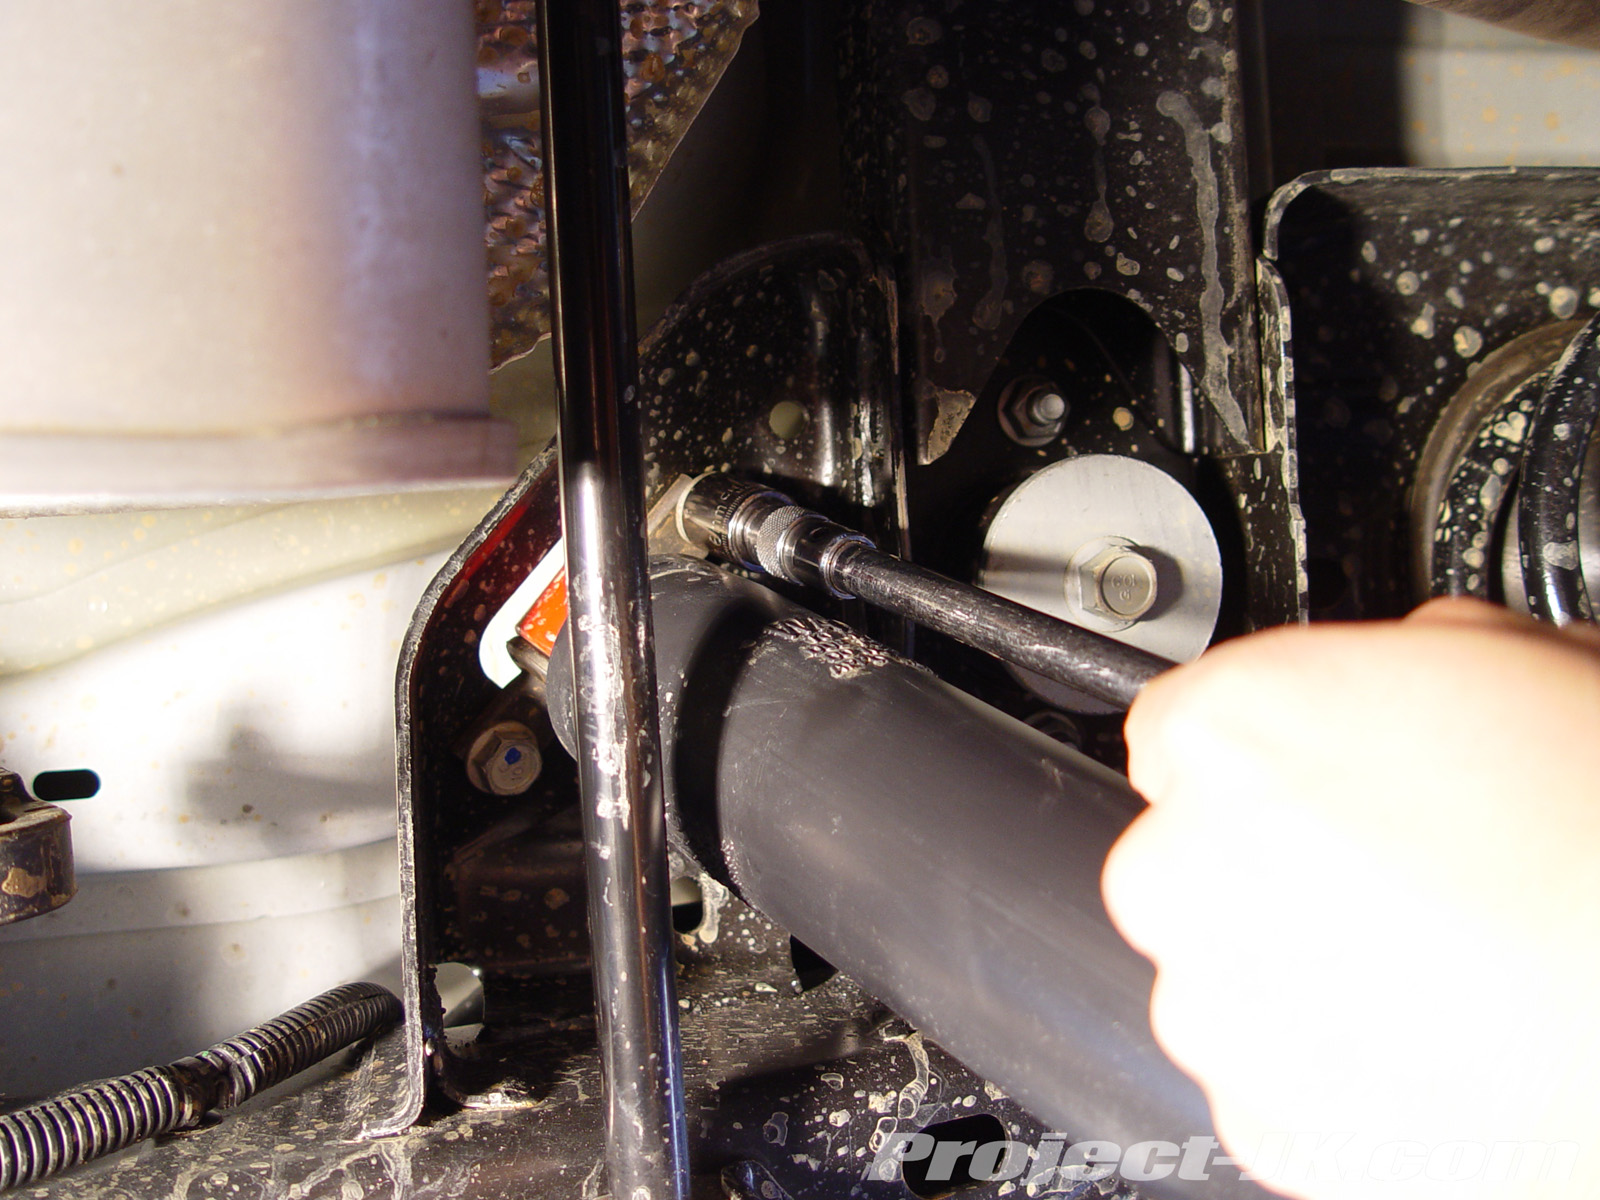
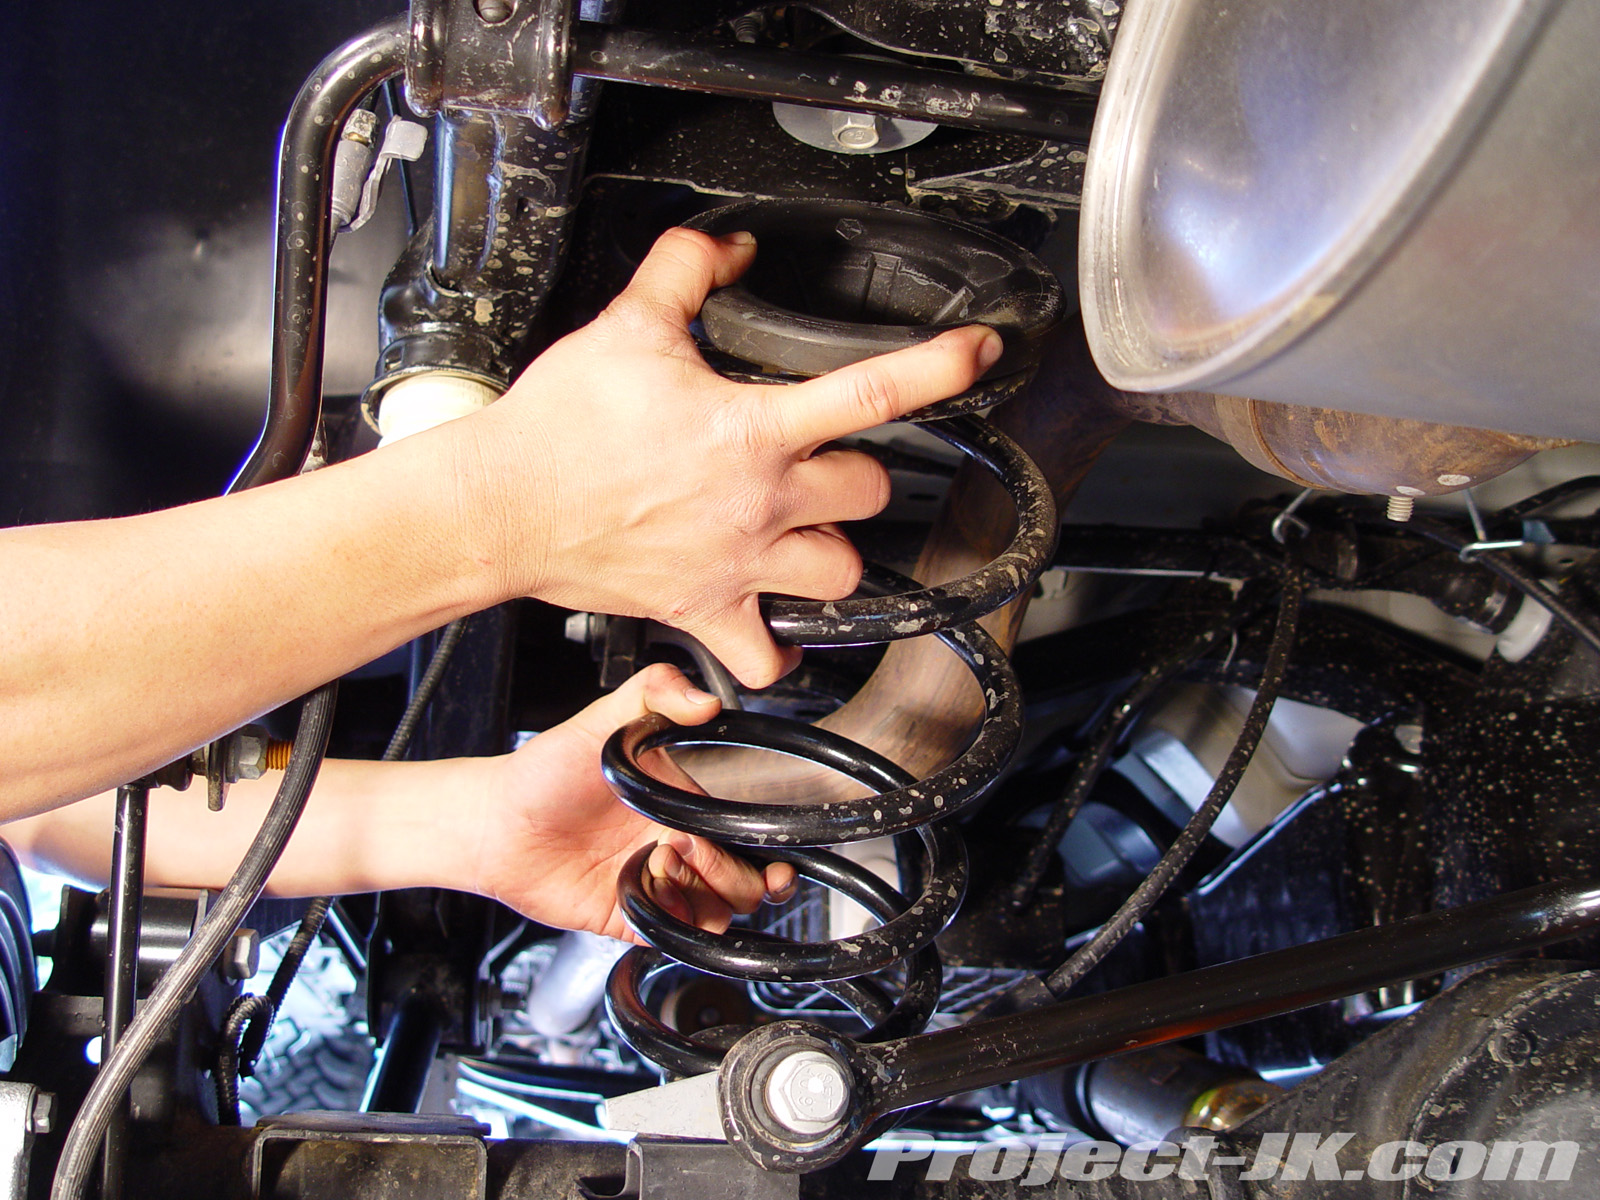
| 9. Being mindful of your brake lines, carefully lower your Jeep JK Wrangler’s front axle until the factory front coils can be slipped out of the upper perch and be removed completely with ease. |
10. Using a 21mm socket and wrench, remove the bolts securing your factory front lower control arms to your Jeep JK Wrangler’s front axle mounts. These bolts will be tough to remove and the use of a breaker bar may be needed. |
11. Again, using a 21mm socket and wrench, remove the bolts securing your Jeep JK Wrangler’s factory front lower control arms to the frame rail mounts and then completely remove it from your Jeep. Be sure to save the factory hardware as they will be reused. |
 |
12. Your Jeep JK Wrangler’s factory front lower control arms measure 22-5/8″ in length eye to eye. As a starting point, I set my new TeraFlex adjustable front lower control arms to being 23″ long which is 3/8″ longer than stock. |
 |
13. Install your TeraFlex adjustable lower front control arms onto the frame mounts using the factory hardware. Do not torque this bolt yet as it will need to be done once your Jeep JK Wrangler is back on the ground. |
 |
 |
 |
| 14. Install your TeraFlex adjustable lower front control arms onto the axle mounts using the factory hardware. Again, do not torque this bolt yet as it will need to be done once your Jeep JK Wrangler is back on the ground. |
15. Using a pair of needle nose pliers, pry off the wiring harness from your Jeep JK Wrangler’s drivers side upper control arm axle mount bracket as shown in this pic. |
16. Remove the bolts securing your Jeep JK Wrangler’s factory front upper control arms from the axle mounts using a 18mm socket and wrench. Be sure to save the factory hardware as they will be reused. |
 |
 |
 |
| 17. Using a 18mm wrench, remove the bolt securing the driver side upper control arm to the frame mount of your Jeep JK Wrangler and remove the control arm itself. Then, loosen the passenger side upper control arm frame mount bolt as shown in this pic. |
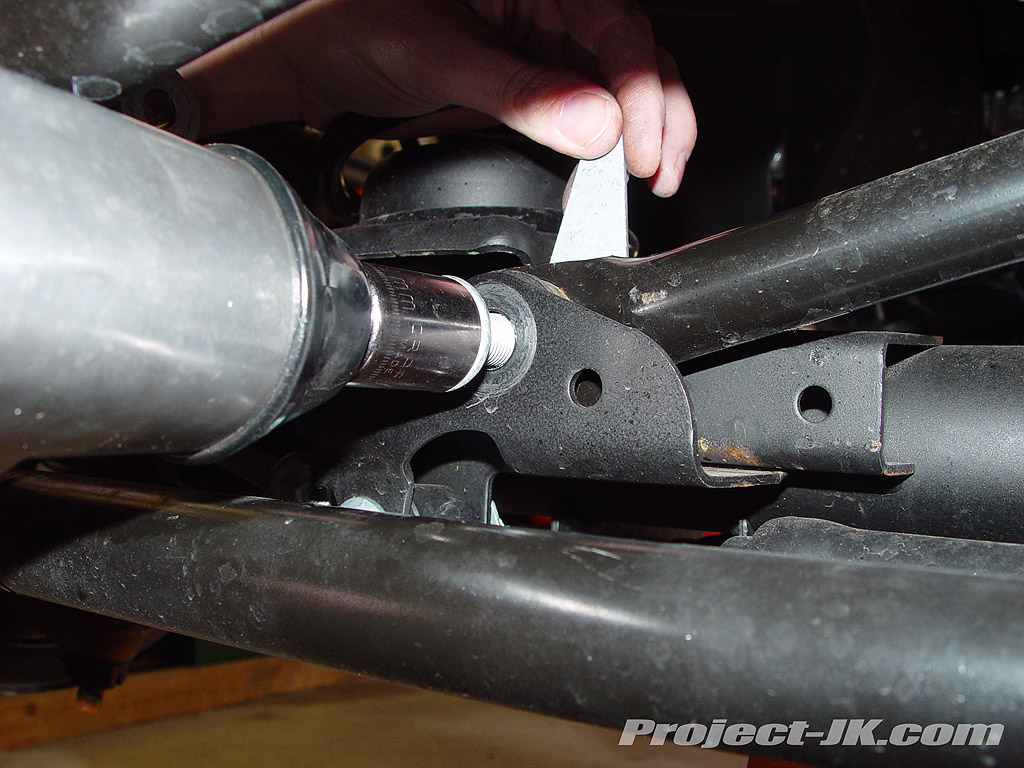
18. As you can see in this pic, the passenger side upper control arm frame mount bolt cannot be extracted due to your Jeep JK Wrangler’s exhaust being in the way. For the purposes of this write-up, I recommend that you just cut it and replace it with a new bolt. |
19. Pull the head of the passenger side upper control arm frame mount bolt out as far as you can and then cut it off using a Sawzall reciprocating saw and metal cutting blade as shown in this pic. Once cut, extract the remaining length of the bolt and remove the control arm itself from your Jeep JK Wrangler. |
 |
20. Your Jeep JK Wrangler’s factory front upper control arms measure 18-3/4″ in length eye to eye. Again, as a starting point, I set my TeraFlex front adjustable upper control arms to 18-7/8″ long which is 1/8″ longer than stock. |
 |
21. Using a 18mm socket attached to a 6″ ratchet extension carefully feed the new replacement bolt provided into the access hole on the outside of the frame rail and install the TeraFlex adjustable upper control arm onto your Jeep JK Wrangler’s passenger side frame mount as shown in this pic. Then, using the new replacement washer and lock nut. Tighten but do not torque this bolt and nut at this time. |
 |
 |
 |
| 22. Install your TeraFlex driver side adjustable upper control arm onto the frame mount on your Jeep JK Wrangler using the factory hardware. An 18mm socket will be needed for this job. Tighten but do not torque this bolt at this time. |
23. Install both TeraFlex adjustable upper control arms onto the axle mounts using the factory hardware. Make sure that the bolts are installed from the inboard to outside and then finger tighten but do not torque these bolts at this time. |
24. Zip-tie the wiring harness you previously cut off of the factory driver side upper control arm to your new TeraFlex one as shown in this pic. |
 |
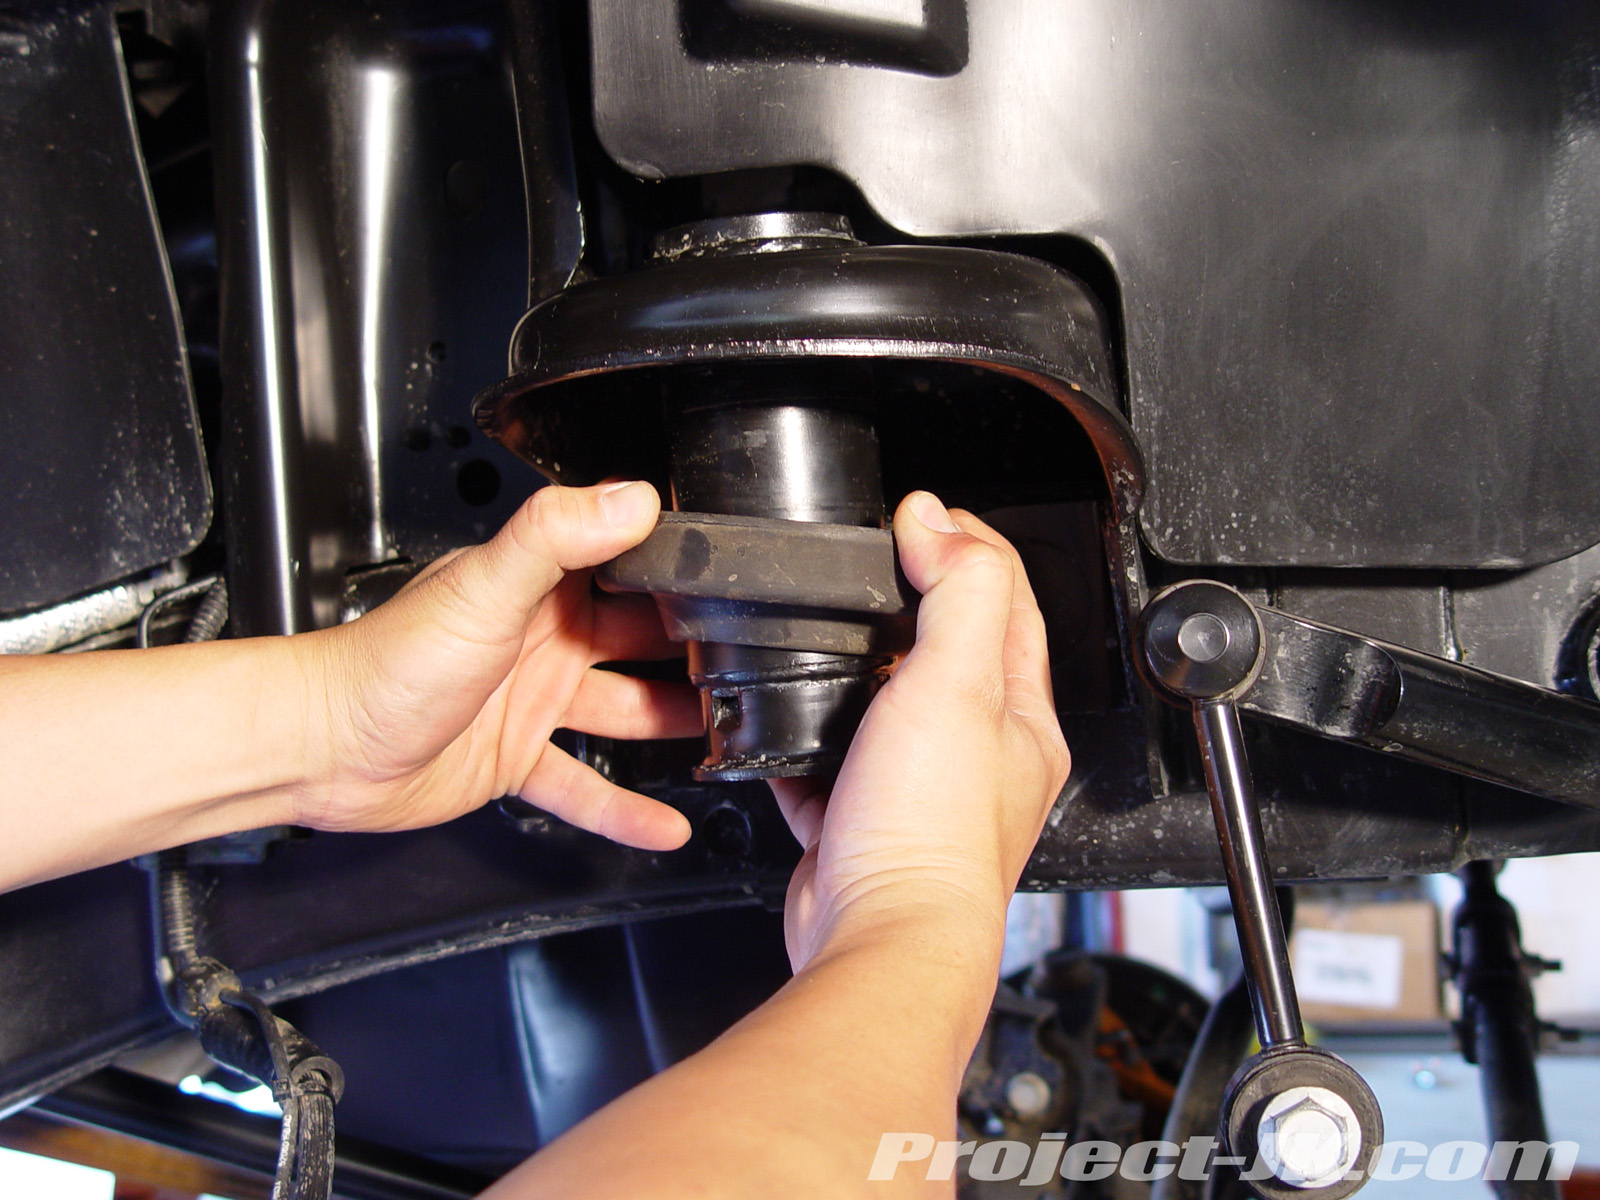
25. Firmly grab the yellow factory bump stop on your Jeep JK Wrangler and pry it out of its retaining cup. |
 |
 |
 |
| 26. Clean off the lower spring perch on your Jeep JK Wrangler’s front axle and then, using one of the TeraFlex bump stop extensions as a template, mark the point where you will need to drill your mounting hole on the lower spring perch using a center punch and hammer |
27. Use a 1/8″ metal drilling bit to make a pilot hole in the center of your Jeep JK Wrangler’s front lower spring perches. Then, drill the pilot holes you just made to their final size using an 11/32″ metal drilling bit. If you use a unibit, you can skip the pilot hole and do all this in one step. |
28. Using a 9/16″ socket and one of the self-tapping bolts provided with the TeraFlex kit, slowly thread the holes you just drilled out by pressing down and ratcheting the bolt on. Make sure to back out often to clear out the debris and take your time. |
 |
29. Take your your new TeraFlex upper front bump stop extensions and apply some white lithium grease to the connecting end of it. |
 |
30. Install the yellow factory bump stop into the new TeraFlex upper front bump stop extensions. |
 |
 |
 |
| 32. Place one of the TeraFlex front lower bump stop extensions on top of your Jeep JK Wrangler’s front axle lower spring perch. Then, position the new upper front bump stop extension on top of it and under the opening of the retaining cup. Using your floor jack, slowly raise your front axle up until the upper front bump stop extension plugs into the retaining cup. |
33. Take one of your new TeraFlex front coils, slip it up over the bump stop extension and then before seating it onto the lower spring perch, slip in one of the lower bump stop extensions through the bottom of the coil as shown in this pic. |
34. Insert the self-tapping bolt through the middle of the TeraFlex lower bump stop extension and secure it in place using a 9/16″ socket and a 3″ ratchet extension. Working through the coils as shown in this pic, tighten the bolt to 30 ft. lbs. of torque. |
| 35. You will now need to install your new TeraFlex front stainless steel extended brake line. For instructions on how to do this, click on the link below:Extended Brake Lines Installation Write-Up |
 |
 |
 |
| 36. Begin the installation of your new TeraFlex 9550 front shocks by slipping one of the large washers on top of the mounting stud so that the concave side is pointing up. Then, install one of the black polyurethane bushings on top of the washer as shown in this pic. |
37. Insert the TeraFlex 9550 front shock mounting stud through the top of your Jeep JK Wrangler’s shock tower. Then, slip the other black polyurethane bushing on top followed by the the 2nd large washer (concave side facing down) and nut as shown in this pic. |
38. Grasp the TeraFlex 9550 front shock can firmly with one hand and then secure the mounting stud nut in place using a 16mm wrench. |
 |
39. Using an 18mm socket and wrench, secure your new TeraFlex 9550 front shocks to your Jeep JK Wrangler’s axle mount using the factory hardware and tighten the nut and bolt to 56 ft. lbs. of torque. |
 |
40. Install your new TeraFlex adjustable front track bar onto the frame mount of your Jeep JK Wrangler making sure that the bend is pointing up and closest to the frame. Loosely secure the track bar in place using the factory hardware.NOTE: I installed my track bar on to a track bar relocation bracket of a different make as TeraFlex did not have one of their own at the time of this installation. Newer kits do come with one and they will require some welding. |
 |
41. Reinstall your Jeep JK Wrangler’s front wheels, lower it back down on the ground and tighten the lug nuts to 95 ft. lbs. of torque. |
 |
42. Install your new TeraFlex front sway bar links to your Jeep JK Wrangler’s front sway bar using the new hardware provided. Tighten them to 75 ft. lbs. of torque. You will need an 19mm socket and wrench to do this job.NOTE: If you have a Sahara or X, click on the link below to see instructions on how to install the quick disconnect mounts and storage pins:
TeraFlex Sway Bar Quick Disconnect Installation Write-Up |
 |
43. If you have a Rubicon, simply secure your new TeraFlex sway bar links to your Jeep JK Wrangler’s axle mounts using the factory hardware. Tighten these bolts to 75 ft. lbs. of torque. You will need an 18mm socket and wrench to do this job. |
 |
44. With the engine off, put your key in the ignition, make sure that the steering wheel is unlocked and then have a friend turn it in one direction or the other until you can line up your TeraFlex adjustable front track bar bushing with the axle mount hole on your Jeep JK Wrangler. Secure the track bar in place using the factory hardware. Using a 21mm socket and ratchet extension, tighten both the frame and axle mounting bolts to 125 ft. lbs. of torque. |
 |
45. With the TeraFlex adjustable front track bar installed, loosen up the 2 turnbuckle nuts with a 19mm wrench. |
 |
46. Firmly grab the turnbuckle and rotate it clockwise or counter-clockwise to give you the length you need to re-center your front axle. Refer to the basic front end alignment write-up below for help on how to do this:Basic Front End Alignment Write-Up
Once centered, secure the turnbuckle in place by re-tightening the 2 nuts. |
| 47. Using a large crescent wrench, tighten all your TeraFlex adjustable lower and upper control arm jam nuts. Keep an eye on the lower control arm rod ends as you will want them sitting parallel to the mounting brackets. Then, go through and tighten all the lower control arm mounting bolts to 125 ft. lbs. of torque and the upper control arm mounting bolts to 75 ft. lbs. of torque. |
|
48. If you have an automatic and removed your skid plate earlier, use an 18mm socket to re-install and secure it to the frame of your Jeep JK Wrangler using the 3 factory bolts. |
 |
49. Remove the wheel chocks from the rear and place them up front. Loosen but do not remove the lug nuts on the rear wheels. Then, lift the rear end of your Jeep JK Wrangler from the differential using a tall floor jack and then set it back down onto (2) jack stands, each placed just behind the lower control arm frame mounts. Remove the wheels using a 19mm lug wrench or socket and set them under the frame rails for added protection. Leave the floor jack under front the axle to help support it. |
 |
 |
 |
| 50. Using a 16mm socket and a 6″-12″ ratchet drive extension, remove your Jeep JK Wrangler’s 2 upper rear shock mount bolts. |
51. Using an 18mm socket and wrench, remove the bolt and nut securing your Jeep JK Wrangler’s rear shocks to the lower axle mounts. Remove and set aside your shocks for now. |
52. Using an 18mm socket and wrench, remove the bolt and nut securing your Jeep JK Wrangler’s rear sway bar links to the lower axle mounts. Using a 19mm and 18mm wrench, completely remove the links from the sway bar itself. |
 |
53. Remove the rear track bar bolt and nut from your Jeep JK Wrangler’s lower axle mount using a 21mm socket. As was the case with the front track bar, this can be a tough bolt to remove and a breaker bar will help to make this job easier. |
 |
 |
 |
| 54. Using a 10mm deep well socket and extension, remove the 2 nuts securing your Jeep JK Wrangler’s emergency brake cables to the bottom of the tub. This is necessary in order for you to get your rear axle to droop enough to install your new coils. |
55. Using a 10mm socket, unbolt the rear brake line brackets which are fastened to the outside frame rails of your Jeep JK Wrangler. Leave them dangling at this time. |
56. Slowly lower your Jeep JK Wrangler’s rear axle being mindful of the ESP wiring. Once your axle is dropped low enough, your factory coils should just about fall out and can be removed with ease. Set aside the upper rubber isolators as they will be reused. |
 |
57. Lift your axle back up a bit and set it on jack stands so that it’s sitting level. Then, begin removing your Jeep JK Wrangler factory rear lower control arms from the frame rail mounts using a 21mm socket. These bolts will be tough to remove and the use of a breaker bar may be needed. Also, be sure to keep your hardware as they will be reused. |
 |
58. Remove your Jeep JK Wrangler factory rear lower control arms from the axle mounts using a 21mm socket and wrench. As before, these bolts will be tough to remove and a breaker bar may be needed. Again, be sure to save the factory hardware as they will be reused. |
 |
59. Your Jeep JK Wrangler’s factory rear lower control arms measure 19-5/8″ in length eye to eye. As a starting point, I set my new TeraFlex adjustable rear lower control arms to being 20″ long which is 3/8″ longer than stock. |
 |
 |
 |
| 60. Install your TeraFlex adjustable rear lower control arms onto the frame mounts using the factory hardware. Finger tighten the bolts for now. |
61. Install your TeraFlex adjustable rear lower control arms onto the axle mounts using the factory hardware. Finger tighten the bolts for now. |
62. Position your floor jack under your Jeep JK Wrangler’s rear pinion so that it helps to support it but not push up on it. |
 |
63. Remove your factory rear upper control arms from the frame rail mounts using a 21mm socket. As before, these bolts will be tough to remove and a breaker bar may be needed. Be sure to save the factory hardware as they will be reused. |
 |
64. Remove your factory rear upper control arms from the axle mounts using a 21mm socket. Again, these bolts may require the use of a breaker bar in order to free it up. Be sure to save the factory hardware as they will be reused. |
 |
 |
 |
| 65. Before installing your TeraFlex rear upper control arms, I would recommend that you set your Jeep JK Wrangler’s pinion up so that it sits parallel (or close to it as possible) with the drive shaft. Using the floor jack you have already positioned under the pinion and an angle finder, raise the pinion up until it reads the same angle on both the pinion and drive shaft. |
 |
66. Make sure that both of your TeraFlex rear upper control arms are set to the same length Then, using the factory bolts and flagged nuts, install the upper control arms onto the frame mount mounts of your Jeep JK Wrangler and loosely tighten the bolts down. Getting the bolt to line up with the flagged nut can be quite a challenge but if you go slow and take your time, it can be done. |
 |
67. Adjust the length of of your driver side TeraFlex rear upper control arm so that its bushing lines up with the axle mounting hole. Be mindful of how many rotations it takes to get there as you will need to set the passenger side arm to the same length. Using the factory bolts and flagged nuts, secure the upper control arms onto axle mounts and tighten the bolts to 125 ft. lbs. of torque. It is important to torque these bolts now as it will be very difficult to do later. |
 |
 |
 |
| 68. Firmly grab your Jeep JK Wrangler’s rear yellow bump stops and pull them out of the retaining cups as shown in this pic. |
69. Place the TeraFlex rear lower bump stop extension on top of your axle bump stop plate and secure it in place using the hardware provided. You will need a 13mm and 1/2″ wrench (or 13mm Gearwrench) for this job. |
70. Apply a little white lithium grease to the back end of the factory yellow bump stop and insert it into the TeraFlex upper rear bump stop extension. |
 |
71. Place the new rear upper bump stop extension on top of the lower extension mounted on top of your Jeep JK Wrangler’s axle. Position it just under the opening of the retaining cup and then using your floor jack, slowly raise your axle up until the upper bump stop extension plugs into the retaining cup. |
 |
 |
 |
| 72. Take your Jeep JK Wrangler’s rear rubber spring isolators and install them onto the center pin of the TeraFlex 1/2″ coil spacers provided with the kit. |
73. Apply some white lithium grease to the knob on the opposite side of the TeraFlex rear coil spacers as shown in this pic. |
74. Install the TeraFlex coil spacer into the upper spring perch on your Jeep JK Wrangler. This will take some effort to do and twisting it while pushing up will help things out. |
 |
 |
 |
| 75. Remove the driver side lower control arm mounting bolt from your Jeep JK Wrangler’s rear axle. Then, place the TeraFlex rear track bar relocation bracket on top of your Jeep JK Wrangler’s factory track bar axle mount as shown in this pic. |
76. Loosely secure the TeraFlex rear track bar relocation bracket to the side of your Jeep JK Wrangler’s rear lower control arm axle mount as shown. |
77. Slip the crush sleeve provided with the kit up between the factory rear axle track bar mount so that it lines up with the mounting holes on the TeraFlex track bar relocation bracket. Then, secure everything in place using the fine thread bolt, washers and stover nut. |
 |
 |
 |
| 78. Slide the large U-bolt provided onto your Jeep JK Wrangler’s rear axle and insert the 2 ends through the TeraFlex rear track bar relocation bracket as shown. |
79. Using the coarse thread stover nuts provided, secure the TeraFlex rear track bar relocation bracket onto your Jeep JK Wrangler’s rear axle. You will need to use a 19mm wrench or deep socket for this job. |
80. Using a 19mm socket and wrench, tighten the new rear track bar mounting bolt 125 ft. lbs. of torque. |
 |
 |
 |
| 81. Using a 21mm socket and wrench, tighten your Jeep JK Wrangler’s rear lower control arm axle mounting bolt to 125 ft. lbs. of torque. |
82. With the large open end pointing up and small tapered end pointing down, install your new TeraFlex rear coils on your Jeep JK Wrangler. |
83. Open up the TeraFlex rear coil retaining kit and place the toothed nut in the tool provided as shown in this pic. |
 |
 |
 |
| 84. Assemble the TeraFlex rear coil retainer as shown in this pic (bolt, lock washer and large washer) |
85. Insert the tool with toothed nut on it up through the bottom of your Jeep JK Wrangler’s lower spring perches and then place the assembled TeraFlex rear coil retainer on top of it as shown in this pic. |
86. Using the tool to hold the toothed nut in place, secure the TeraFlex rear coil retainer onto your Jeep JK Wrangler’s rear axle. You will need a 9/16″ socket, 3″ extension and ratchet for this job. |
| 87. You will now need to install your new TeraFlex rear stainless steel extended brake line. Once again, for instructions on how to do this, click on the link below:Extended Brake Lines Installation Write-Up |
 |
 |
 |
| 88. Install your new TeraFlex rear sway bar links onto your factory Jeep JK Wrangler sway bar using the hardware included with the kit. You will need a 19mm socket and wrench for this job. |
89. Using the factory hardware, secure your new TeraFlex rear sway bar links to your Jeep JK Wrangler’s axle mounts. You will need an 18mm socket and wrench for this job. |
90. Using the factory hardware, install your new TeraFlex 9550 rear shocks onto rear upper shock mounts on your Jeep JK Wrangler. You will need a 16mm socket and a long ratchet extension for this job. |
 |
91. Using the factory hardware, install your new TeraFlex 9550 rear shocks onto your Jeep JK Wrangler’s lower axle mounts. You will need an 18mm socket and wrench for this job. |
|
92. Reinstall your Jeep JK Wrangler’s rear wheels, lower it back down on the ground and then tighten the lug nuts to 95 ft. lbs. of torque. |
 |
93. After installing this lift, I found that the top hole on the TeraFlex relocation bracket did the best job of re-centering the rear axle on my Jeep. However, as you can imagine, the track bar and mounting holes were not exactly lined up and if you find this to be the case as well, you will want to have a friend push on the passenger side rear quarter panel of your Jeep JK Wrangler a bit so that you can get things to line up. Using the factory hardware, secure your rear track bar on the relocation bracket. Tighten this bolt to 125 ft. lbs. of torque. You will need a 21mm socket and wrench for this job. |
 |
94. Using a 21mm socket and wrench, tighten your Jeep JK Wrangler’s rear track bar frame mount to 125 ft. lbs. of torque. |
  |
95. Using a large crescent wrench, tighten all your TeraFlex adjustable lower and upper control arm jam nuts up front and in the rear. Keep an eye on the lower control arm rod ends as you will want them sitting parallel to the mounting brackets and they will have a tendency to rotate over as you are doing this. If they do, use a pry bar and place it between the rod end and one side of the axle mounting bracket to help you keep them in place as you tighten the jam nut. |
 |
 |
|
| 96. Using a 21mm socket, go around and tighten all the TeraFlex adjustable lower control arm bolts both at the frame and axle mounts to 125 ft. lbs. of torque. |
97. Using a 21mm socket, tighten the TeraFlex adjustable upper rear control arm bolts at the frame mounts to 125 ft. lbs. of torque. |
98. Using an 18mm socket tighten up your TeraFlex front adjustable upper control arm frame mount bolts to 75 ft. lbs. of torque. |
 |
99. Using an 18mm socket and wrench, tighten up your TeraFlex front upper control arm axle mount bolts to 75 ft. lbs. of torque. |
And that should be it! Your Jeep JK Wrangler is now sitting on top of a HUGE TeraFlex 4″ Flex Arm Lift. With the exception of re-centering your steering wheel and setting your caster angle, no further alignment adjustments should be needed as the only thing left would be your toe-in adjustment and this will not have changed due to the new steering design of the JK.
If everything checks out, take your rig out and get it dirty! And, if more adjustments are needed, click on the link below for information on how to do basic front end alignment:Basic do it Yourself Front End Alignment
If you have any questions, please don’t hesitate to give us a holler. |
Additional Photos
|
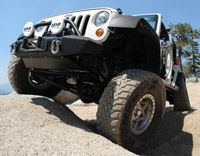
| Before w/Stock 32″ BFG M/T’s |
 |
 |
 |
| After w/37″ Toyo M/T’s |
 |
 |
 |
| To see tons more photos from this installation, click on the links below:Tera Flex 4″ Flex Arm Lift Installation Photos
|


What is the tallest lift these arms will fit? Will it fit a 6″ lift?
the coils that come with this lift will actually yield over 5″ lift. and, from what i have seen, it will offer about as much lift as what some manufacturers consider to be 6″ of lift. needless to say, yes, it should work but of course, at that height, you really should be running a set of long arms – if nothing else, for comfort anyway 🙂
Will this write-up also work for the 3″ Teraflex? Is there anything that would need to be done different?
Thanks
yes. the only difference is that there are fewer things to install with the 3″ lift.
Have you upgraded your drive shafts and if not how are the stock shafts holding up?
How does it handle ‘On-Road’ and ‘Off-Road’? Is this JK a daily driver?
Betrlyf, i am running a je reel rear 1350 and a coast 1350 up front.
Pappa ‘J’, handling on and off road is great and yes, this is a daily driver.
Do you have any trouble getting grease to fill the front lower forward control arms? When I grease mine the grease squirts out around the factory mounting bolt/nut head.
when the joint is full, you’ll know it when grease works its way out. needless to say, what you are seeing is fine.
What about a new sync gear for your transmission? I have a ’98 with an auto tranny and a 4in suspension lift. Someone recommended getting a new gear for the speedo cable running into the tranny. Do you know where I can find out what gear I need for my tire size (33-12.50’s)?
hi mike, this should help you out:
http://www.4x4xplor.com/speedo.html
🙂
With this lift can you use the stock drive shafts? Or should they be changed out?
Just installed a 3″ well .. more like 5.25″ this weekend on a 4dr rubicon. What should the angle of the front axle look like? I am still using the factory shafts and the front axle looks a little scary at the transfer case. I am sure that rubber seal is going to tear right out.
Thanks,
Rick
Where is step 31
Do the after pics have any body lift or spacers or are they with just the 4″ suspension lift?
I’ve been looking at the 3″ Full Flex since I got my JK in August. This write-up is excellent! Thanks for the detail!
How did you get 5.25 of lift out of a 4 inch system?
Getting in late on this one, but ready to get a lift. With a fender chop could you clear 40’s with this lift? I just purchased GY MTR 40’s with wheels for next to nothing. With that said, I need a lift that will work with them. Any suggestions?
Forgot to mention, I would like to stay between 4-5K including steering mods.
I have an 08 Jk Rubicon 2dr manual 6spd. Will I have to upgrade driveshafts for the 4″ lift kit?
I have an 08 Rubicon and this is the lift I’m leaning towards. Along with the 4″ Teraflex I’m wanting to run 37 Iroks and 4:88 gears. New drivelines will have to be installed of course and looking at a kit that Burnsville Off-Road puts out to sure up the front end and keep it from bending. Any thoughts on this combination?
I just picked up a set of TeraFlex front lowers and the instructions recommend different lengths for the front lowers to help with the JK turning to the right. After you finished up your alighnment, did you end up with the same lengths?
I just picked up a Jeep with a similar Teraflex lift done (3″). Everything looks like it was done right, except I keep getting an irritating “clucking” noise out of the rear suspension (sounds and feels like it’s coming from the left rear, though it’s difficult to tell).
The offroad conversion place that did this is perfectly willing to stand behind their work, but they’re several states away, and I don’t have anothe offroad conversion shop that’s familiar with teraflex lift kits nearby.
All bolts have been torqued and everything feels tight when I go under the vehicle, and I can’t replicate it by bouncing the vehicle up and down while parked. But just about every minor bump you roll over, even when moving slowly, causes this “clunk” (that’s felt as much as heard).
Wondering if anyone has any ideas what could be causing this? It’s maddening!
double check your bump stop extensions and check to see if the track bar mounting bolt on the passenger side is making contact with it. if so, the extensions are installed backwards. also, check to see if rear coils on the passenger side is maybe making contact with the track bar – check the driver side coil as well to see if it might be making contact with a track bar relocation bracket bolt if you have one installed.
First, I must say that I absolutely love the Project JK website!!! Excellent how-to, much more thorough than the manufacturer’s installation guide. I’m preparing to install my own 3″ TeraFlex full-flexarm lift kit. Thought I’d mention that for Step 27: both the TeraFlex install guide and professional machinist/millwright charts that I have at work indicate that the proper drill-size for a 3/8″x16 course thread tap is a 5/16″ bit, not an 11/32″ bit. I also noted that the local department store’s 3/8″ tap as packaged also incorrectly specified a 11/32″ drill bit size. I’m not a machinist, so I’m not absolutely sure if it affects the thread depth, but I chose to go with the 5/16″ bit.
do teraflex lift kits that say they are 4″ kits lift the front and rear 4″ or is the front lifted higher to level the stance? also, what about the new 6″ lcg lift by teraflex? 6″ in front and 6″ in rear or level? how does the teraflex 6″ lcg compare to the 6″ full traction?
Hello,
When you instal your lower and uper front arm, is it necessary to adjust the front driveshaft how to explain it back in step 65 for the rear driving shaft.
Thank You!
no, you do not want to do this up front as that will cause your front axle to have zero to negative caster
What are the specs on the wheels with the 37″ Toyos?
Manufacturer: (I assume Walker Evans)
Wheel Model/Type:
Backspacing:
Center caps:
Retained the stock Conical lugnuts?
The bolt/lock nut/washer cut in step 19, what are its specs & where would I be able to order online? Any suggestions are greatly appreciated. Hard to find here at GTMO.
Did this kit settle over time? Or did it stay around 5.25 inches of lift?
The coils are really firm – too firm for my taste but, they didn’t settle.
Could you tell me what your height is from the ground to the top of your windshield? I’m running the same toyo’s and would change to this lift but I still need it to fit in the garage. Thanks