Instructions
|
 |
This is a shot of what all you should get with your LoD Signature Series JK Rear Bumper Tire Carrier. As you can see, I got mine with the optional back-up lights. |
 |
 |
 |
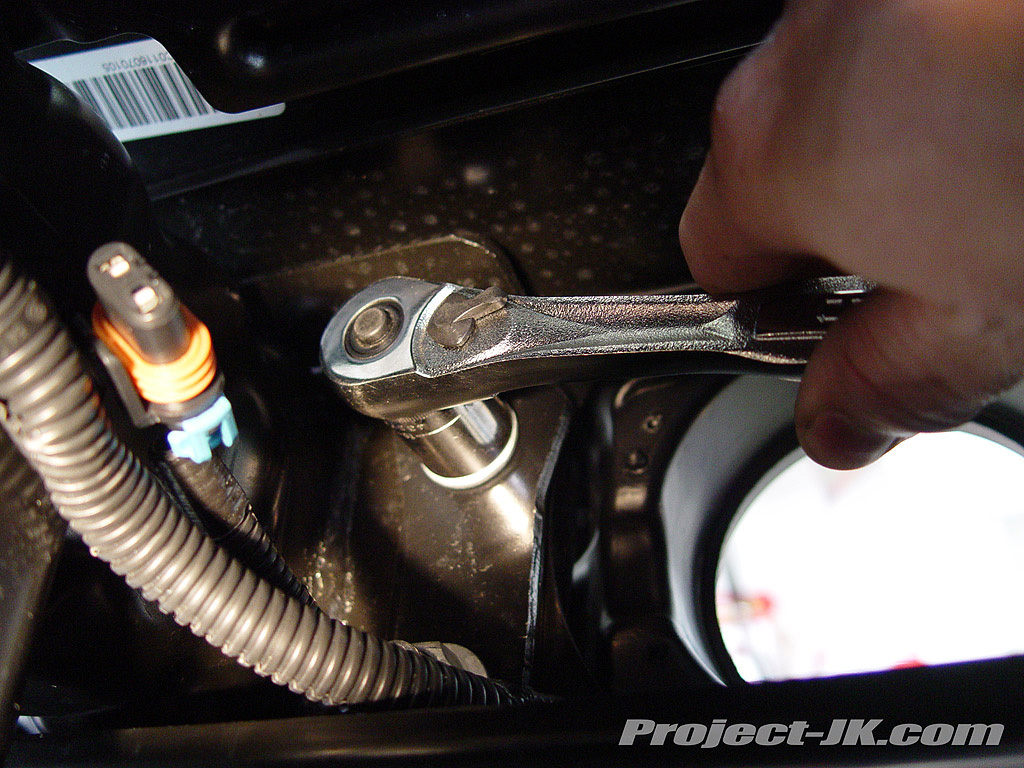
| 1. Begin removing your factory rear bumper by climbing underneath your Jeep JK Wrangler and removing the bolts securing the inner mounting brackets to the rear cross member. You will need a 16mm socket for this job. |
2. Using a 16mm socket and a 3″ ratchet extension, remove the bolts securing the inner mounting brackets to your Jeep JK Wrangler’s rear bumper. Pull the brackets out and discard as they will not be needed. |
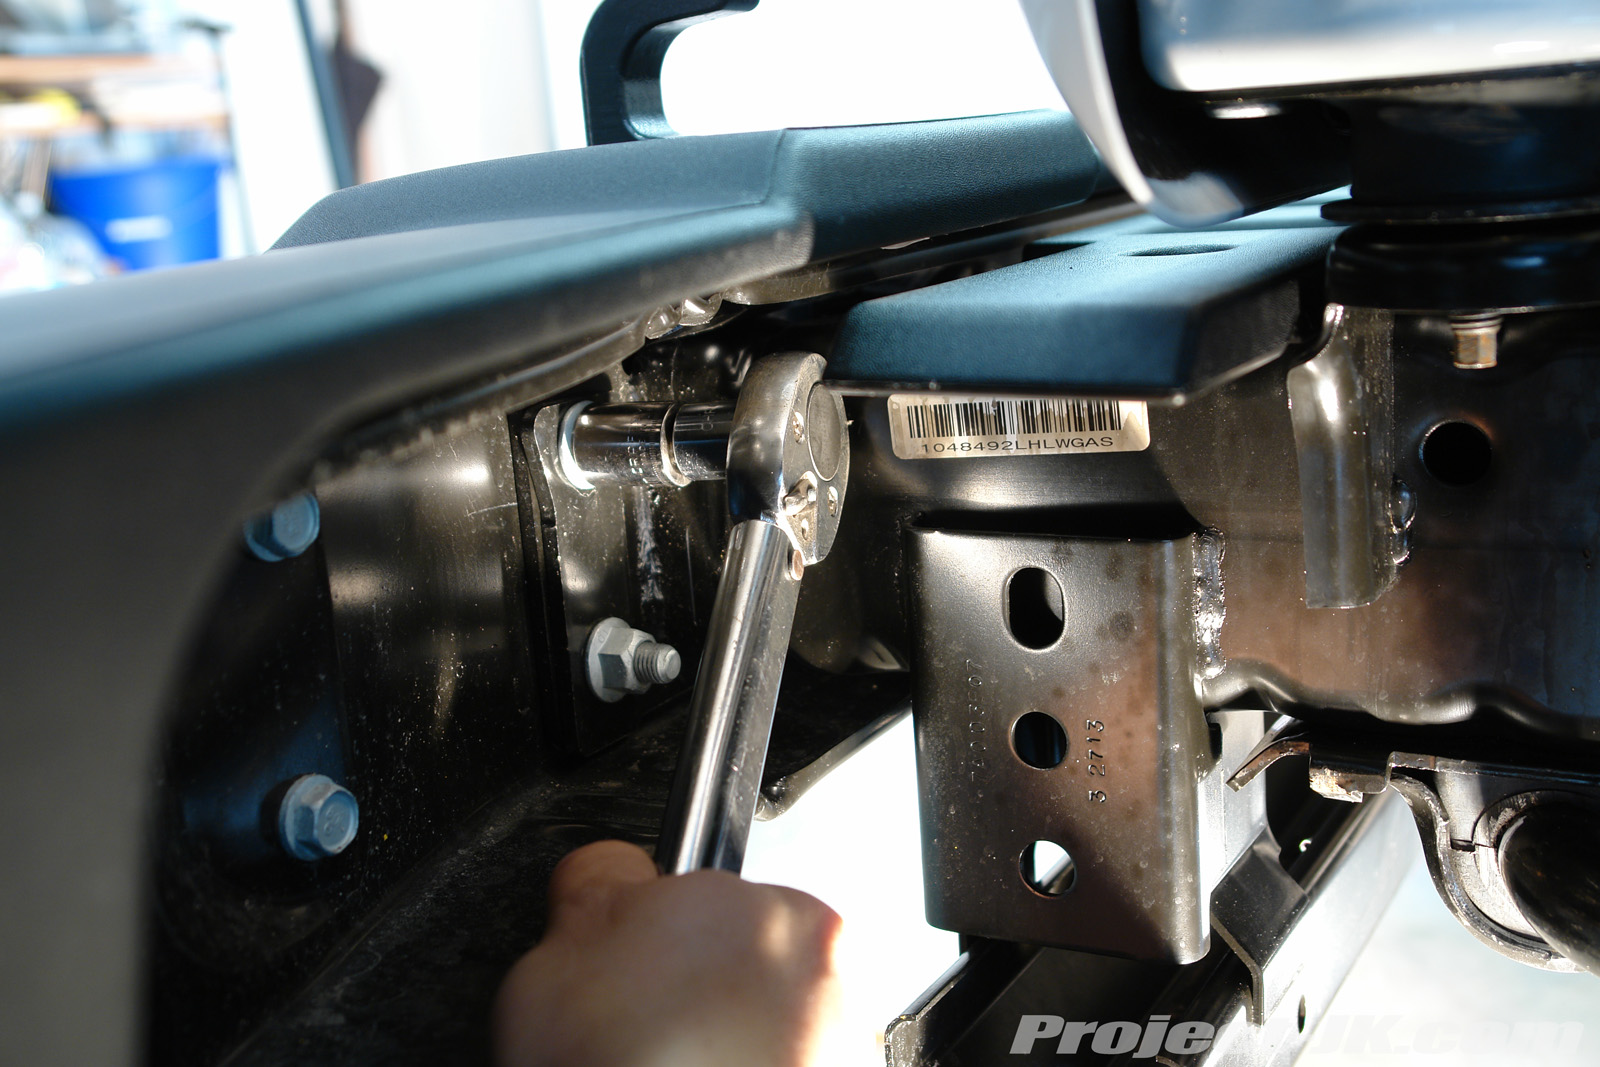
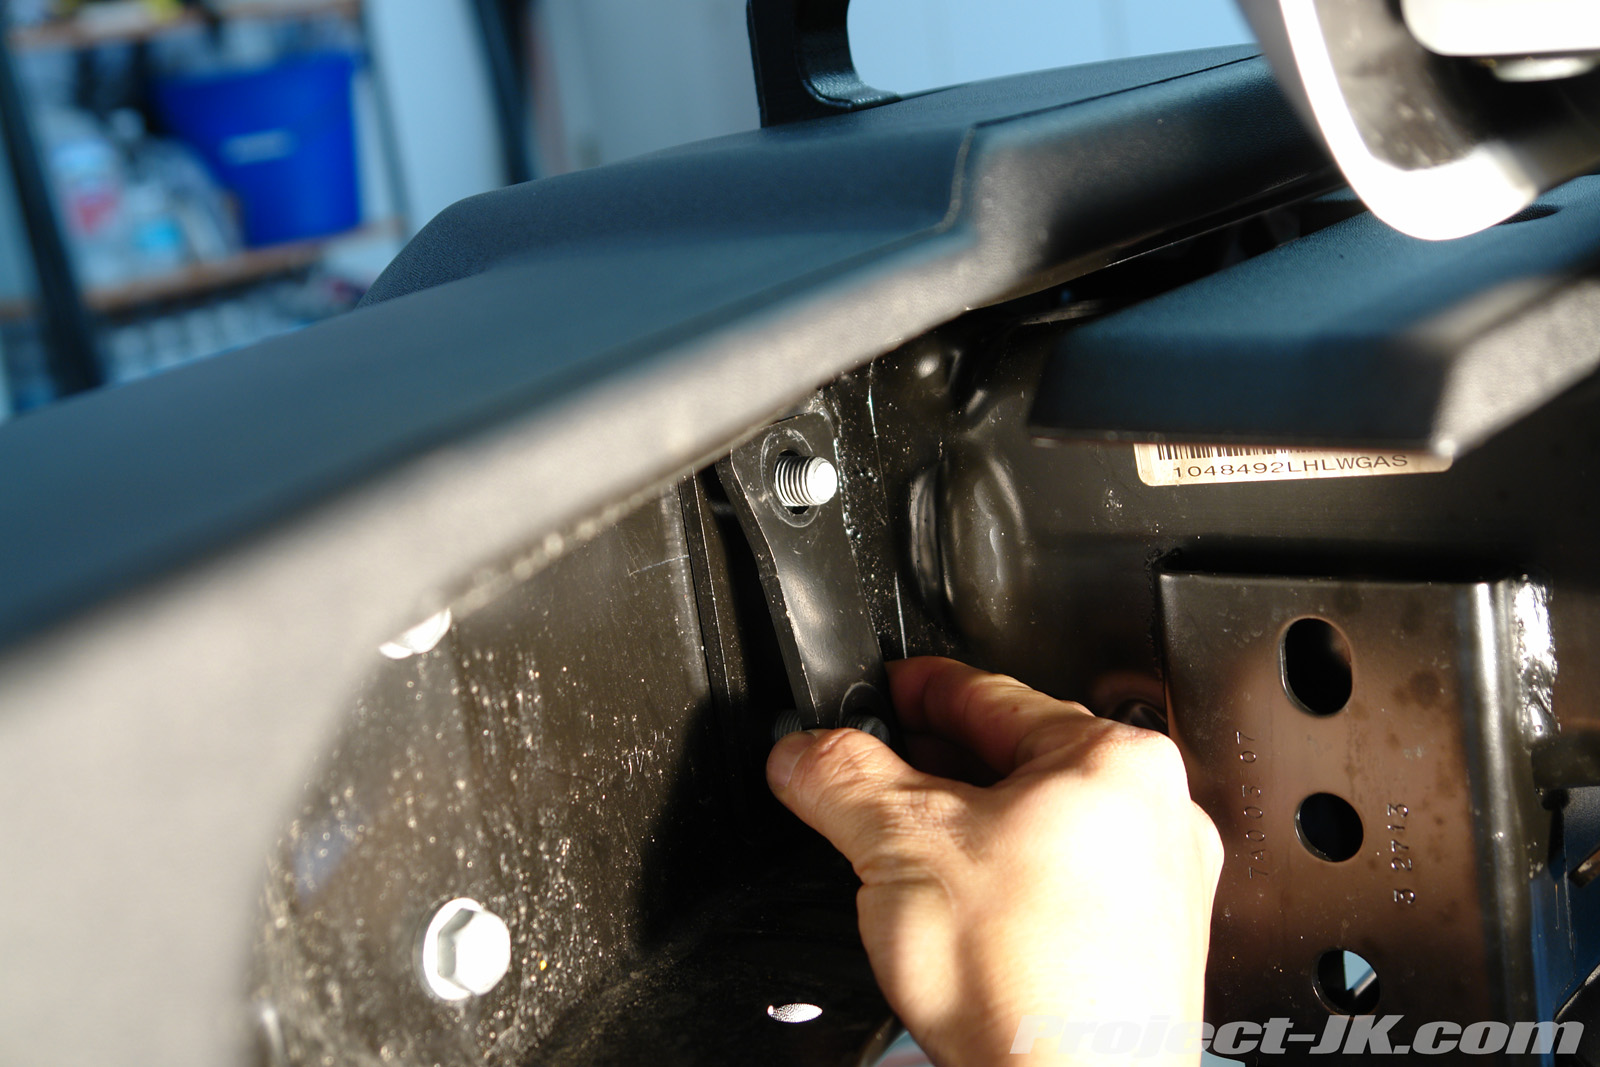
3. Using a 16mm socket, remove the 2 bolts securing the rear bumper outer mounting brackets to the outside of your Jeep JK Wrangler’s frame rails. Set aside these bolts as they will be reused. |
 |
 |
 |
| 4. If your Jeep JK Wrangler came equipped with a tow hitch receiver, begin removing it by pulling the wiring harness straight down and out of it’s mount and zip tie it out of the way. |
5. Climb back underneath your Jeep JK Wrangler and then remove the 4 bolts securing the tow hitch receiver to the rear cross member using an 18mm socket. |
6. Even with the bolts removed, you may find that the tow hitch receiver is difficult to remove. If this is the case for you, use a pry bar to help coax it off your Jeep JK Wrangler’s rear cross member as shown in this pic. |
 |
 |
 |
| 7. Using a lug wrench or a 19mm socket, remove the 3 lug nuts securing your spare tire to your Jeep JK Wrangler’s tail gate tire carrier. Then, remove the spare tire itself and set it aside for now. |
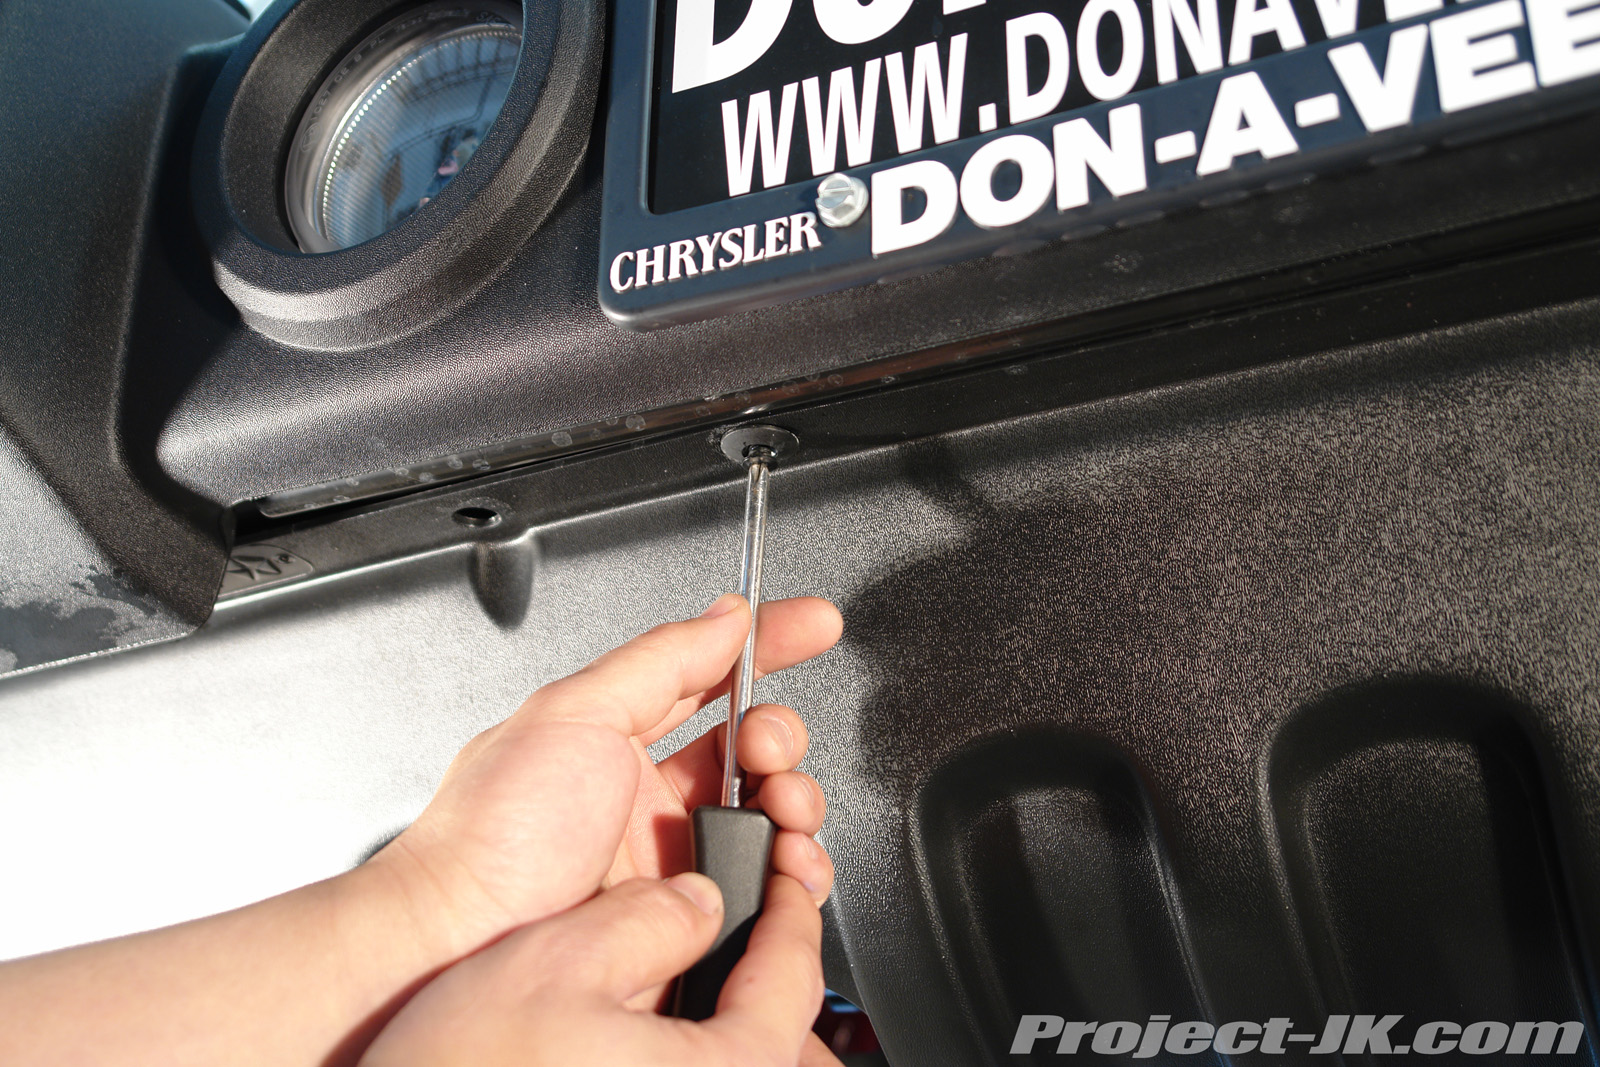
8. Using a Torx T-15 bit, remove the screws securing the back plate of your Jeep JK Wrangler’s 3rd brake light so that you can gain access to the wiring harness. |
9. Press down on the plastic clip and then unplug your Jeep JK Wrangler’s 3rd brake light wiring harness as shown in this pic. |
 |
 |
 |
| 10. Using a 13mm socket, remove the 8 bolts securing the spare tire carrier mount to the tailgate of your Jeep JK Wrangler. Then, remove the spare tire carrier mount and discard. |
11. With the help of a friend, carefully slide your new LoD Signature Series Rear Bumper onto your Jeep JK Wrangler’s frame rails. |
12. Using the factory bolts that you removed in step #3, secure your new LoD Signature Series Rear Bumper to the existing factory mounting holes on your Jeep JK Wrangler’s frame rails. You will need a 16mm socket for this job. |
 |
 |
 |
| 13. The driver side of your Jeep JK Wrangler’s rear cross member will need to have a mounting hole drilled out. Using the bumper as a template, mark the location of where you will need to drill your hole with a center punch and hammer. |
14. Using a 1/8″ metal drilling bit and hand drill, drill a pilot hole through the point you just marked on your Jeep JK Wrangler’s rear cross member. Be sure to wear safety glasses for this job as you will be showered with sharp metal debris. |
15. Stepping up to a 1/2″ metal drilling bit, drill through the pilot hole you just made in your Jeep JK Wrangler’s rear cross member. |
 |
 |
 |
| 16. Using a center punch, mark the location of the lower hole you will need to drill through your Jeep JK Wrangler’s frame rails as shown in this pic. |
17. Using a 16mm socket, remove the 2 bolts securing your LoD Signature Series Rear Bumper to your Jeep JK Wrangler’s frame rails. Then, with the help of a friend, remove the bumper and set it aside for now. |
18. As before, use a 1/8″ metal drilling bit to create a pilot hole in your Jeep JK Wrangler’s frame rail and then follow it up with a 1/2″ drill bit. NOTE: This hole will need to be drilled all the way through to the other side of the frame rail. |
 |
19. If you purchased your LoD Signature Series Rear Bumper with the optional back up lights, take the supplied wiring for it and plug it into the leads extending from the lights as shown in this pic. |
|
20. Using the factory bolts that you removed in step #3, re-install and secure your new LoD Signature Series Rear Bumper to the existing factory mounting holes on your Jeep JK Wrangler’s frame rails. Be mindful of your back up light wiring and make sure that it’s routed to the passenger side rear quarter panel. You will need a 16mm socket for this job. |
 |
21. Insert the provided bolts and nuts through the additional holes in the LoD Signature Series Rear Bumper mounting flanges and all the way through the frame rails of your Jeep JK Wrangler and then secure them in place using a 19mm socket and wrench. |
 |
 |
 |
| 22. Take one of the mounting nuts provided with the LoD Signature Series Rear Bumper and secure it to the open end of a 19mm wrench using some tape as shown in this pic. |
23. Insert the 19mm wrench with the nut taped to it up through the slot located on the bottom of your LoD Signature Series Rear Bumper. Insert a mounting bolt through the rear cross member of your Jeep JK Wrangler and fasten it to the nut using a 19mm Gearwrench as shown in this pic. Repeat this step on the opposite mounting hole. |
24. Insert the long mounting bolts up through the bottom of your LoD Signature Series Rear Bumper and rear cross member of your Jeep JK Wrangler. Then, reach up on top of the bumper and fasten the provided nuts on to the bolts. Tighten the bolts and nuts using a 19mm wrench and socket as shown in this pic. |
 |
 |
 |
| 25. Apply some white lithium grease to the LoD Signature Series Rear Bumper hinge pin as shown in this pic. |
26. Carefully install the A-Frame tire carrier on to the hinge pin of your LoD Signature Series Rear Bumper. |
27. Install the hinge pin support bracket on top of the LoD Signature Series Rear Bumper’s hinge pin as shown in this pic. |
 |
 |
 |
| 28. Using a 9/16″ socket on top and wrench underneath, secure the hinge pin support bracket to the top of the LoD Signature Series Rear Bumper using the bolts and nuts provided with the kit. |
29. Using a 9/16″ socket, secure the top of the hinge pin support bracket to the LoD Signature Series Rear Bumper hinge pin using the bolt provided with the kit. |
30. Using a 5/16″ wrench, secure the zerk nipple provided with the kit to your LoD Signature Series Rear Bumper A-Frame hinge tube as shown in this pic. |
 |
 |
 |
| 31. Loosely attach the LoD Signature Series Rear Bumper lever clamp latch to the A-frame using the 4 bolts provided with the latch. |
32. Thread the 2 jam nuts onto the LoD Signature Series Rear Bumper lever clamp U-bolt as shown in this pic. |
33. With the LoD Signature Series Rear Bumper in the closed position an the lever clamp locked, install the U-bolt through the lever and secure it in place using the nyloc nuts provided with the kit. |
 |
 |
 |
| 34. Make sure the squared U-bolt end of the latch lines up properly with the latch hooks on LoD Signature Series Rear Bumper. If needed, loosen the 4 mounting bolts on the A-frame and make the necessary adjustments needed. A 7/16″ socket will be needed to do this. |
35. Using a 1/2″ socket and wrench, adjust the length of the LoD Signature Series Rear Bumper latch so that the A-frame sits tight and secure when locked into place. A good tight fit should require some effort to lock. You do not want it to open and close too easily. |
36. Insert the longest of the 3 tire carrier mount tube bolts through the center of the tube as shown in this pic. |
 |
 |
 |
| 37. Attach the tire carrier mount tube to the center cross bar on the A-Frame of your LoD Signature Series Rear Bumper and secure it in place using the provided nut. You will need a 5/8″ socket and an 11/16″ wrench for this job. |
38. Take the remaining 2 bolts and nuts and secure the outer holes of the tire carrier mount tube to the A-Frame of your LoD Signature Series Rear Bumper. Again, you will need a 5/8″ socket and an 11/16″ wrench for this job. |
39. Thread the LoD Signature Series Rear Bumper rubber isolator (or “Snubber”) onto the A-frame by hand. |
 |
 |
 |
| 40. Adjust the length of the snubber so that it makes good solid contact with the tailgate of your Jeep JK Wrangler when the A-Frame of the LoD Signature Series Rear Bumper is closed. The pressure applied to the tailgate will help prevent any movement of the A-Frame and keep it from rattling. Tighten the jam nut with a 9/16″ wrench to keep the snubber from moving. |
41. Attach the tire carrier mount onto the mount tube and secure it in place using the bolt and nut provided. You will need a 1/2″ socket and wrench for this job. NOTE: The mount tube has 3 different mounting holes to allow for adjustments that might be needed to accommodate wheels with different back spacing. |
42. Install your Jeep JK Wrangler’s spare tire onto your new LoD Signature Series Rear Bumper Tire Carrier and secure it in place using a lug wrench or 19mm socket. |
 |
 |
 |
| 43. Attach the back up light ground wire to your Jeep JK Wrangler’s frame. I used the passenger side factory inner mounting bracket bolt for this. You will need a 16mm socket to use this bolt. |
44. Using a phillips screwdriver, remove the 2 screws on the passenger side tail light closest to the tailgate of your Jeep JK Wrangler as shown in this pic. |
45. Tilt the tail light to the side and remove it from the quarter panel of your Jeep JK Wrangler as shown. Allow your tail light to dangle for now. |
 |
 |
 |
| 46. Lift up the carpeting inside your Jeep JK Wrangler just above the corner of the passenger side quarter panel and locate the rubber grommet with the wiring harness coming though it. |
47. Push up the foam cover and feed the power lead of your new back up lights up through the bottom of the quarter panel. |
48. Reach into the tail light hole, grab the power lead and and feed it through the rubber grommet. Push the foam cover back into place before proceeding. |
 |
49. Route your power lead towards the front of your Jeep JK Wrangler underneath the carpeting and plastic trim and wire it and its switch to your dash however you see fit. For a tip on how you can route the power lead and wire it up to the battery, click on the CB installation write-up below:
Affordable Jeep JK Wrangler
CB Radio Solution
Midland Model-1001Z |
Optional Trail Rack & Jerry Can Mount
Installation Instructions
|
 |
This is a shot of everything you will get with the optional LoD Signature Series Rear Bumper Tire Carrier trail rack and jerry can mounts. |
 |
 |
 |
| 1. Using a nut, washer and 1 of the 2 longest bolts provided with the kit, secure the driver side trail rack support arm lower mount to the middle of the LoD Signature Series Rear Bumper Tire Carrier A-frame as shown. A 9/16″ socket and wrench will be needed for this job. |
2. Using a 9/16″ socket and wrench, secure the driver side trail rack support arm upper tab to the top of the LoD Signature Series Rear Bumper Tire Carrier A-frame using the bolts, nuts and washers provided with the kit. Repeat step #1-2 on the passenger side. |
3. Lift up and place your LoD Signature Series Rear Bumper Tire Carrier trail rack on top of the support arms with the rounded corners facing out as shown in this pic. |
 |
4. Using the 4 smaller bolts, nuts and washers, secure the LoD Signature Series Rear Bumper Tire Carrier trail rack to the support arms. You will need a 1/2″ socket and wrench for this job. |
 |
5. Using 2 bolts, nuts and washers provided with the kit, secure the passenger side jerry can mount bracket to the A-Frame of the LoD Signature Series Rear Bumper Tire Carrier. You will need a 9/16″ socket and wrench for this job. Repeat this step on the driver side. |
That should be it – You’ve just beefed up the protection of your Jeep JK Wrangler’s rear end, made it highly functional and made it look great with an LoD Signature Series Rear Bumper Tire Carrier! Please let me know if you have any questions. |
Installed Photos
|
To see photos of what the LoD Signature Series Rear Bumper Tire Carrier looks like installed with the optional trail rack and jerry can mounts, simply click on the link below: LoD Signature Series Rear Bumper Tire Carrier
w/Trail Rack & Jerry Can Mounts Photos |
 |
 |
 |
 |
 |
 |
| |
Sweet! Been thinking about this bumper thanks for all the work you do on these write-ups eddie!
Nice looking bumper. It appears you didn’t mount your brake light. Is that an option in SoCal? 🙂 Also, it appears there is about 1″ gap between the body and the bumper. I assume that is because you have a body lift on your JK, correct?
Guess you won’t need your rearview mirror anymore lol. Wish it set a little closer up to the body, but other than that, it looks great. I love the placement of the lights, tow points, & hitch.
thank you for the kind words JKTyrant, i’m glad to know that my write-ups have been useful to you.
meach4x4, i don’t think a 3rd brake light is required here in california and if they are, i have not had any issues with the local law enforcement in over 10 years for not having one on any of my jeeps. regarding the gap you see, yes, i have a 1″ body lift.
84 jeeper, you are correct in assuming that you all but loose your rear view mirror. between the rear head rests, tire and jerry cans, it’s pretty much zero visibility.
In regards to your response about the 3rd brake light, yes they are required in California… you have just been lucky not to have been cited for the violation yet. I should know, I am a deputy sheriff. Make your rig legal and re-install your brake light!
Thanks for the write up! Just wondering what which finish you chose…
thanks for the info ron but i can’t ‘re-install’ my brake light as i now have an aftermarket bumper tire carrier. i will however look for a way to accomdate something.
jk-bert, i went with the flat black finish and think it’s the nicest finish i have seen to date.
Hello Ive been thinking of putting 4in lift and 37″ tires on the same jk you have and I was wandering if you can tell what is the max hight of you jeep and of your garage, I’m trying to find out if I will still be able to get her in the garage (this is a must). Yours is looking very tight. Thanks Jeff / keep up the great work!!!!!
I did purchase the third brake light bracked. Haven’t received yet but would love to see the installation instructions for that as well. Thanks.
Been looking for the installation procedures for the signature series mid width front bumper also, are they available?
By the way, I have a 4 door 2008 wrangler unlimited x. JK
i’ll see what i can’t do about the 3rd brake light.
i am working on the mid width write-up but for now, i can tell you that the stubby write-up is pretty much the same.
Wondering what size lift and tires are on this JK, looking into one but must be able to fit in garage.
Hey, I was wondering if the existing jk 3rd brake light wiring was sufficient length to be routed to the new location on carrier? If not what did you do to lengthen it. Thanks for the review!
AWESOME write-up! Love the step by step procedures with all the pictures. Thanks so much for taking the time to put this together. I recently bought the stubby version of this bumper and I’ve been searching for a write-up for the light kit. I found one on the forum that was really well put together.
As far as the rear view visibility. My solution to that problem will be in the future, buying MYGIG Lockpick and installing a rear view camera to a DPDT switch so 1) You can turn the camera on at will, 2) You can have it off at all times, and 3) You can have it turn on when the Reverse switch is hit.
Thanks again for the amazing job on the write-up!
Hi,
I see that you change your rims and tires right? Why? You don’t like ProComp Xtreme M/T anymore? How did they hold up? Which are better for highway use also?Thx
Wayalife – love this write up. Can you tell me what kind of rocker rails / step bars you have on this jeep? Thanks!