Instructions
|
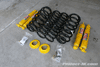 |
This is a pic of all the parts you should get with your new Old Man Emu 2″ Jeep JK Wrangler Lift Kit. Take some time to make sure you have all the parts shown as well as all the tools listed on the left prior to starting this project. |
 |
 |
 |
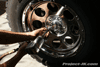
| 1. Park your Jeep JK Wrangler on a level surface and chock your rear tires. Then, using an 18mm socket and wrench, remove the bolts and nuts securing your front sway bar links to the lower axle mounts. (NOTE: If you have a manual transmission, skip to step #3). |
2. If you have an automatic transmission, use an 18mm socket to remove the 3 bolts (one on each frame rail and one on the cross member) securing its skid plate to the frame of your Jeep JK Wrangler. Remove the skid plate and set it aside for now. |
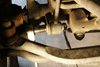
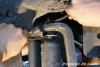
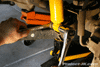
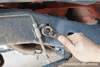
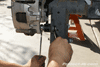
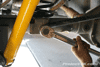
3. Remove the bolt securing your Jeep JK Wrangler’s front track bar to the front axle mount using a 21mm socket. This can be a tough bolt to remove and an impact wrench or breaker bar will help to make this job |
 |
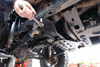
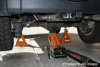
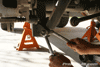
4. Loosen (but do not remove) the lug nuts on your front wheels, raise the front end of your Jeep JK Wrangler one side at a time from the axle using a tall floor jack and then set it back down onto (2) jack stands, each placed just behind the lower control arm frame mounts as shown in this pic. |
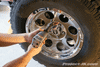 |
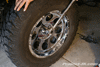
5. Remove the wheels off your Jeep JK Wrangler using a 19mm lug wrench or socket and set them out of the way for now. Leave the floor jack under the front axle to help support it. |
 |
 |
 |
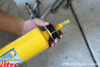
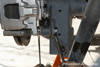
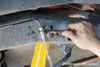
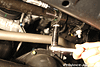
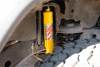
| 6. Using a 16mm or 5/8″ wrench, hold your Jeep JK Wrangler’s shock can in place just below the upper shock mount to keep it from spinning. Then, remove the stud mount nut above using a 16mm wrench. |
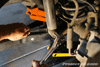
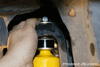
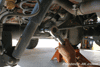
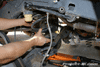
7. Using an 18mm socket and wrench, remove the bolt and nut securing your Jeep JK Wrangler’s front shocks to the lower axle mount. |
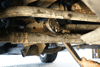
8. Being mindful of your brake lines, carefully lower your Jeep JK Wrangler’s front axle until the factory front coils can be slipped out of the upper perch and be removed completely with ease. |
 |
 |
 |
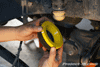
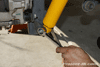
| 9. Slide the factory rubber coil isolator down and off your Jeep JK Wrangler’s upper bump stop tower as shown in this pic. |
10. Place the yellow Old Man Emu 1/2″ coil spacer on top of your Jeep JK Wrangler’s factory rubber isolator. |
11. Reinstall both your new Old Man Emu 1/2″ coil spacer and factory rubber isolator back on to your Jeep JK Wrangler’s upper bump stop tower as shown in this pic. |
 |
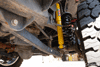
12. Install your new Old Man Emu 2″ front coils by slipping them up your Jeep JK Wrangler’s upper bump stop tower and then set it on the lower spring perch. Rotate the coil until the bottom end of it is seated properly. |
 |
 |
 |
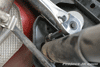
| 13. Begin the installation of your new Old Man Emu front shocks by slipping the large washer on top of the mounting stud followed by one of the black polyurethane bushings and then the zinc finished locating washer with the center hole lip facing up as shown in this pic. |
14. Insert the Old Man Emu front shock mounting stud through the top of your Jeep JK Wrangler’s shock tower. Then, slip the other black polyurethane bushing on top followed by the zinc finished washer (concave side facing down), smaller washer and nut as shown in this pic. |
15. Grasp the Old Man Emu front shock can firmly with one hand and then secure the mounting stud nut in place using a 16mm wrench. |
 |
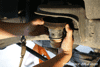
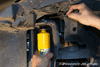
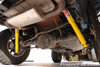
16. Using an 18mm socket and wrench, secure your new Old Man Emu front shocks to your Jeep JK Wrangler’s axle mount using the factory hardware and tighten the nut and bolt to 56 ft. lbs. of torque. |
 |
17. Reinstall your Jeep JK Wrangler’s front wheels, lower it back down on the ground, tighten the lug nuts to 95 ft. lbs. of torque, remove the wheel chocks from the rear and place them up front. |
 |
18. With the engine off, put your key in the ignition, make sure that the steering wheel is unlocked and then have a friend turn it in one direction or the other until you can line up your front track bar bushing hole with the front axle mount hole on your Jeep JK Wrangler. Secure the track bar in place using the factory hardware and tighten it to 125 ft. lbs. of torque. |
|
19. Reinstall your Jeep JK Wrangler’s sway bar links back onto the front axle mounts and tighten them to 75 ft. lbs. of torque. You will need an 18mm socket and wrench to do this job. |
|
20. If you have an automatic and removed your skid plate earlier, use an 18mm socket to re-install and secure it to the frame of your Jeep JK Wrangler using the 3 factory bolts. |
 |
21. Lift the rear end of your Jeep JK Wrangler from the differential using a tall floor jack and then set it back down onto (2) jack stands, each placed just behind the lower control arm frame mounts. Remove the wheels off using a 19mm lug wrench or socket and set them out of the way for now. Leave the floor jack under front the axle to help support it. |
 |
22. Remove the wheels off using a 19mm lug wrench or socket and set them out of the way for now. Leave the floor jack under front the axle to help support it. |
 |
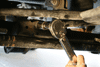
23. Remove the rear track bar bolt and nut from your Jeep JK Wrangler’s lower axle mount using a 21mm socket. As was the case with the front track bar, this can be a tough bolt to remove and a breaker bar will help to make this job easier. |
 |
 |
 |
| 24. Using an 18mm socket and wrench, remove the bolt and nut securing your Jeep JK Wrangler’s rear sway bar links to the lower axle mounts. |
25. Using a 16mm socket and a 6″-12″ ratchet drive extension, remove your Jeep JK Wrangler’s 2 upper rear shock mount bolts. |
26. Using an 18mm socket and wrench, remove the bolt and nut securing your Jeep JK Wrangler’s rear shocks to the lower axle mounts. Remove and set aside your shocks for now. |
 |
 |
 |
| 27. Using a 10mm socket, remove the 2 nuts securing your Jeep JK Wrangler’s emergency brake cables to the bottom of the tub. This is necessary in order for you to get your rear axle to droop enough to install your new coils. |
28. Using a 10mm socket, unbolt the rear brake line brackets which are fastened to the outside frame rails of your Jeep JK Wrangler. Leave them dangling at this time. |
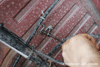
29. Slowly lower your rear axle being mindful of the ESP wiring. Once your axle is dropped low enough, your factory coils should just about fall out and can be removed with ease. Set aside the upper rubber isolators as they will be reused. |
 |
30. Place the factory rubber isolator on top of your new Old Man Emu rear coils and then install both back on to your Jeep JK Wrangler. Make sure that the rubber isolator is seated properly in the upper spring perch. |
 |
31. Using an 18mm socket and wrench, secure the factory rear sway bar link back onto your Jeep JK Wrangler’s lower axle mounts and tighten them to 75 ft. lbs. of torque. |
 |
 |
 |
| 32. Using a 16mm socket and a ratchet extension, install your new Old Man Emu shocks on to the rear upper mounts on your Jeep JK Wrangler using the factory hardware. Tighten these bolts to 37 ft. lbs. of torque. |
33. Using an 18mm socket and wrench, install your new Old Man Emu rear shocks onto your Jeep JK Wrangler’s lower axle mounts using the factory hardware. Tighten these bolts to 56 ft. lbs. of torque. |
34. Using a 10mm socket and the factory hardware, re-install your rear brake line brackets back on to your Jeep JK Wrangler’s frame rails. |
|
35. Using a 10mm socket, re-secure your Jeep JK Wrangler’s emergency brake cables hanger to the bottom of the tub using the factory nuts. |
 |
36. Reinstall your Jeep JK Wrangler’s rear wheels, lower it back down on the ground, tighten the lug nuts to 95 ft. lbs. of torque. |
 |
37. If you have a friend helping out, have them push hard on the passenger side of your Jeep JK Wrangler until the rear track bar axle mount hole lines up enough for you to insert the bolt through it. Then, secure the rear track bar bolt and flag nut in place and tighten them to 125 ft. lbs. of torque. |
 |
38. Because of the lift, your steering wheel will be off just a bit. To re-center your steering wheel, use a 15mm wrench to loosen the 2 nuts on the turnbuckle as shown in the pic to the left. Then, rotate the turnbuckle clockwise or counter clockwise as needed while a friend watches the steering wheel (or you periodically check on it yourself) go back to center. Once re-centered, secure the nuts and take it for a drive to check your steering wheel. This may take a few tries to get it on 100% but that’s all there is to it. |
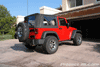
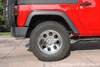
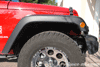
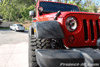
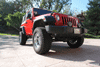
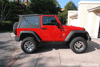
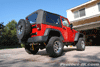
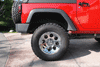
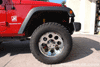
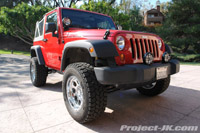
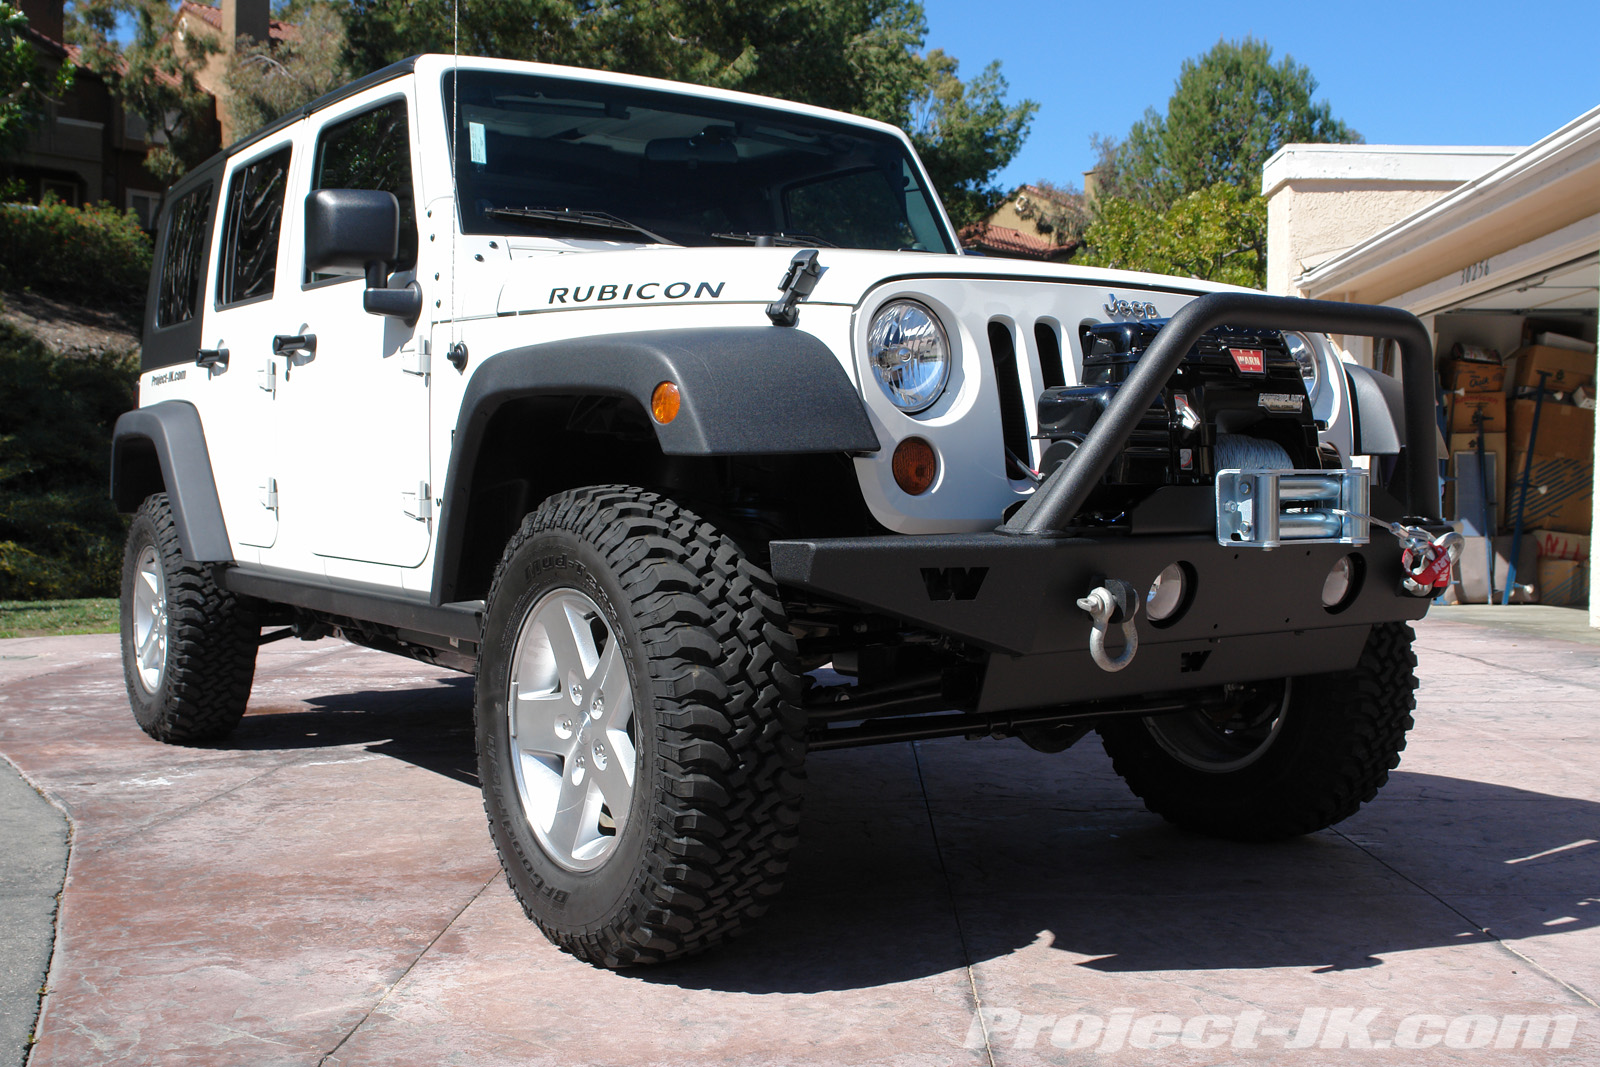
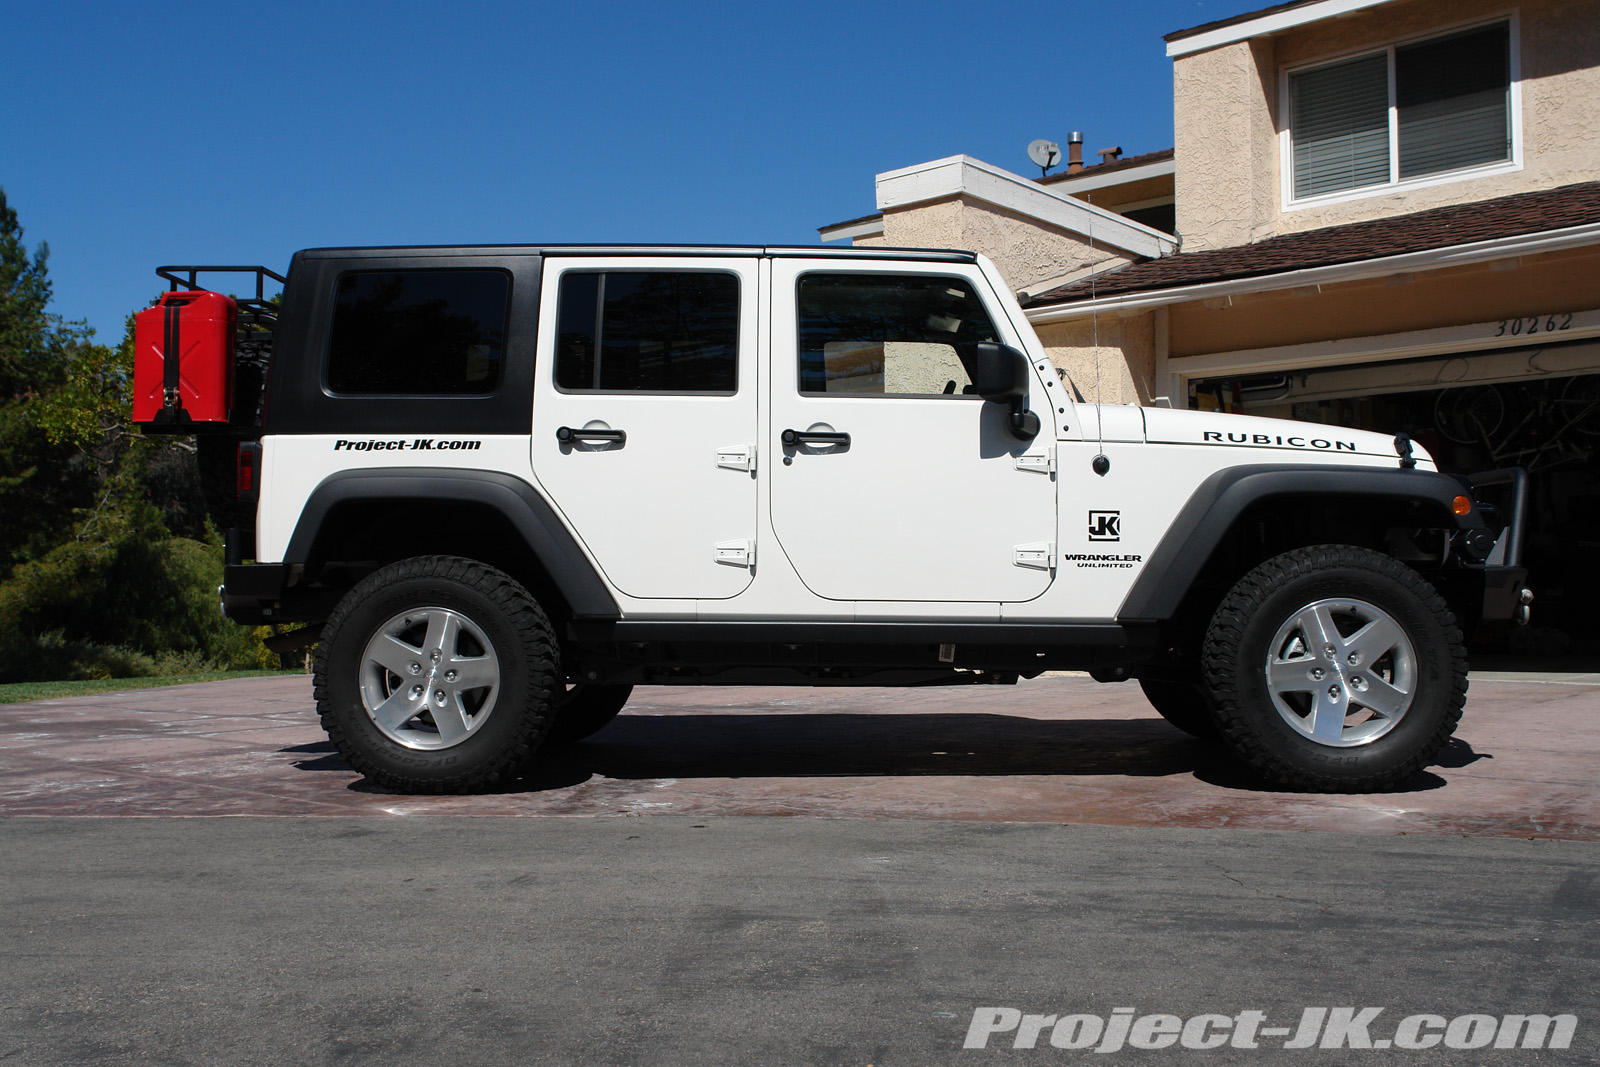
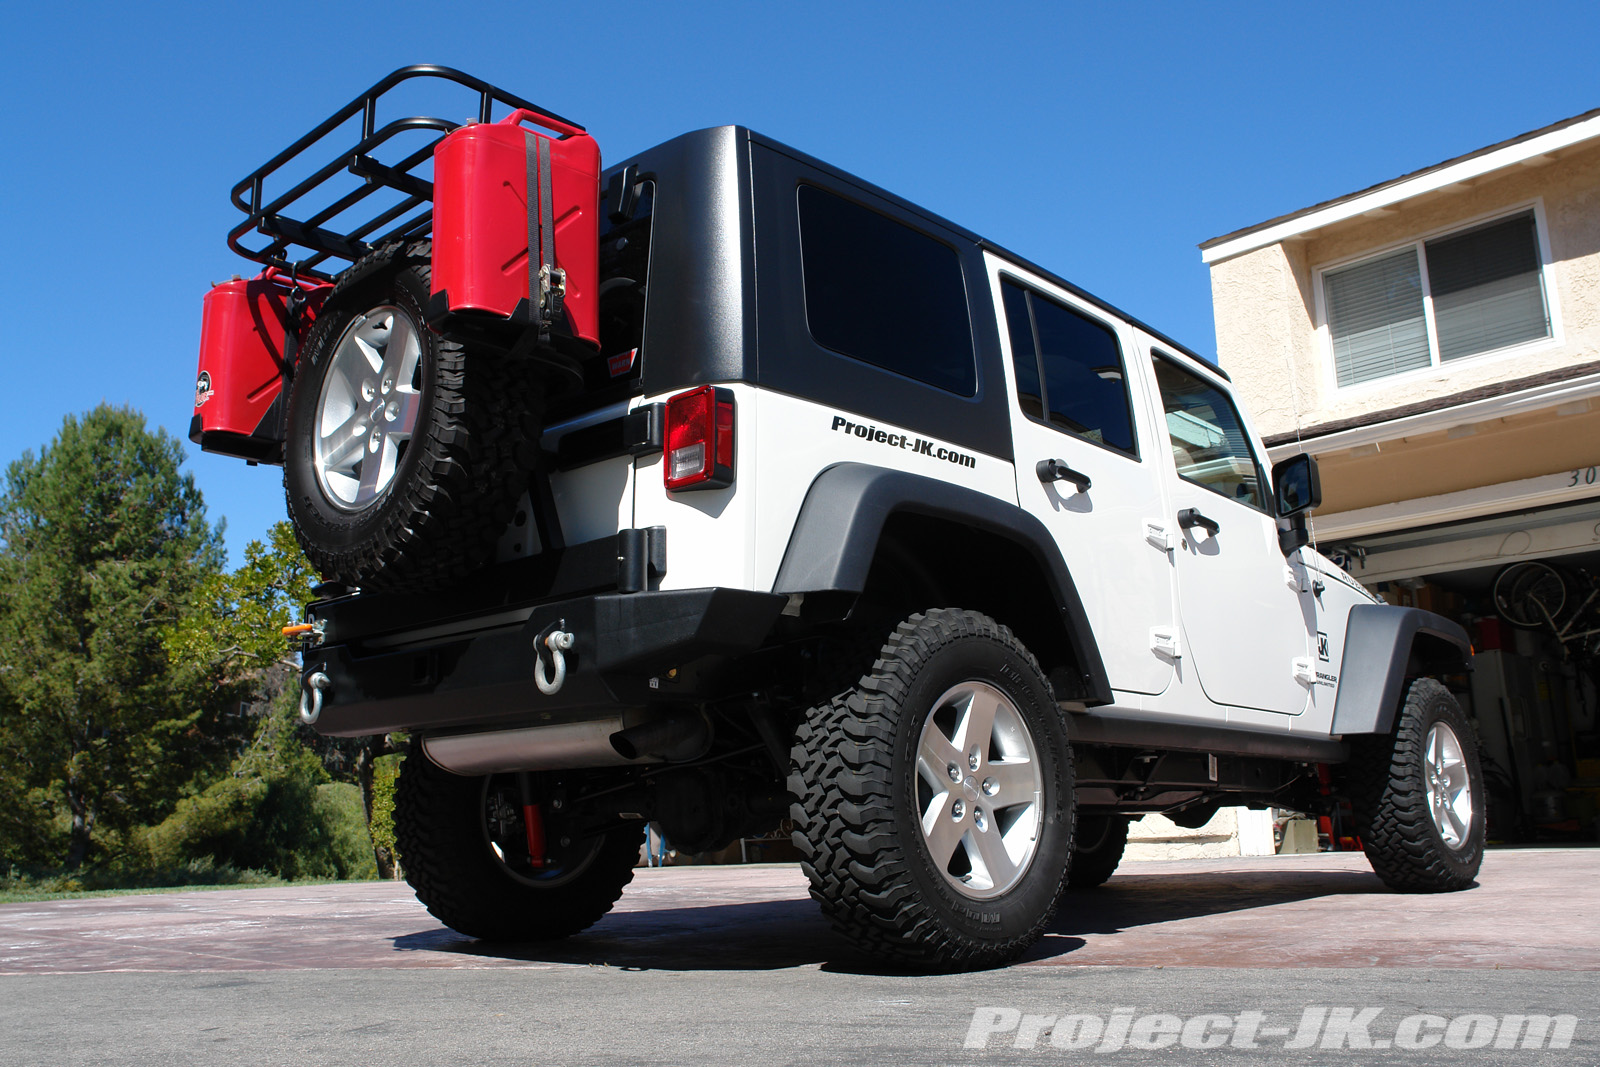
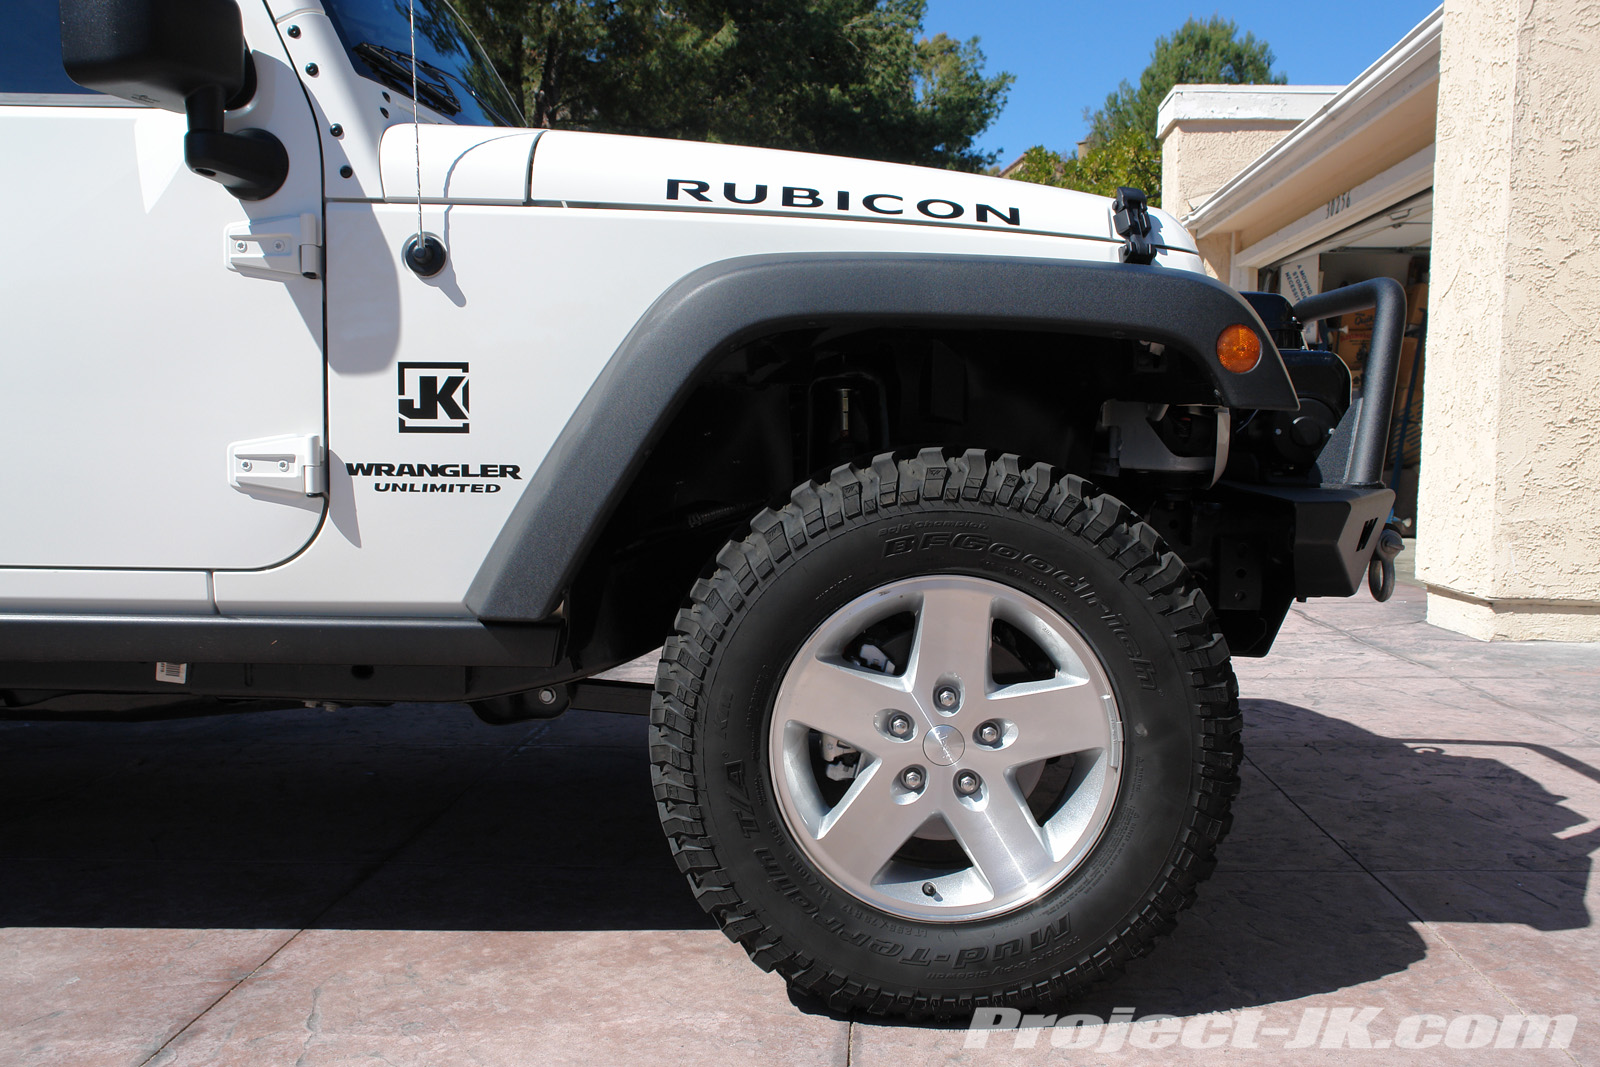
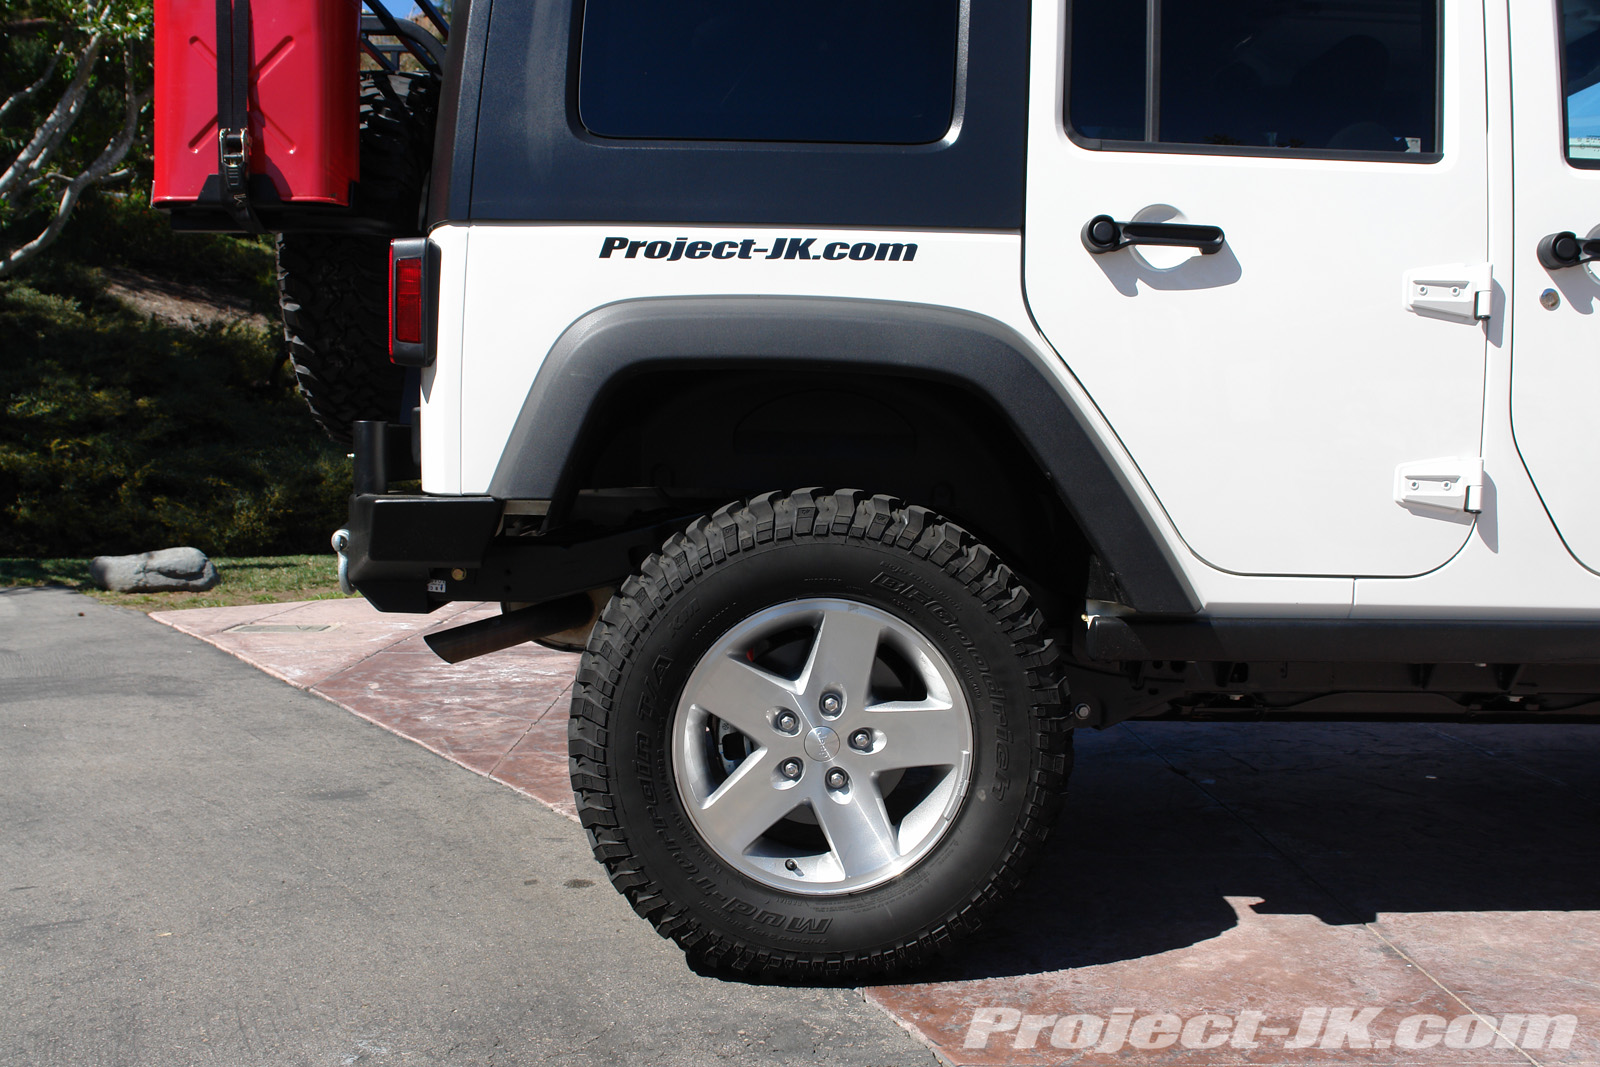
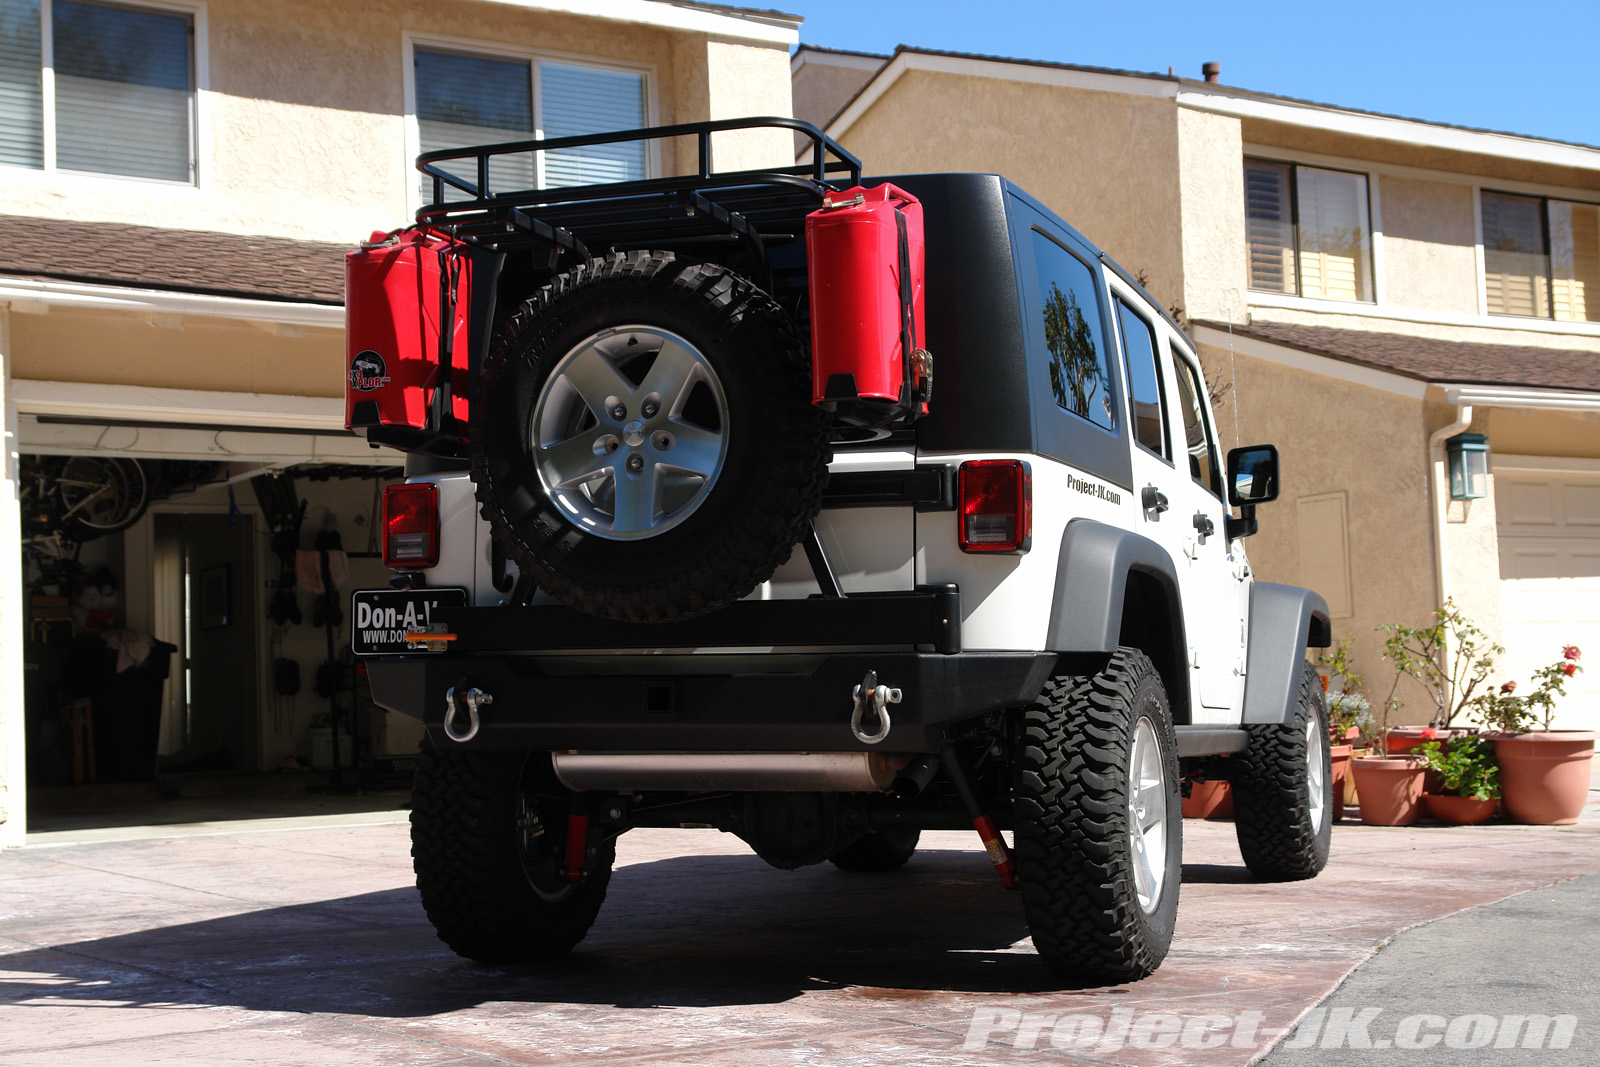
Congratulations, you now have a Jeep JK Wrangler that’s sitting on top of Old Man Emu 2″ Jeep JK Wrangler suspension lift. And, from what I have seen, this kit sits closer to 3″-3.5″ lift and would imagine it would clear 35″ tires with ease. Certainly, John’s JK already had 33’s on and as you can see in the after pics below, there is more than enough room to fit more. Give your Jeep a thorough test drive and after about 100 miles, give your nuts and bolts another check with the torque wrench just to make sure nothing has come loose.
Please let me know if you have any questions. |
Additional Photos
|
| Before |
 |
 |
 |
 |
 |
 |
| After |
 |
 |
 |
 |
 |
 |
 |
 |
 |
| Click on the link below to see all the Old Man Emu 2″ Jeep JK Wrangler suspension lift pics: Old Man Emu 2″ Jeep JK Wrangler Lift Pics |
On Pro Comp’s tire website they have this 33 inch tire in 3 different places. The numbers on the 3 tires are 325/60R-18, 325/50R-20, and 305/65R-17. I have no clue as to how to read these numbers. Do you know which one it might be? Also, do the numbers at the end, for instance, on the second one, -20, does that mean a 20 inch rim?
yes, the 20, 18 or 17 refers to your wheel size. for instance, a 285/75R17 would be a 33″ tire on a 17″ wheel
Did those 1/2 coil spacers come with the OME lift you ordered? Also, I need a 33×12.5 on a 17″ rim…I cant find one anywhere! do they even make a tire that exact size?
the spacers were added due to the fact that the jeep was going to get a heavy front bumper and winch. regarding tires, what brands have you been looking at – should be easy to find in a bfg mt or goodyear mtr. a good metric equivalent would be 315/75R17
If I got the OME heavy lift, would I need the spacers? I am deciding between the BFG A/T’s or the pro comp xtreme A/T.
spacers and the installation of them is purely subjective and you would have to determine that after you install your lift. personally, i would say no but, that’s just me.
Have you had any rubbing issues on or offroad with the 12.5″ wide tire with only 4.5″ of backspacing?
Does this lift require an adjustable track bar, control arms, new sway bars, or new brake lines? Can you use bump stops with this lift? thanks
depends on what brand tire you are running. some 12.50’s are wider than others but, for the most part, no, there have been no rubbing issues. also, adjustalbe track bars would be nice to have but not necessary. brakeline are not needed as the shocks that come with this kit will not allow for the over extensions of them and last but not least, yes, you can install bumpstop extensions with this kit.
Do you know anything about the OME long arm kit? Is it a 2″ lift as well? In this write up, are you running the heavy or standard load lift? Thanks
to the best of my knowledge, there is no such thing as an OME long arm kit – there is a long travel kit and you can read about it here:
http://project-jk.com/jeep-jk-write-ups/northridge4x4-old-man-emu-jeep-jk-wrangler-long-travel-lift-kit-installation-write-up
Will this lift work on the 2011 jeep wrangler rubicons?
yes, it most certainly will
I installed this kit about 6 weeks ago along with both the rear and front adjustable track bars from JKS. Super easy installation, took about 3 hours with help (although it can be done by one person) in the garage. I got the heavy duty springs and on my 2010 Unlimited Sport, gave me every bit of 3″ of lift. I have recently added the JKS Quicker Disconnects up front and plan to add adjustable sway bar links in the back as well to bring the sway bars up to their proper orientation. This is the only additional recommendation I would make to anyone installing this, or any lift. Getting those sway bars back to the correct position will help with the handling of the vehicle and (along with the front disconnects) give you all the offroad flex possible.
Hi guys,
Thanks for the great write-up, as always 🙂 I just bought this kit from Northridge 4×4 with the JKS adjustable track bars. With these track bars, will I just need to install them and then skip having a friend push the rear to align and having them turn the steering wheel to align the holes? Shouldn’t I just be able to adjust them out while the Jeep is on a flat surface and then bolt them in, or am I missing something?
you cannot adjust the track bar while it is installed on both ends. you will need to disconnect it from one end in order to adjust it.
Wayoflife,
I understand I need it to be disconnected from one end to adjust it. I found the info I needed on your site – guess I need to measure it out and adjust that way. Just did the front half of the lift… It’s huge! Can’t wait until the whole thing is done. Been following your write-up the whole time – only thing that differs is that Northridge doesn’t ship the kit with the 1/2″ spacers anymore.
Thanks again!
One quick question – I have the JKS 0-2″ lift Quicker Sway Bar Disconnects; can I re-use these up front or do I need to get the 2.5″-6″ ?
they might be on the short side but you should be able to use them with this lift and without any problems.
Hi
I have put 4 OME shocks and the rear coils only on my Rubicon Jk as when ever i would tow my offroad camper the JK would look like it was pulling a wheelie with its nose in the air and the back sitting low. After the coils where put in the trailer is nice and level with the back of the Jk but when I am not towing the car looks a bit funny cause the back is raised and the front is standard. Do you think I should get the coils for the front as well to level it out? Not sure if it dangerouse as it is now. Love ur article on the OME lift by the way
actually, i probably would have kept your old rear coils and just installed a set of air bags.
Hi, I just removed my rear coils and will be installing a set of airbags as you have suggested. I live in South africa so I cant get hold of decent air bags but I will order the ones on ur site and ship it to a buddy who stays in NYC, who will bring it over for me when he goes on holiday to SA. Thanks for the advice. PS do you think the standard Rubicon shocks are better than the OME shocks?
the OME are nicer than stock rubicon
I wanted to ask a few questions because the guys at 4 wheel parts left me scratching my head. I went in to talk about the ome lift but they told me it would lift my jeep Sahara 2008 2dr hardtop 4 inches. Causing more issues due to this being a “basic” lift. Telling me there were better 2.5 inch lifts out there. More complete. I really like the reviews on this lift. Eddie if you were me, wanting to raise enough to support heavy bumpers on my Sahara jk and run 33-34 inch tires, would you recommend this lift and what adjustments would you make? I know your anal like me. Thanks!
the guys at 4wheelparts don’t know what they’re talking about. yes, you can get an OME lift that will provide 4″ of lift but, this kit is not one of them. when it comes to 2.5″ lifts, most will offer pretty much the same results. if you’re just looking to clear 33″ tires, this kit or even a standard budget boost like what teraflex makes will do the job just fine. i would not run 34’s as they are an odd size.
I have a 2 door 2012 wrangler sport with 33in tires and I am looking at the OME 2 in lift. I had a few questions regarding the kit. For one, i already have rancho rs5000 shocks. Will these work with this kit. Also, with the new 2012 drivetrain, I was wondering if there was anything else that might need to be updated in order to run this lift kit. I already know the exhuast will have to be moved back due to the lowering of the drive shaft with the lift. Any kind of reply will help. Thanks.
I am in the middle of this OME springs/shocks. When I lowered my rear axle to swap springs my axle edged forward towards the front of the jeep. Is this normal? How do I get the axle to swing back when raising the axle to re-bolt everything? Thanks p
yes, this is normal and not a problem. adjustable control arms is needed to reposition your axle.
Great write up btw very informative. I was interested in this kit and after reading this I’m pretty much sold… The reason is I have an 08 4dr Sahara unlimited, soft and hard top, rugged ridge fr stubby(no winch yet) body armor rear tire carrier bumper and roof rack, aev 17 pintler rims 4’7 bs, and 285/70 nittos..Is my set up..I tow and load up the rear for camping etc… I get crazy sag.. And I choose to be anal as you. Also this is my 1st jeep(will never drive anything else again!) so I was thinkin the hd kit… But what exactly would you recommend to do this all at once??…just sayin that all the stuff that may need to be replaced I’d rather do it all at once…. Thanks for the help!
5 years old and still a good reference, thanks for the help! One thing I noticed was that the shock assembly for the fronts seems incorrect in your description and images. The top rubber mount is the one that should be surrounded in washers, not the lower. You’ll want the rubber meeting up to the inside of the shock tower like the stock mounts. Just check the diagram on the plastic bag that the mounting hardware is in. Also, the nut size for the new shocks is 3/4″ not 16mm like the stock shocks, not having one I found that a crescent wrench sucks to use to get that job done. Lastly, I had to make a spring compressor out of a ratchet strap to pull the fronts coils on.
I have a 2012 Unlimited Sahara, I have read many forums and still have questions.
Will I need a exhaust adapter? Adjustable Track Bars? Alignment? Drive Shaft? Driving Stabalizer?
Some say yes, some say no.
I have always leaned towards OME and seems the to be the easiest and best to install.
I have no idea.
Please help! I am a newbie!
Hey, great write-up. I was wondering, on a rubicon with the electronic sway-bar disconnect, will I need longer sway bar links? I have read that the rear links could be used, but if I do so what links do I use for the rear?
great write up , installed mine yesterday with this pages help . everything went great as you described except one thing . my ome kit came with a rear track bar re-locator bracket , that wasn’t listed here , buy didn’t have too much adding it . im glad this write up was here , the kit came with no instructions . I forgot to measure the front but actually got right at 4″ of lift in the back . I have a spacer kit for the exhaust I haven’t installed yet but its still a good 2″ + from the front drive shaft . All my brake lines , wires ect seem to still have enough play in them but will jack it up till the tires aren’t touching just to make sure . My steering was off just a little but was easy to fix . I don’t think it needs an alignment but will get one because gy mtr’s aren’t cheap . Thanks for the info and I hope this comment helps anyone else wanting to install this kit .
Greetings, I bought the lift from extremeterrain and since it doesn’t come with an install guide you should submit yours I think they’ll pay you for it since you’ve already done the hard work. but good write up
Great write up. Just finished this lift on a 2016 2 door JK. I used this to assist. Looks like I gained the 3+ inches noted. Couple comments;
1. Up front I took the brake line loose at the forward side of the axle shock mount. Gives you more drop.
2. I used spring compressors all around to ease the install. I know they are a PITA, but worth it to me.
3 the OMEJK2DHKS heavy kit comes with a frame track bar lowering kit for rear track bar. Has good instructions.
4 I added rear brake line relocation brackets just Incase and the emergency brake cable lowering bracket..
Greetings, I had the Old Man Emu 2 inch “light duty” lift kit installed on my 2017 Jeep 4 door. Do I need new sway bar links or are the original ones okay to use? I plan on running 33 inch tires. Thanks, great write up..