Instructions
|
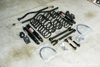 |
This is a pic of all the parts that you will get with your new Old Man Emu Jeep JK Wrangler Long Travel Lift Kit package. Of course, if you have a Rubicon, you will not need the JKS sway bar quick disconnects. |
 |
 |
 |
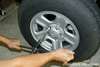
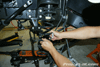
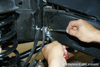
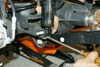
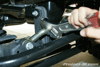
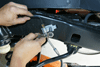
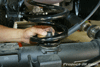
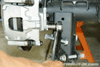
| 1. Park your Jeep JK Wrangler on a level surface and chock your rear tires. Then, using an 18mm socket and 19mm wrench, remove the bolts and nuts securing your front sway bar links to the sway bar. Then, using an 18mm socket and wrench remove the bolts and nuts securing the links to the axle mounts. |
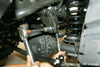
2. If you have an automatic transmission, use an 18mm socket to remove the 3 bolts (one on each frame rail and one on the cross member) securing its skid plate to the frame of your Jeep JK Wrangler. Remove the skid plate and set it aside for now. |
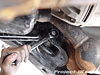
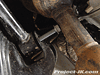
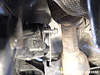
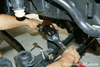
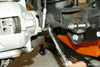
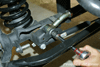
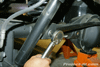
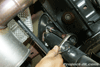
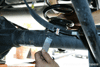
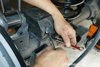
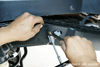
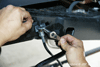
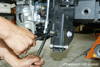
3. Remove the bolt securing your Jeep JK Wrangler’s front track bar to the front axle mount using a 21mm socket. This can be a tough bolt to remove and an impact wrench or breaker bar will help to make this job easier. |
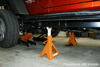 |
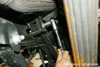
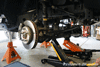
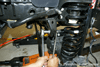
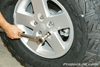
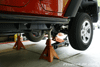
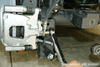
4. Loosen (but do not remove) the lug nuts on your front wheels, raise the front end of your Jeep JK Wrangler one side at a time from the axle using a tall floor jack and then set it back down onto (2) jack stands, each placed just behind the lower control arm frame mounts as shown in this pic. |
 |
5. Remove the wheels off your Jeep JK Wrangler using a 19mm lug wrench or socket and set them out of the way for now. Leave the floor jack under the front axle to help support it. |
 |
 |
 |
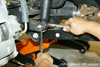
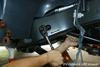
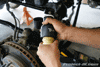
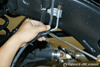
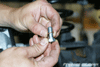
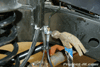
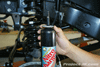
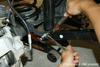
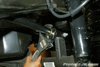
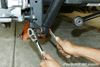
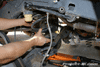
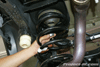
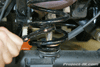
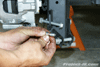
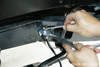
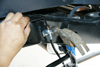
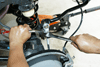
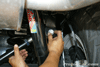
| 6. Using a 16mm or 5/8″ wrench, hold your Jeep JK Wrangler’s shock can in place just below the upper shock mount to keep it from spinning. Then, remove the stud mount nut above using a 16mm wrench. |
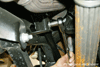
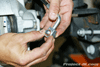
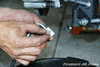
7. Using an 18mm socket and wrench, remove the bolt and nut securing your Jeep JK Wrangler’s front shocks to the lower axle mount. |
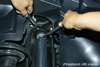
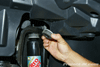
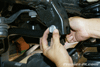
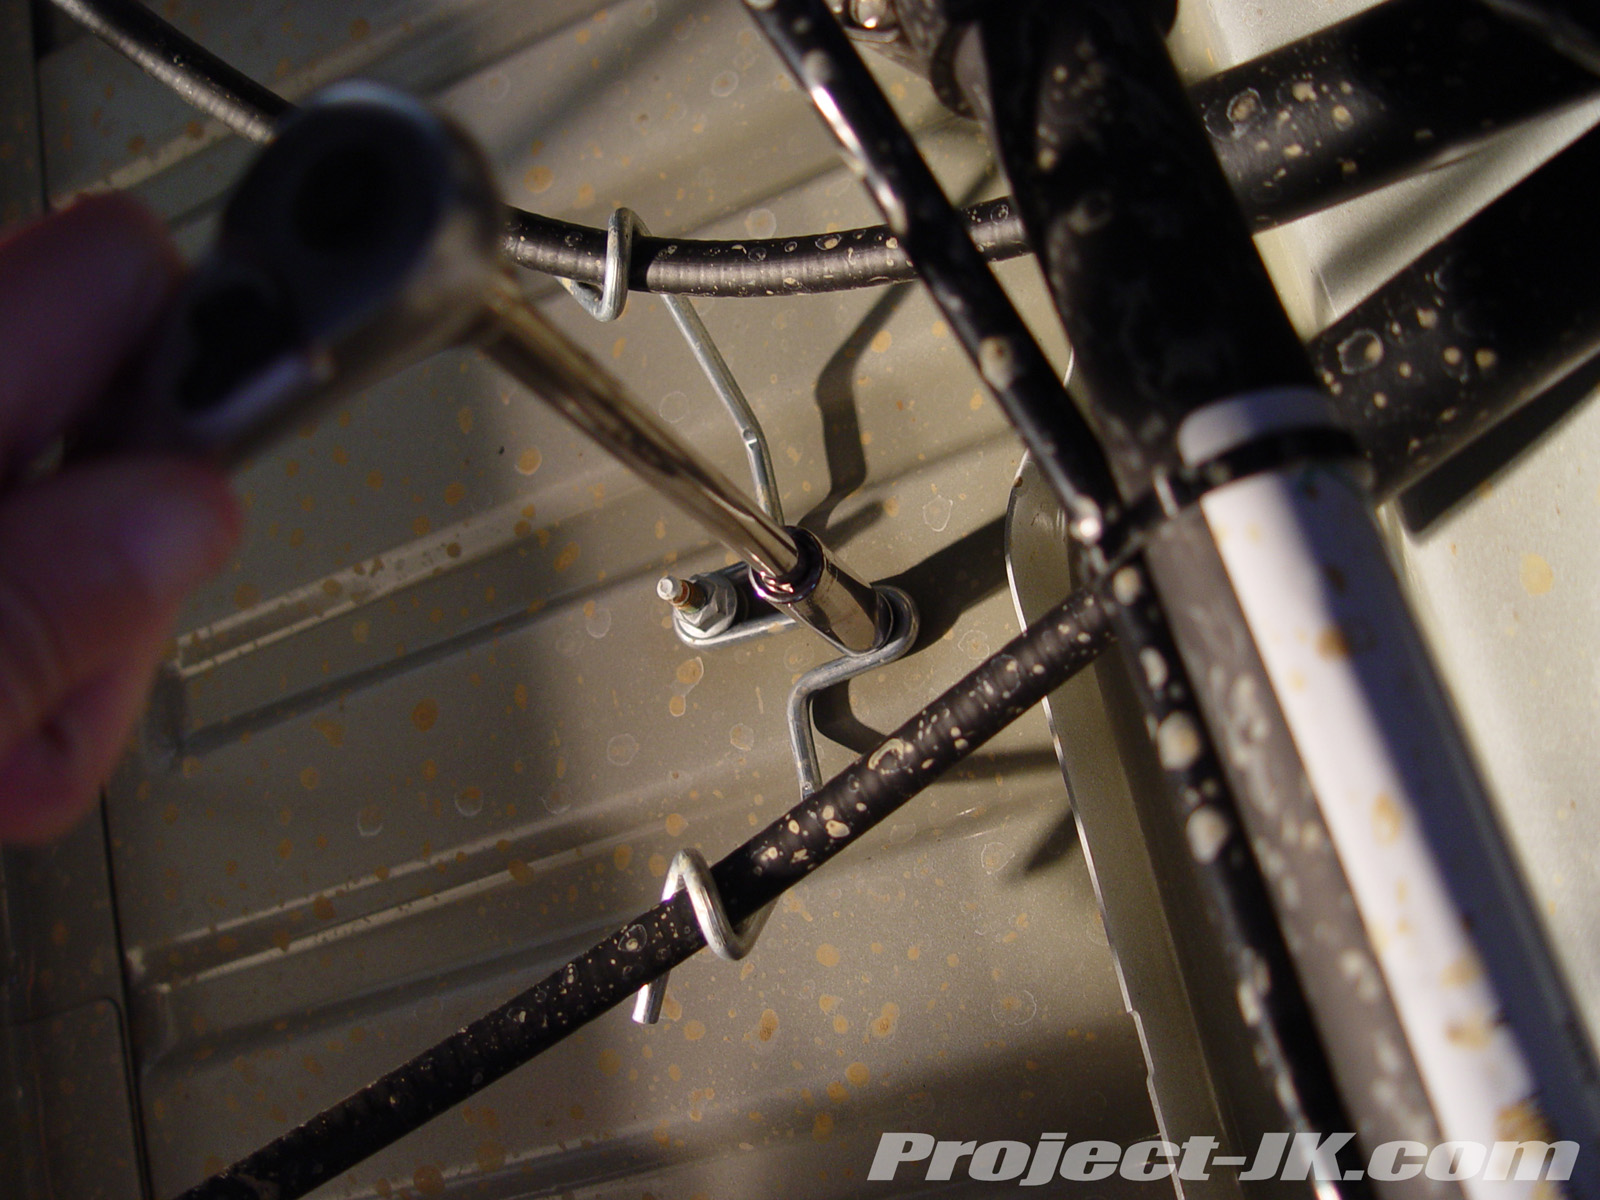
8. Pull your Jeep JK Wrangler’s ESP/BAS lines from their mounts as shown in this pic. |
 |
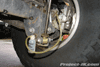
9. Being mindful of your brake lines, carefully lower your Jeep JK Wrangler’s front axle until the factory front coils can be slipped out of the upper perch and be removed completely with ease. |
 |
10. Support your Jeep JK Wrangler’s front axle with 2 jack stands and then place your floor jack under the pinion to help support it when you remove your control arms. |
 |
 |
 |
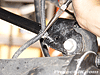
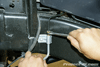
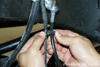
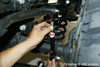
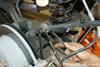
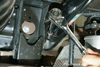
| 11. Use an 18mm wrench to separate the bolt from the flagged nut securing the passenger side upper control arm to the frame mount of your Jeep JK Wrangler. |
12. As you can see in this pic, the passenger side upper control arm frame mount bolt cannot be extracted due to your Jeep JK Wrangler’s exhaust being in the way. Currie recommends that you just cut this bolt and provides a replacement for it which will ultimately be installed in reverse. |
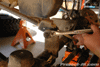
13. Pull the head of the passenger side upper control arm frame mount bolt out as far as you can and then cut it off using a Sawzall reciprocating saw and metal cutting blade as shown in this pic. Once cut, extract the remaining length of the bolt and remove the control arm itself from your Jeep JK Wrangler. |
 |
 |
 |
| 14. Remove the bolt securing your factory passenger side front upper control arm to your Jeep JK Wrangler’s axle mount using an 18mm socket. Be sure to save the factory hardware as they will be reused. |
15. Using a power drill and a 1/2″ metal drilling bit, drill out your Jeep JK Wrangler’s upper control arm frame mount hole. This will allow you to use a replacement 1/2″x3″ grade 8 bolt. |
16. Your new Currie Rock Jock front adjustable upper control arms should come pre-set to 18-3/4″ center to center length as specified by Currie. However, for my purposes, I decided to shorten them to 18-1/2″ (1/4″ shorter than stock) to help give me a bit more caster when all is said and done. |
 |
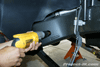
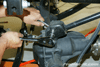
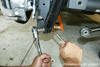
17. With the zerk nipple on the frame side pointing down, install your new Currie Rock Jock adjustable front upper control arm onto the frame mount using the new 1/2″x3″ grade 8 bolt, washer and nut provided. Because your exhaust will still be in the way, you will need to install this bolt through your frame rail as shown in this pic. A 3/4″ socket and 6″ extension will be needed for this job. Also, pay close attention when pulling your socket back out as it can catch on your frame rail and fall inside. IF your socket falls inside, it will not be easy to extract. Loosely tighten the bolt on for now. |
 |
18. Install your new Currie Rock Jock adjustable front upper control arm onto the axle mount using the factory hardware. Loosely tighten the bolts for now. |
 |
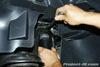
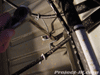
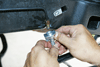
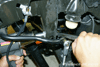
19. If you have a Rubicon model Jeep JK Wrangler, you will need to use a pair of needle nose pliers to pry off the wiring harness from driver side factory upper control arm axle mount bracket as shown in this pic. |
 |
 |
 |
| 20. Remove the bolt securing your factory driver side front upper control arm to your Jeep JK Wrangler’s axle mount using an 18mm socket. Be sure to save the factory hardware as they will be reused. |
21. Use an 18mm wrench to separate the bolt from the flagged nut securing the driver side upper control arm to the frame mount of your Jeep JK Wrangler. |
22. With the zerk nipple on the frame side pointing down, loosely install your new Currie Rock Jock adjustable front upper control arm onto your Jeep JK Wrangler’s driver side frame mount. |
 |
23. Install your new Currie Rock Jock adjustable front upper control arm onto the driver side axle mount using the factory hardware. Loosely tighten the bolts for now. |
 |
 |
 |
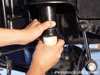
| 24. Firmly grab the yellow factory bump stop on your Jeep JK Wrangler and pry it out of its retaining cup. |
25. Take your your new TeraFlex front bump stop extensions and apply some white lithium grease to the connecting end of it. |
26. Install the yellow factory bump stop into the new TeraFlex upper front bump stop extensions. |
 |
27. Place one of the TeraFlex front lower bump stop extensions on top of your Jeep JK Wrangler’s front axle lower spring perch. Then, position the new upper front bump stop extension on top of it and under the opening of the retaining cup. Using your floor jack, slowly raise your front axle up until the upper front bump stop extension plugs into the retaining cup. |
 |
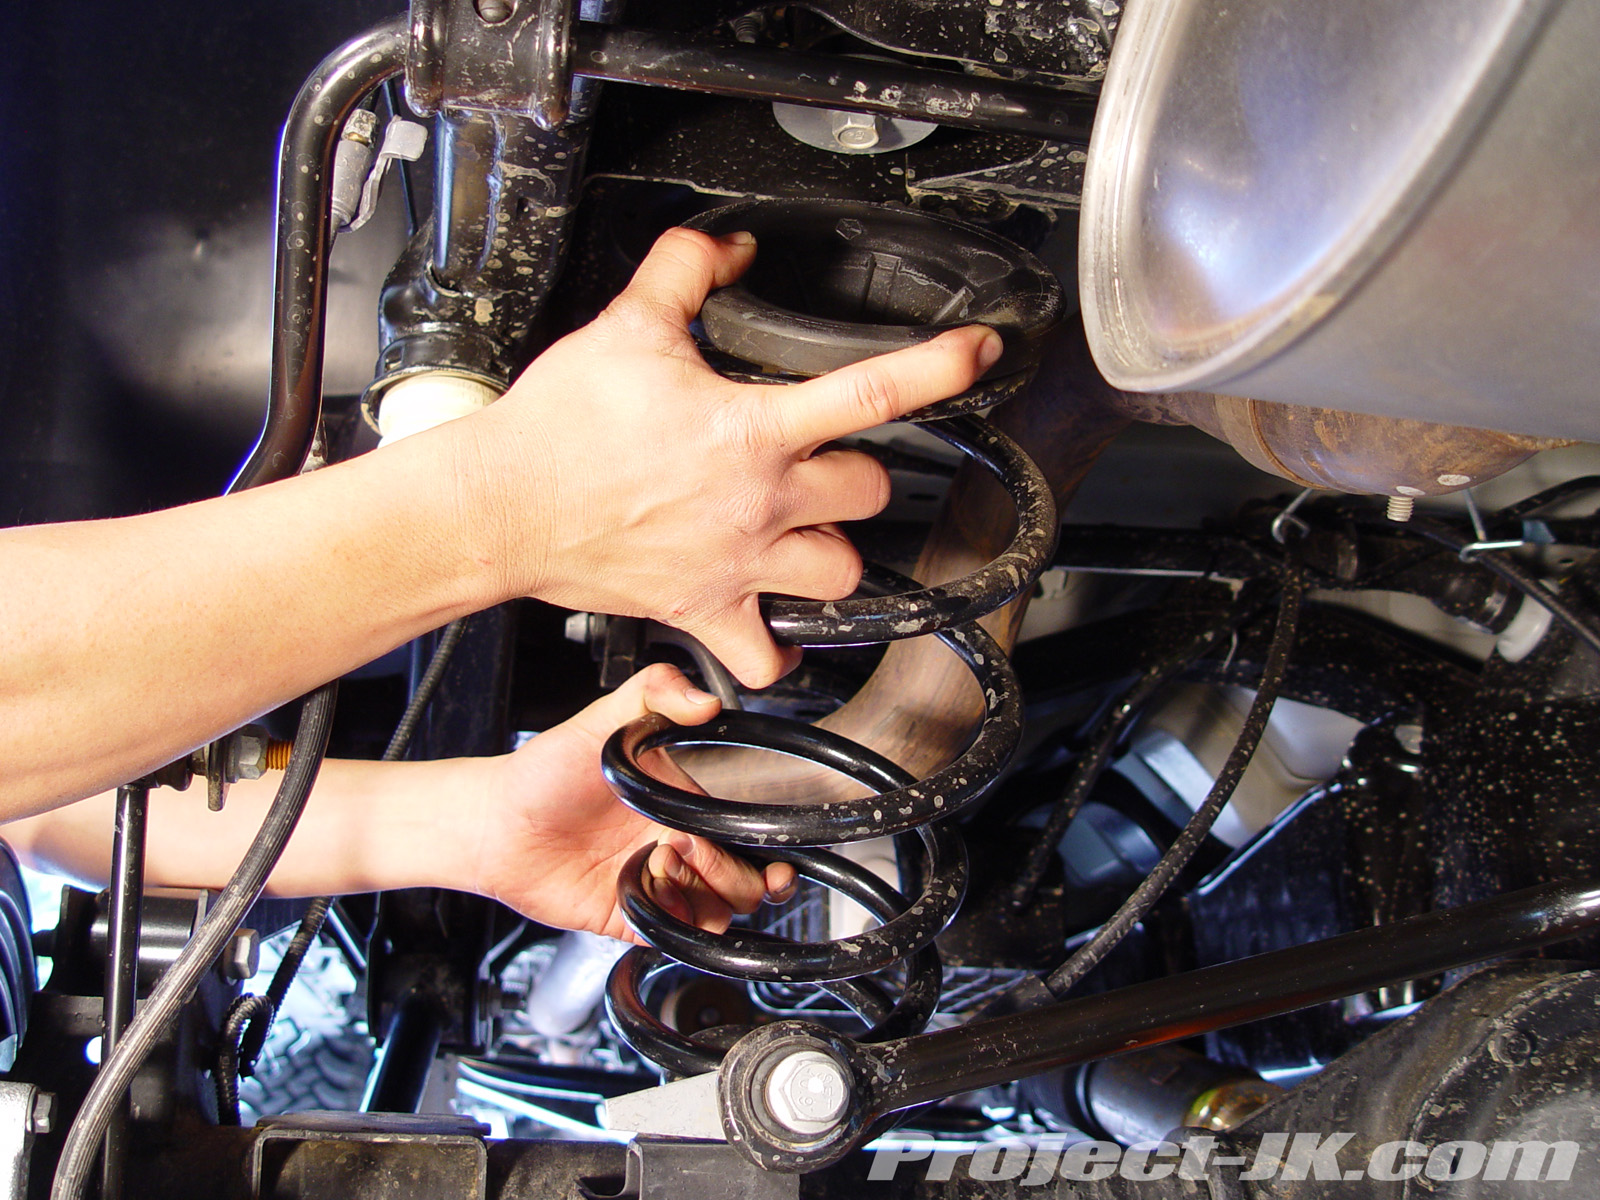
28. Install your new Old Man Emu HD front coils by slipping them up your Jeep JK Wrangler’s upper bump stop tower and then set it on the lower spring perch. Rotate the coil until the bottom end of it is seated properly. |
 |
29. Reconnect your Jeep JK Wrangler’s ESP/BAS lines onto their mounts. |
 |
 |
 |
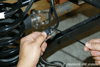
| 30. Begin the installation of your new stainless steel brake lines by cutting the thin support tie holding your driver side brake line and ABS line together as shown in this pic. |
31. Use a flat head screwdriver or pair of pliers to carefully separate the main plastic coupling holding your brake line and ABS lines together. |
32. Using an 11mm wrench, separate your Jeep JK Wrangler’s hard line from the bracket/hose. |
 |
 |
 |
| 33. Using a 10mm socket, remove the bolt securing the bracket/hose to the frame rail. Set aside the bolt for later use but the hose can be discarded. |
34. Place an oil catch pan underneath your Jeep JK Wrangler’s brake caliper. Then, using a 15mm socket, remove the banjo bolt securing your brake line to it and set it aside as you will need to reuse it. The factory hose can be discarded. |
35. Your new stainless steel front brake lines come in a driver side and passenger side configurations with the caliper connector leaning towards the inside of the Jeep. This pic shows the driver side hard line next to the caliper to show you what to look for. |
 |
 |
 |
| 36. Slip one of the new copper crush washers that should come with your new stainless steel brake lines on to the factory banjo bolt you removed earlier. |
37. Insert the factory banjo bolt with copper crush washer on through the new stainless steel brake line and then slip on another copper crush washer as shown in this pic. |
38. Using a 15mm socket, secure your new stainless steel break line to the break caliper on your Jeep JK Wrangler. Be VERY CAREFUL to only tighten the banjo bolt to 276 in. lbs. of torque. This is a very delicate bolt and can break easily if too much force is applied. |
 |
 |
 |
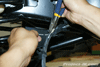
| 39. Determine which way your new mounting bracket needs to be oriented (up or down) so that it can be bolted to your Jeep JK Wrangler’s frame and then slip your the stainless steel brake line up through it as shown in this pic. |
40. Use a 10mm socket to secure your new stainless steel brake line mounting bracket to your Jeep JK Wrangler’s frame rails using the factory bolt. |
41. Secure your Jeep JK Wrangler’s factory hard line to your new stainless steel brake line using a 12mm and 17mm wrench. |
 |
 |
 |
| 42. Using a hammer to tap it on, secure your new stainless steel brake line to the mounting bracket using the retaining clip provided with the kit. |
43. Reattach your new stainless steel brake line and ABS wiring together using the factory main plastic coupler. |
44. For additional support, zip-tie your new stainless steel brake line and ABS together as they were before. |
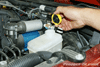 |
45. Check the fluid level in your master cylinder, fill as needed and then repeat these steps on the driver side of your Jeep JK Wrangler. |
 |
 |
 |
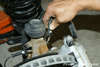
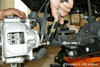
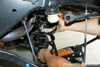
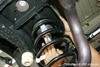
| 46. Begin the installation of your new OME long travel front shocks by slipping one of the factory large washers on top of the mounting stud as shown in this pic. |
47. Slip the factory rubber bushing with the stepped center section onto the stud of your OME long travel front shock as shown in this pic. |
48. Insert the OME long travel front shock mounting stud through the top of your Jeep JK Wrangler’s shock tower. Then, slip the other black polyurethane bushing on top followed by the the 2nd large washer and factory nut as shown in this pic. |
 |
 |
 |
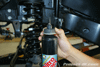
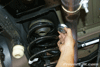
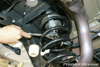
| 49. Grasp the OME long travel front shock can firmly with one hand and then secure the mounting stud nut in place using a 16mm wrench. |
50. Due to the fact that your new OME long travel shock is pressurized, you may find it helpful to use a long flat head screwdriver or small pry bar to help you get it up and into the axle mount. |
51. Using an 18mm socket and wrench, secure your new OME long travel front shocks to your Jeep JK Wrangler’s axle mount using the factory hardware and tighten the nut and bolt to 56 ft. lbs. of torque. |
 |
 |
 |
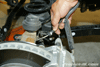
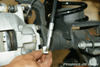
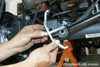
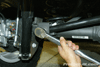
| 52. Using a 21mm socket and wrench, remove your Jeep JK Wrangler front track bar from it’s frame mount. |
53. Loosely install your new JKS adjustable front track bar on to your Jeep JK Wrangler’s frame mount using the factory bolt and nut. |
54. Reinstall your wheels or, if you have them, your new wheels and tighten the lug nuts to 95 ft. lbs. of torque. Then lower your Jeep JK Wrangler back on the ground. |
 |
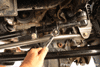
55. Set your track bar to the needed length and install it onto your Jeep JK Wrangler’s axle mount. If you find that it is still off, with the engine off, put your key in the ignition, make sure that the steering wheel is unlocked and then have a friend turn it in one direction or the other until you can line up your JKS adjustable front track bar bushing with the axle mount hole. Secure the track bar in place using the factory hardware. Using a 21mm socket and ratchet extension, tighten the axle mounting bolt to 125 ft. lbs. of torque. |
 |
 |
 |
| 56. Using a 21mm socket and wrench, tighten your JKS adjustable front track bar frame mount bolt and nut to 125 ft. lbs. of torque. |
57. Using a crescent wrench, secure your JKS adjustable front track bar jam nut in place. |
58. Using a crescent wrench, secure your Currie Rock Jock adjustable control arm jam nuts. Then, tighten the mounting bolts to 75 ft. lbs. of torque. An 18mm socket and wrench will be needed for all the bolts except for the passenger side frame bolt. That will require a 3/4″ socket and 6″ extension. |
 |
59. If you have an X or Sahara Model Jeep JK Wrangler and you picked up a set of JKS sway bar link quick disconnects, click on the link below for instructions on how to install it:JKS Sway Bar Quick Disconnect
Installation Write-UpIf you have a Rubicon, you will want to install your factory rear sway bar links up front as they are much longer. You can do this step after you are finished with the rear installation of this lift. |
|
60. If you have an automatic and removed your skid plate earlier, use an 18mm socket to re-install and secure it to the frame of your Jeep JK Wrangler using the 3 factory bolts. |
 |
 |
 |
| 61. Chock your front tires and lift the rear end of your Jeep JK Wrangler from the differential using a tall floor jack and then set it back down onto (2) jack stands, each placed just behind the lower control arm frame mounts. |
62. Remove the wheels using a 19mm lug wrench or socket and set them out of the way for now. Leave the floor jack under the axle to help support it. |
63. Remove the rear track bar bolt and nut from your Jeep JK Wrangler’s lower axle mount using a 21mm socket. As was the case with the front track bar, this can be a tough bolt to remove and a breaker bar will help to make this job easier. |
 |
 |
 |
| 64. Using a 16mm socket and a 6″-12″ ratchet drive extension, remove your Jeep JK Wrangler’s 2 upper rear shock mount bolts. |
65. Using an 18mm socket and wrench, remove the bolt and nut securing your Jeep JK Wrangler’s rear shocks to the lower axle mounts. Remove and set aside your shocks for now. |
66. Using an 18mm socket and 19mm wrench, remove the bolt and nut securing your Jeep JK Wrangler’s rear sway bar links to the sway bar itself. Then, using an 18mm socket and wrench, remove the bolts and nuts securing the links to the lower axle mounts. |
 |
 |
 |
| 67. Using a 10mm socket, remove the 2 nuts securing your Jeep JK Wrangler’s emergency brake cables to the bottom of the tub. This is necessary in order for you to get your rear axle to droop enough to install your new coils. |
68. Using a 10mm socket, unbolt the rear brake line brackets which are fastened to the outside frame rails of your Jeep JK Wrangler. Leave them dangling at this time. |
69. Slowly lower your rear axle being mindful of the ESP wiring. Once your axle is dropped low enough, your factory coils should just about fall out and can be removed with ease. Set aside the upper rubber isolators as they will be reused. |
 |
 |
 |
| 70. Place the factory rubber isolator on top of your new OME rear coils and then install both back on to your Jeep JK Wrangler. Make sure that the rubber isolator is seated properly in the upper spring perch. |
71. To begin the installation of the Currie Rock Jock spring retainers, take the bungs and slip them over the top of the upper perches and set them in the center holes. |
72. Reach in between the coils and insert the Currie Rock Jock spring retainer spacers through the bottom of the upper spring perch rubber isolator. |
 |
 |
 |
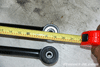
| 73. Assemble the Currie Rock Jock 1/2″-20×2-1/2″ bolts and 1/2″ washers provided as shown in this pic. |
74. Slip the assembled Currie Rock Jock upper spring retainer clamps in between the coils and insert the bolt up through the center retainer spacers and bungs. Make sure that the clamps are positioned at a 90° angle to the end of the springs. |
75. Secure the Currie Rock Jock upper spring retainer clamps in place by slipping a 1/2″-20 nylock nut and two 1/2″ washers over each spring perch and fasten them to the previously installed bolt coming up through the center. You will need a 3/4″ wrench and socket for this job. |
 |
 |
 |
| 76. Slip the large 3-1/2″ OD x 1/2″ ID lower spring retainer washers through the bottom of your Jeep JK Wrangler’s rear coils as shown in this pic. |
77. Slip the nut plates up through the bottom of your Jeep JK Wrangler’s rear lower axle spring perches as shown in this pic. |
78. Apply some red loc-tite to the 1/2″-13×1″ thread forming bolts and use them to secure the nut plate and spring retainer washers in place. A 3/4″ socket will be needed for this job. |
 |
79. Place the TeraFlex rear lower bump stop extension on top of your axle bump stop plate and secure it in place using the hardware provided. You will need a 13mm and 1/2″ wrench (or 13mm Gearwrench) for this job |
 |
 |
 |
| 80. Open up your hood so that you can keep an eye on the master cylinder and then place an oil catch pan underneath your Jeep JK Wrangler’s driver side rear brake caliper. Then, using a 15mm socket, remove the banjo bolt securing your brake line to it. |
81. Temporarily reinstall the 10mm bolt securing the brake line mounting bracket to the frame. Then, using an 11mm wrench, separate your Jeep JK Wrangler’s hard line from the bracket/hose. Now, remove the bolt securing the bracket/hose to the frame rail. Set aside the bolt for later use but the hose can be discarded. |
82. Slip one of the new copper crush washers that should come with your new stainless steel brake lines on to the factory banjo bolt you removed earlier. |
 |
 |
 |
| 83. Insert the factory banjo bolt with copper crush washer on through the new stainless steel brake line (be mindful that the elbow of the hard line needs to extend towards the back) and then slip on another copper crush washer as shown in this pic. |
84. Using a 15mm socket, secure your new stainless steel break line to the break caliper on your Jeep JK Wrangler making sure that the hard line elbow extends out and back (as opposed to up, then out) as shown in this pic. Be VERY CAREFUL to only tighten the banjo bolt to 276 in. lbs. of torque. This is a very delicate bolt and can break easily if too much force is applied. |
85. Determine which way your new mounting bracket needs to be oriented (up or down) so that it can be bolted to your Jeep JK Wrangler’s frame and then slip your the stainless steel brake line up through it as shown in this pic. |
 |
 |
 |
| 86. Use a 10mm socket to secure your new stainless steel brake line mounting brackets to your Jeep JK Wrangler’s frame rails using the factory bolts. |
87. Slip your new stainless steel brake line up through the new mounting bracket and then fasten your Jeep JK Wrangler’s factory hard line to it using a 12mm and 17mm wrench. |
88. Secure your new stainless steel brake line to the mounting bracket using the retaining clip provided with the kit. |
|
89. Check the fluid level in your master cylinder, fill as needed and then repeat these steps on the opposite side of your Jeep JK Wrangler. |
 |
90. You will need to bleed your Jeep JK Wrangler’s brake system before you can drive it. Click on the link below to see a detailed write-up on how to do this:Jeep JK Wrangler Brake Bleeding Write-Up |
 |
91. Assemble your new adjustable rear sway bar link ends and jam nuts on to the links themselves. Note, the links are designed to be adjustable once installed so there are 2 left hand and 2 right hand threaded ends. Position your Jeep JK Wrangler’s rear sway bar so that it’s arms are sitting level to the ground or slightly up from level. Then, set your new links so that they can be bolted up to the sway bar and axle mounts. |
 |
 |
 |
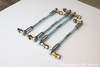
| 92. Using a 3/4″ and 5/8″ wrench, secure your new adjustable rear sway bar links to the rear sway bar on your Jeep JK Wrangler. |
93. Again, using a 3/4″ and 5/8″ wrench, secure your new adjustable rear sway bar links to the mounts on your Jeep JK Wrangler’s rear axle. |
94. Using a 19mm and 3/4″ wrench, secure the jam nuts on your new adjustable rear sway bar links as shown in this pic. |
 |
 |
 |
| 95. Using a 16mm socket and a ratchet extension, install your new Old Man Emu shocks on to the rear upper mounts on your Jeep JK Wrangler using the factory hardware. Tighten these bolts to 37 ft. lbs. of torque. |
96. Using an 18mm socket and wrench, install your new Old Man Emu rear shocks onto your Jeep JK Wrangler’s lower axle mounts using the factory hardware. Tighten these bolts to 56 ft. lbs. of torque. |
97. Using a 21mm socket and wrench, remove your Jeep JK Wrangler rear track bar from it’s frame mount. |
|
98. Reinstall your wheels or, if you have them, your new wheels and tighten the lug nuts to 95 ft. lbs. of torque. Then lower your Jeep JK Wrangler back on the ground. |
 |
 |
 |
| 99. Loosely install your new JKS adjustable rear track bar on to your Jeep JK Wrangler’s frame mount using the factory bolt and nut. |
100. If you have a friend helping out, have them push hard on the passenger side of your Jeep JK Wrangler until the rear track bar axle mount hole lines up enough for you to insert the bolt through it. Then, secure the rear track bar bolt and flag nut in place and tighten them to 125 ft. lbs. of torque. |
101. Using a 21mm socket and wrench, tighten your JKS adjustable rear track bar frame mount bolt and nut to 125 ft. lbs. of torque. Then tighten up the jam nut using a large crescent wrench. |
 |
102. With a lift of this amount or more, you will more than likely need to make a few adjustments to your Jeep JK Wrangler’s alignment. Specifically, your track bars will need some adjusting to get your axles centered. Also, you will probably need to make some adjustments to the drag link in order to re-center your steering wheel. For instructions on how to make these adjustments, simply click on the link below:Basic do it Yourself
Front End Alignment Due to the design of the steering system on the Jeep JK Wrangler, no toe-in adjustments will be required but if you wish to add more toe-in, the write-up above will be able to help you out as well. |
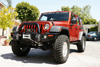
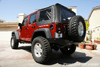
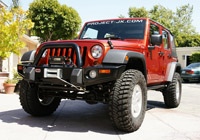
After installing this lift and letting the coils settle, I still saw a full 3″+ of lift and this was more than enough to clear the new 35″ Goodyear MT/R’s with Kevlar. Granted, I do have the OME HD coils and this did make a difference. If you are looking for a ride height closer to 2″, be sure to order your kit with LD coils.So far, I am very pleased with the performance and handling of this lift. The overall ride is firm and responsive without being harsh.Please let me know if you have any questions. |
After Shots
|
 |
 |
 |
Northridge4x4 Old Man Emu
Long Travel Lift
Photo Gallery |

Hi Ed, I saw the pics of the JK in the gallery last month and read some about it in the forum last week. Glad to see you had time to do a write up and give us some more specs. I can see by the pics there is more to come. I am also waiting for your frist video and write up with this JK in it to see how it does on the trail. Thanks for all you do for the JK Jeep.
Ed, Your timing is perfect. I just ordered this kit from Dave at Northridge4x4 and its on its way to me. Same 35″ MT/R tires and I am using my stock Rubi wheels to save a few bucks. I will be doing my install next week. Its my first install so these instructions will be a big help. Thanks
Great write up. I installed my kit a few months ago and have wheeled it a few times, the only problem I had was the front driveshaft on my 2Dr auto rubbed the skid plate and under extreme lateral flex contacted the transmission and tore the boot. Corrected the skid problem by notching it with a sawzall and grinder and replaced the boot until I can buy some aftermarket driveshafts.
Eddie,
Great write up, like always. Hey, how are the Goodyear MT/R’s with Kevlar on the road and off? Are they loud on the road and have you put them to the test off road yet? I am looking at the 34×12.00R17 for my jeep (3″ lift).
Thanks,
Bill
hey eddie, just curious why you did another 4door? There is a lot of jeep guys who think real jeeps don’t have 4 doors. I have an 08′ 2door rubicon and i can tell u from experiance i see your point on the space factor for sure. We go wheeling through the rockey mountians in alberta canada and a lot of the trails have extremely tight turns even some 2 doors can have trouble with. anyway just wondering why another 4-door
-Ryan
hey bill, so far the new mtr’s with kevlar seem to be really good tires and not too loud on pavement. i have not had a chance to test them out on the trail yet but plan to in about a week.
hoodlum336, trust me, we really did consider getting a 2-door. in fact, we were originally planning to get a 2-door the first time around but was talked out of it by friends. however, after wheeling the crap out of our white 4-door, it became very clear to us that the 4-door is ever bit as capable as a 2-door and in a lot of cases, more so. sure, it can be hard to negotiate tight trails but, you just have to learn how to wheel a little bit differently. trust me, it can be done and we do it all the time. for our purposes, getting another 4-door only made sense as we typically only run one jk at a time and with 3 people and a dog and a ton of gear, a 2-door simply wouldn’t cut it.
thank you for the quick reply eddie. I have seen alot of your videos and would agree that you can go or get anywhere with a 4door. Every time we go out with 2 people and a geman shepherd and gear i picture all that room in a 4 door!!! You guys should plan a trip to canada, BC has some really sick trails.
-Ryan
hi Eddie,
i m mike, french guy
first of all, i would like to thank you for this great forum.
i wonder what the car is like on the road (your new JK X)for every day use with this new modification ?
Is there a link that shows everything that has been done to this Jeep?
I installed this same kit on a 08 dr rubicon, wish I had your write up during the install. Ride, is firm, flex is good. I did rip the from boot on the drive shaft, new shafts have been ordered from northridge. David said you just installed a set of coast shafts on this jeep, how about getting the write-up on line so my install will be easy. Or if you want someone to run though the draft send a copy be more than happy to provide feadback.
thanks
tom
What is the overall height of the jeep after the install. I have a 4dr Rubi with a soft top and was going to go with 35s ( toyo). I have a hard top as well but I think the bows make the soft top taller. I was just wanting to check height for the garage. I think it would be cool if you had a section were people could post their jeep height and what they have on it. If everything was selected through drop down boxes it would be more accurate because people seem to omit things. Thanks
Thanks Eddie for the writeup. I am about to install mine this week and was wondering what happened to the brake line bleeding link. The page was blank. The one thing I want to make sure I do right is reinstall the brakes! Thanks again.
Just printed this out as my lift will be here Friday.
I have all tools nessasary so about how long should I plan on this taking?
Hi Eddie, this is by far my favorite Jeep suspension/tire profile. On my 4dr 2007 Sahara i have the 18×7.5 wheels which i think look very cool. Could i i fit 35 MTR’S on them, given i do a 3″ or 4″ lift like you did on the project jk jeep. Will there be any fit issue, like rubbing, having to use spacers.
Every time i go to the local 4×4 shop they try to sell me new wheels. I like the stock wheels the jeep came with. What are specs on the Mtr’s 35’s the project jk jeep has?
Thanks Eddie…….
I have a 2010 JK Rubicon. I am wondering if I should buy this lift in the standard load or heavy load. I am running 33×12.5 tires. I will be adding a stubby front bumper with a winch, rock sliders, a rear bumper and tire carrier, lights on the hood and a delta sky bar. I don’t want a huge space between the fender and tire but I also do not want the fender right on top of the tire. PLEASE HELP ME OUT!! Thank you, Brandon
I’m getting a 2 door JK in the near future and I’m going to run 33″ tires. My question to you is which OME spring rating do I get (Light, Medium or Heavy)? I will not add aftermarket bumpers or a hard top…so no additional weight. I’m wanting to get a total of 2″ of suspension lift. From what I have read, the three different spring ratings will get you from 2″-3.5″ of suspension lift even though they claim to be a 2″ lift. Thanks for you help!
wayoflife:
I want to ask a question about ABS line
In this write up, step 26-42 talked about front brake/ABS line and step 65-67, 78-86 talked about rear brake line
Seems to me the ABS line is not touched during this process, so I guess the stock length of ABS line is long enough for this lift?
Do all of these parts come with the OME long travel kit if you purchase it off of northridge? Also, in the pictures posted do you have any other suspension upgrades installed? If I were to be running 35″ tires with this lift with new bumpers and sideskirts, would I need coil spacers? Thanks
Thank god for this write up. There were no instructions with mine and I would have been lost. One posted noted to disconnect the brake line supports whenever possible and god was he right. At full droop the brake lines looked as they were about to snap. I ordered a set of extended brake lines and I would fully suggest anybody installing this kit to do the same. At full droop with the tires on the brake lines still are being stretched and look to be vulnerable to breaking.
After the kit is installed what adjustments(or numbers) should be made if you have adjustable rear control arms. Your front end alignment you had the the flat spot on the differential make sure it was at 90 degrees what should the rear be? and do you have distant between the front and rear axles. the front end is set up right the rear is another adjustment I can make.
Thanks
Does anyone actually know the OME HD Coil Spring Part numbers for this lift? I may have to piece mine together over time rather than coming up with the entire $1,600 to buy it all in the “kit.” I see on ARB’s website that there are three different “HD” rear coils (2617, 2618 & 2620). If anyone noticed on the boxes and can remember, I’d sure appreciate it! Thanks!
Are these the same springs that are in the OME 2″ HD lift which most people report 3″+ of lift from after install?
Thanks for the wonderful write-up. Almost six years later, it is still a huge help.