Instructions
|
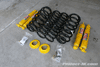 |
This is a pic of all the parts you should get with your new Old Man Emu 2″ Jeep JK Wrangler Lift Kit. Take some time to make sure you have all the parts shown as well as all the tools listed on the left prior to starting this project. |
 |
 |
 |
| 1. Park your Jeep JK Wrangler on a level surface and chock your rear tires. Then, using an 18mm socket and wrench, remove the bolts and nuts securing your front sway bar links to the lower axle mounts. (NOTE: If you have a manual transmission, skip to step #3). |
2. If you have an automatic transmission, use an 18mm socket to remove the 3 bolts (one on each frame rail and one on the cross member) securing its skid plate to the frame of your Jeep JK Wrangler. Remove the skid plate and set it aside for now. |
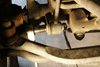
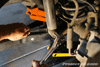
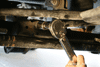
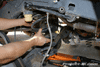
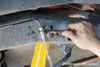
3. Remove the bolt securing your Jeep JK Wrangler’s front track bar to the front axle mount using a 21mm socket. This can be a tough bolt to remove and an impact wrench or breaker bar will help to make this job |
 |
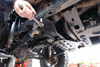
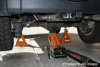
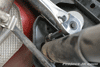
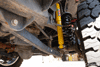
4. Loosen (but do not remove) the lug nuts on your front wheels, raise the front end of your Jeep JK Wrangler one side at a time from the axle using a tall floor jack and then set it back down onto (2) jack stands, each placed just behind the lower control arm frame mounts as shown in this pic. |
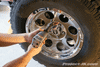 |
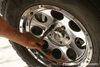
5. Remove the wheels off your Jeep JK Wrangler using a 19mm lug wrench or socket and set them out of the way for now. Leave the floor jack under the front axle to help support it. |
 |
 |
 |
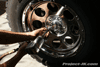
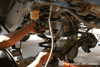
| 6. Using a 16mm or 5/8″ wrench, hold your Jeep JK Wrangler’s shock can in place just below the upper shock mount to keep it from spinning. Then, remove the stud mount nut above using a 16mm wrench. |
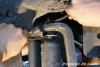
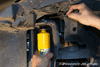
7. Using an 18mm socket and wrench, remove the bolt and nut securing your Jeep JK Wrangler’s front shocks to the lower axle mount. |
8. Being mindful of your brake lines, carefully lower your Jeep JK Wrangler’s front axle until the factory front coils can be slipped out of the upper perch and be removed completely with ease. |
 |
 |
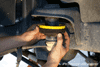 |
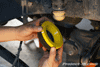
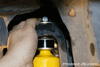
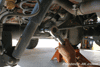
| 9. Slide the factory rubber coil isolator down and off your Jeep JK Wrangler’s upper bump stop tower as shown in this pic. |
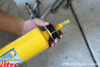
10. Place the yellow Old Man Emu 1/2″ coil spacer on top of your Jeep JK Wrangler’s factory rubber isolator. |
11. Reinstall both your new Old Man Emu 1/2″ coil spacer and factory rubber isolator back on to your Jeep JK Wrangler’s upper bump stop tower as shown in this pic. |
 |
12. Install your new Old Man Emu 2″ front coils by slipping them up your Jeep JK Wrangler’s upper bump stop tower and then set it on the lower spring perch. Rotate the coil until the bottom end of it is seated properly. |
 |
 |
 |
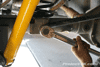
| 13. Begin the installation of your new Old Man Emu front shocks by slipping the large washer on top of the mounting stud followed by one of the black polyurethane bushings and then the zinc finished locating washer with the center hole lip facing up as shown in this pic. |
14. Insert the Old Man Emu front shock mounting stud through the top of your Jeep JK Wrangler’s shock tower. Then, slip the other black polyurethane bushing on top followed by the zinc finished washer (concave side facing down), smaller washer and nut as shown in this pic. |
15. Grasp the Old Man Emu front shock can firmly with one hand and then secure the mounting stud nut in place using a 16mm wrench. |
 |
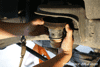
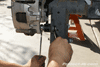
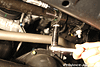
16. Using an 18mm socket and wrench, secure your new Old Man Emu front shocks to your Jeep JK Wrangler’s axle mount using the factory hardware and tighten the nut and bolt to 56 ft. lbs. of torque. |
 |
17. Reinstall your Jeep JK Wrangler’s front wheels, lower it back down on the ground, tighten the lug nuts to 95 ft. lbs. of torque, remove the wheel chocks from the rear and place them up front. |
 |
18. With the engine off, put your key in the ignition, make sure that the steering wheel is unlocked and then have a friend turn it in one direction or the other until you can line up your front track bar bushing hole with the front axle mount hole on your Jeep JK Wrangler. Secure the track bar in place using the factory hardware and tighten it to 125 ft. lbs. of torque. |
|
19. Reinstall your Jeep JK Wrangler’s sway bar links back onto the front axle mounts and tighten them to 75 ft. lbs. of torque. You will need an 18mm socket and wrench to do this job. |
|
20. If you have an automatic and removed your skid plate earlier, use an 18mm socket to re-install and secure it to the frame of your Jeep JK Wrangler using the 3 factory bolts. |
 |
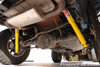
21. Lift the rear end of your Jeep JK Wrangler from the differential using a tall floor jack and then set it back down onto (2) jack stands, each placed just behind the lower control arm frame mounts. Remove the wheels off using a 19mm lug wrench or socket and set them out of the way for now. Leave the floor jack under front the axle to help support it. |
 |
22. Remove the wheels off using a 19mm lug wrench or socket and set them out of the way for now. Leave the floor jack under front the axle to help support it. |
 |
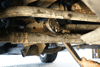
23. Remove the rear track bar bolt and nut from your Jeep JK Wrangler’s lower axle mount using a 21mm socket. As was the case with the front track bar, this can be a tough bolt to remove and a breaker bar will help to make this job easier. |
 |
 |
 |
| 24. Using an 18mm socket and wrench, remove the bolt and nut securing your Jeep JK Wrangler’s rear sway bar links to the lower axle mounts. |
25. Using a 16mm socket and a 6″-12″ ratchet drive extension, remove your Jeep JK Wrangler’s 2 upper rear shock mount bolts. |
26. Using an 18mm socket and wrench, remove the bolt and nut securing your Jeep JK Wrangler’s rear shocks to the lower axle mounts. Remove and set aside your shocks for now. |
 |
 |
 |
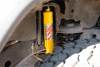
| 27. Using a 10mm socket, remove the 2 nuts securing your Jeep JK Wrangler’s emergency brake cables to the bottom of the tub. This is necessary in order for you to get your rear axle to droop enough to install your new coils. |
28. Using a 10mm socket, unbolt the rear brake line brackets which are fastened to the outside frame rails of your Jeep JK Wrangler. Leave them dangling at this time. |
29. Slowly lower your rear axle being mindful of the ESP wiring. Once your axle is dropped low enough, your factory coils should just about fall out and can be removed with ease. Set aside the upper rubber isolators as they will be reused. |
 |
30. Place the factory rubber isolator on top of your new Old Man Emu rear coils and then install both back on to your Jeep JK Wrangler. Make sure that the rubber isolator is seated properly in the upper spring perch. |
 |
31. Using an 18mm socket and wrench, secure the factory rear sway bar link back onto your Jeep JK Wrangler’s lower axle mounts and tighten them to 75 ft. lbs. of torque. |
 |
 |
 |
| 32. Using a 16mm socket and a ratchet extension, install your new Old Man Emu shocks on to the rear upper mounts on your Jeep JK Wrangler using the factory hardware. Tighten these bolts to 37 ft. lbs. of torque. |
33. Using an 18mm socket and wrench, install your new Old Man Emu rear shocks onto your Jeep JK Wrangler’s lower axle mounts using the factory hardware. Tighten these bolts to 56 ft. lbs. of torque. |
34. Using a 10mm socket and the factory hardware, re-install your rear brake line brackets back on to your Jeep JK Wrangler’s frame rails. |
|
35. Using a 10mm socket, re-secure your Jeep JK Wrangler’s emergency brake cables hanger to the bottom of the tub using the factory nuts. |
 |
36. Reinstall your Jeep JK Wrangler’s rear wheels, lower it back down on the ground, tighten the lug nuts to 95 ft. lbs. of torque. |
 |
37. If you have a friend helping out, have them push hard on the passenger side of your Jeep JK Wrangler until the rear track bar axle mount hole lines up enough for you to insert the bolt through it. Then, secure the rear track bar bolt and flag nut in place and tighten them to 125 ft. lbs. of torque. |
 |
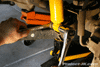
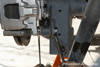
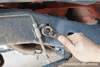
38. Because of the lift, your steering wheel will be off just a bit. To re-center your steering wheel, use a 15mm wrench to loosen the 2 nuts on the turnbuckle as shown in the pic to the left. Then, rotate the turnbuckle clockwise or counter clockwise as needed while a friend watches the steering wheel (or you periodically check on it yourself) go back to center. Once re-centered, secure the nuts and take it for a drive to check your steering wheel. This may take a few tries to get it on 100% but that’s all there is to it. |
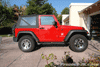
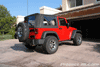
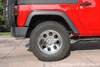
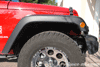
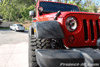
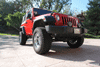
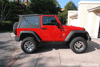
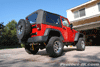
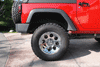
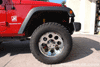
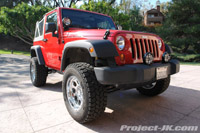
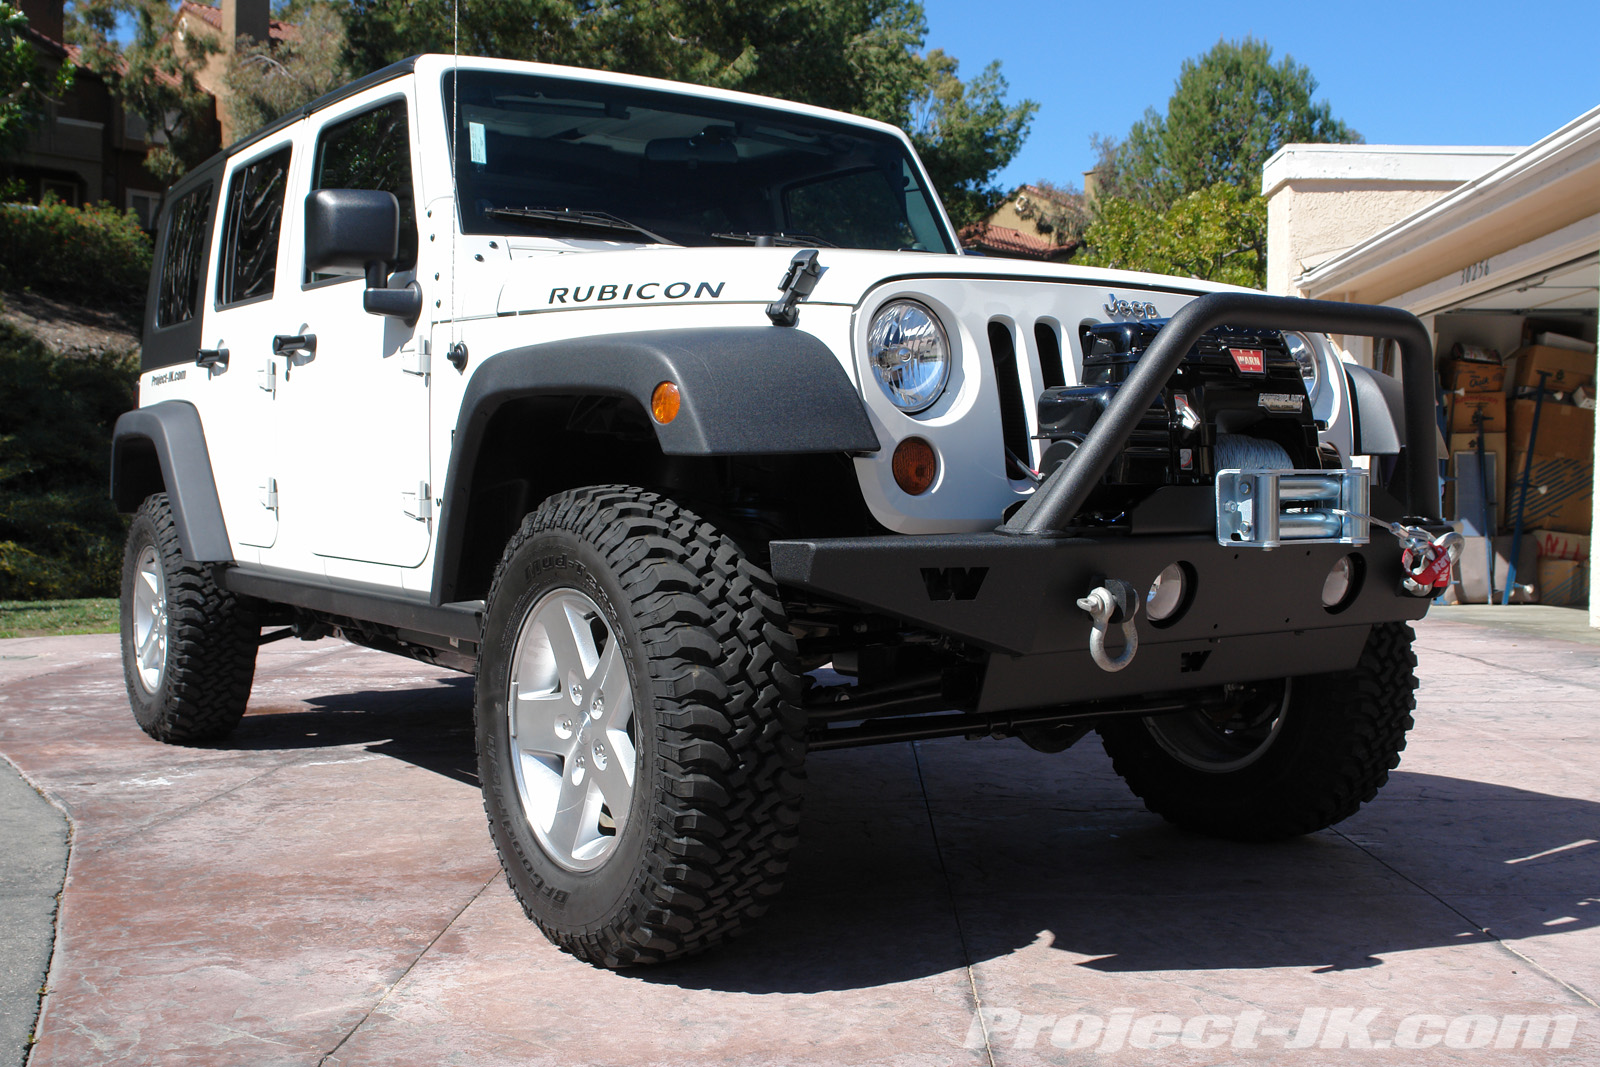
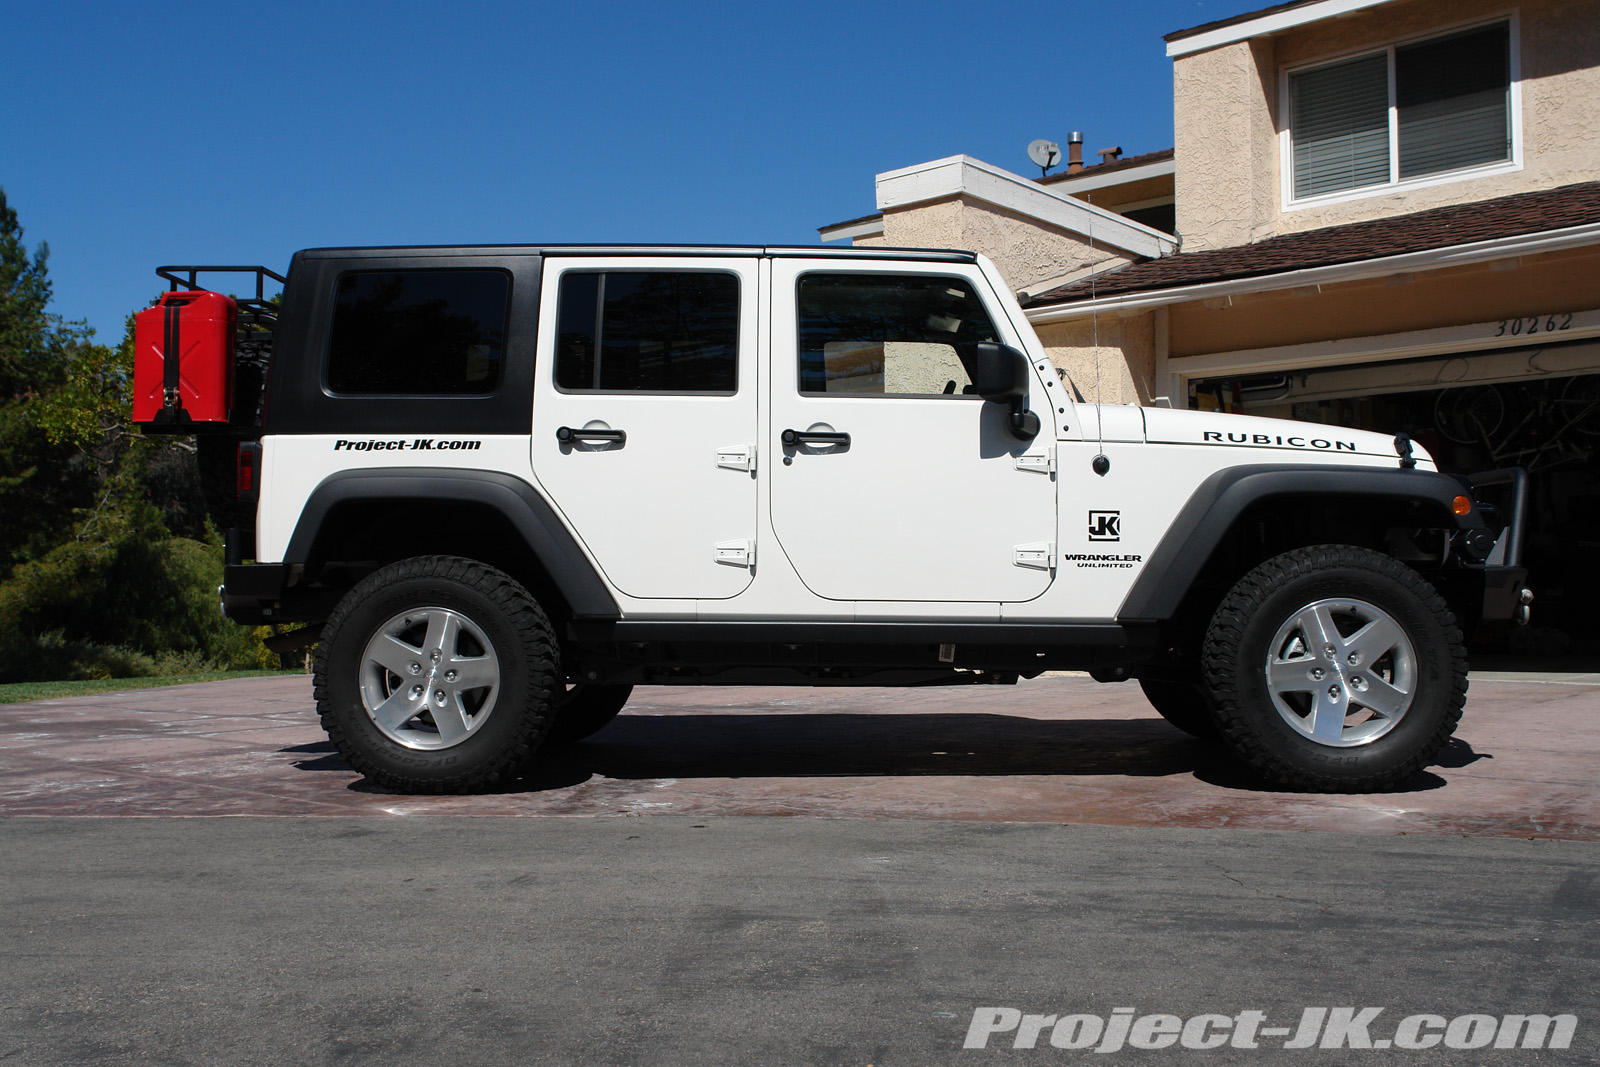
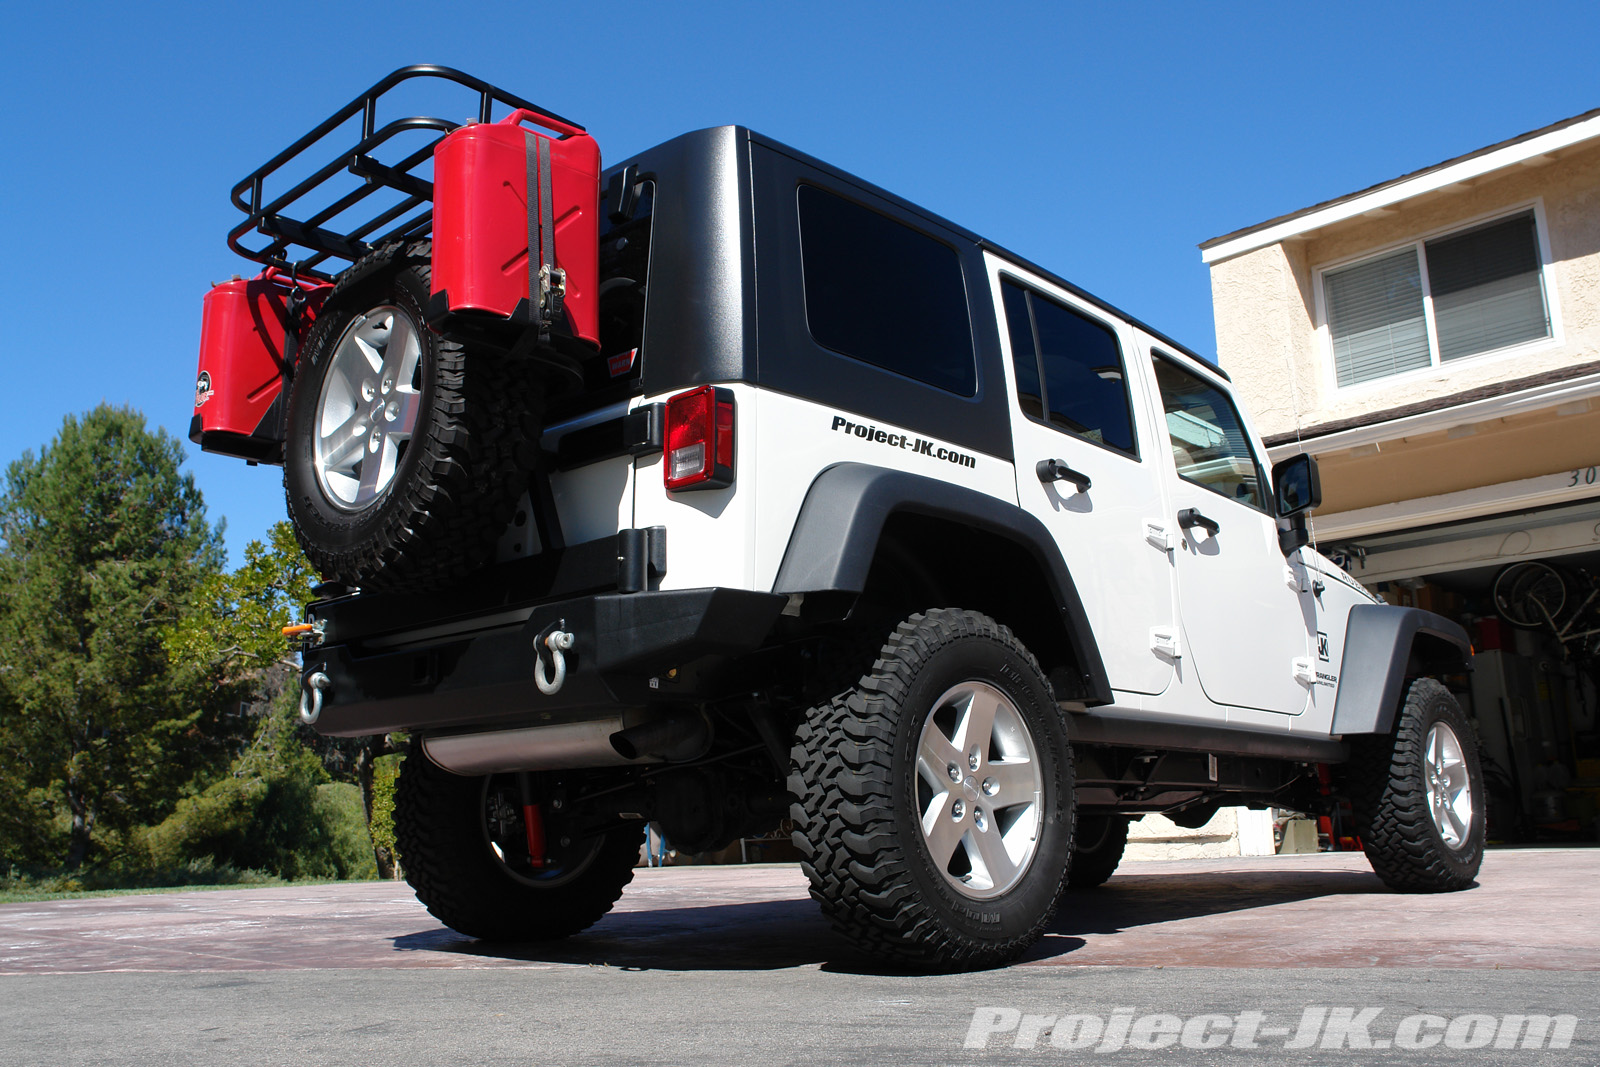
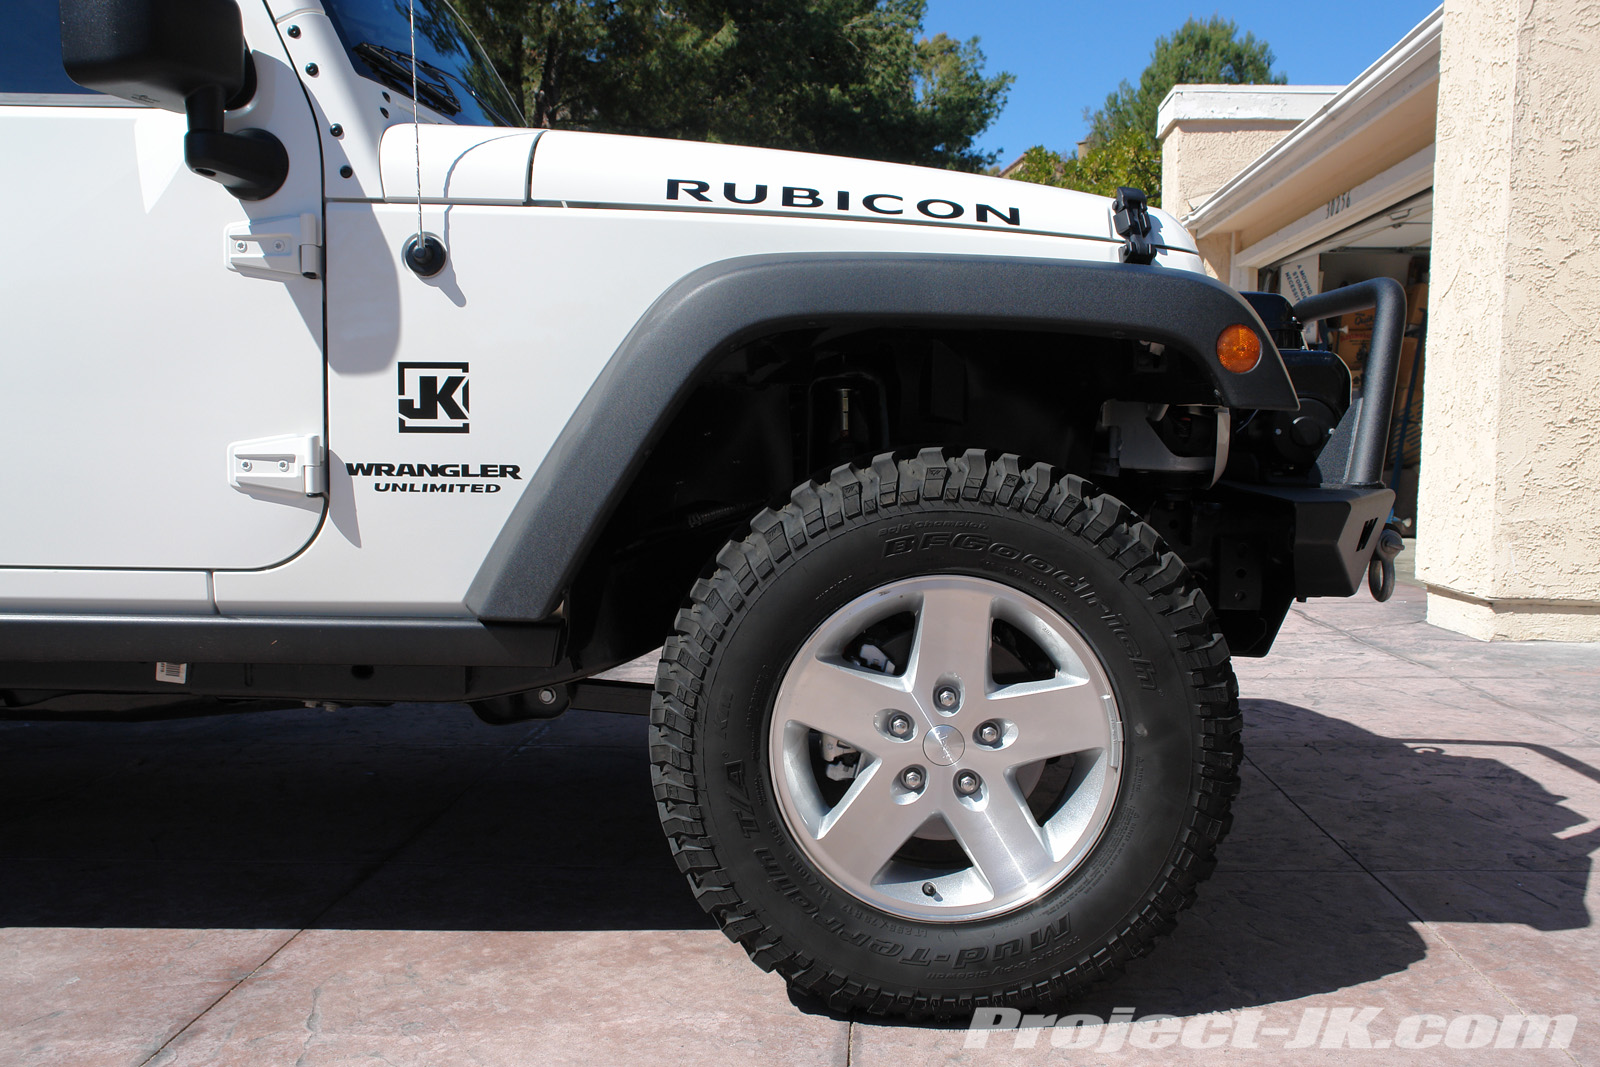
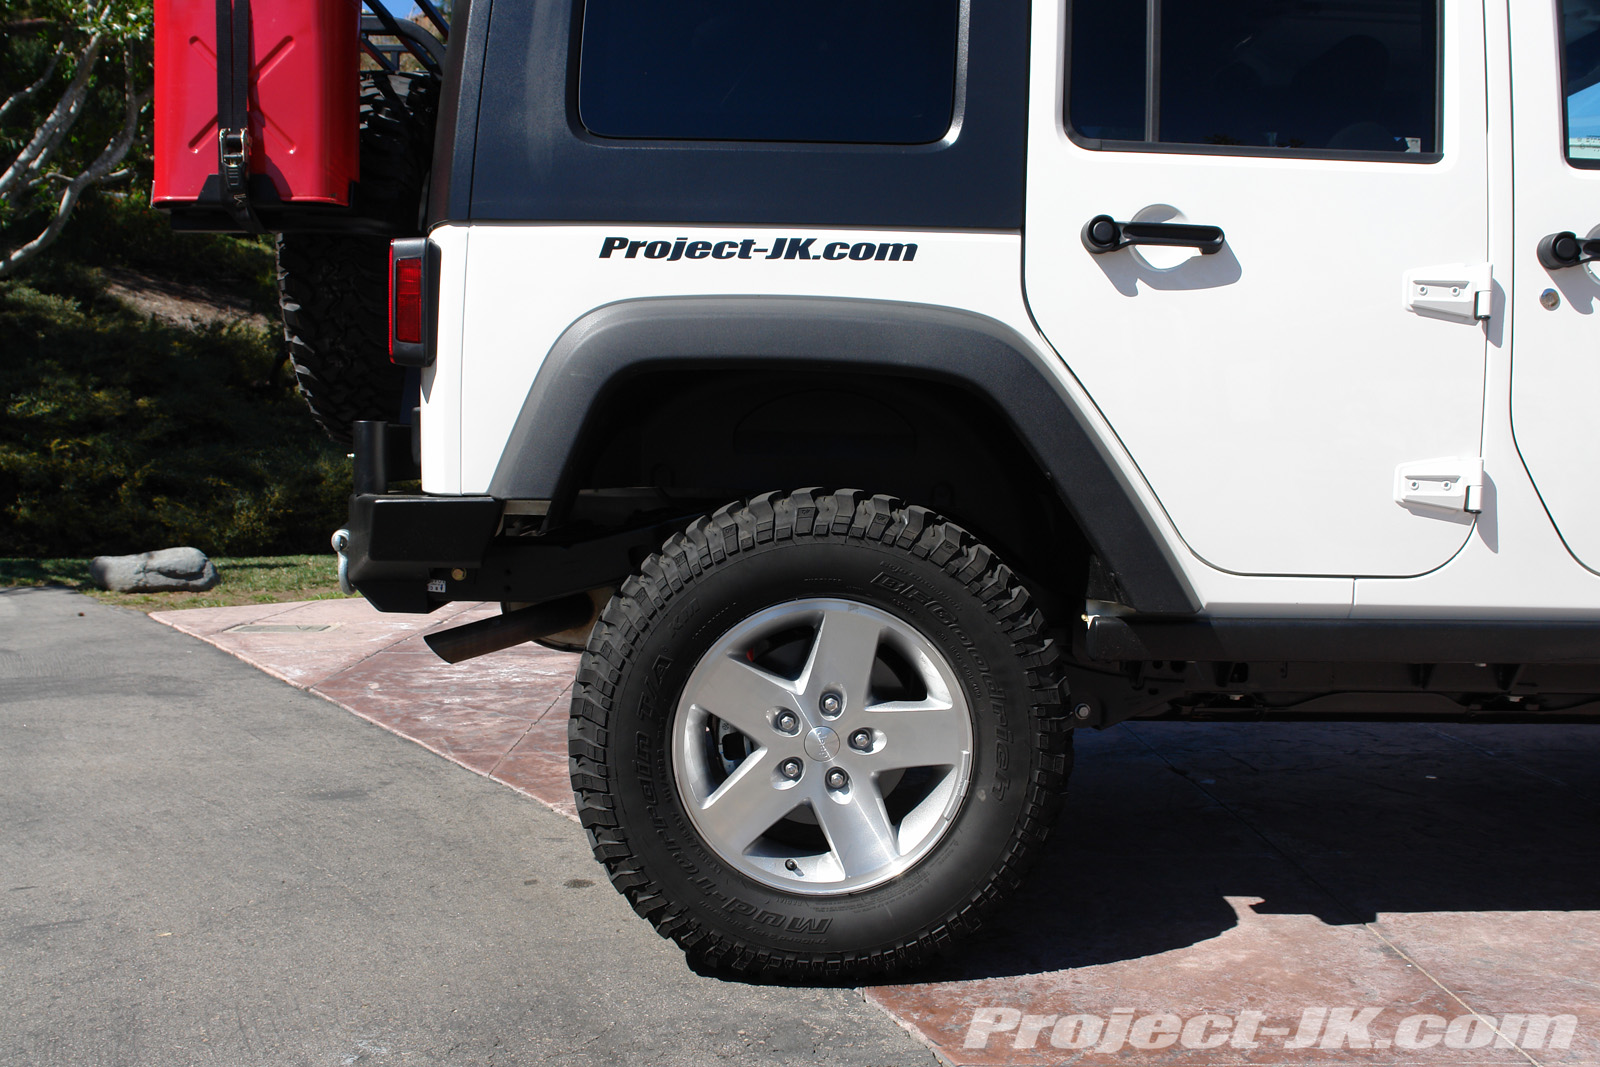
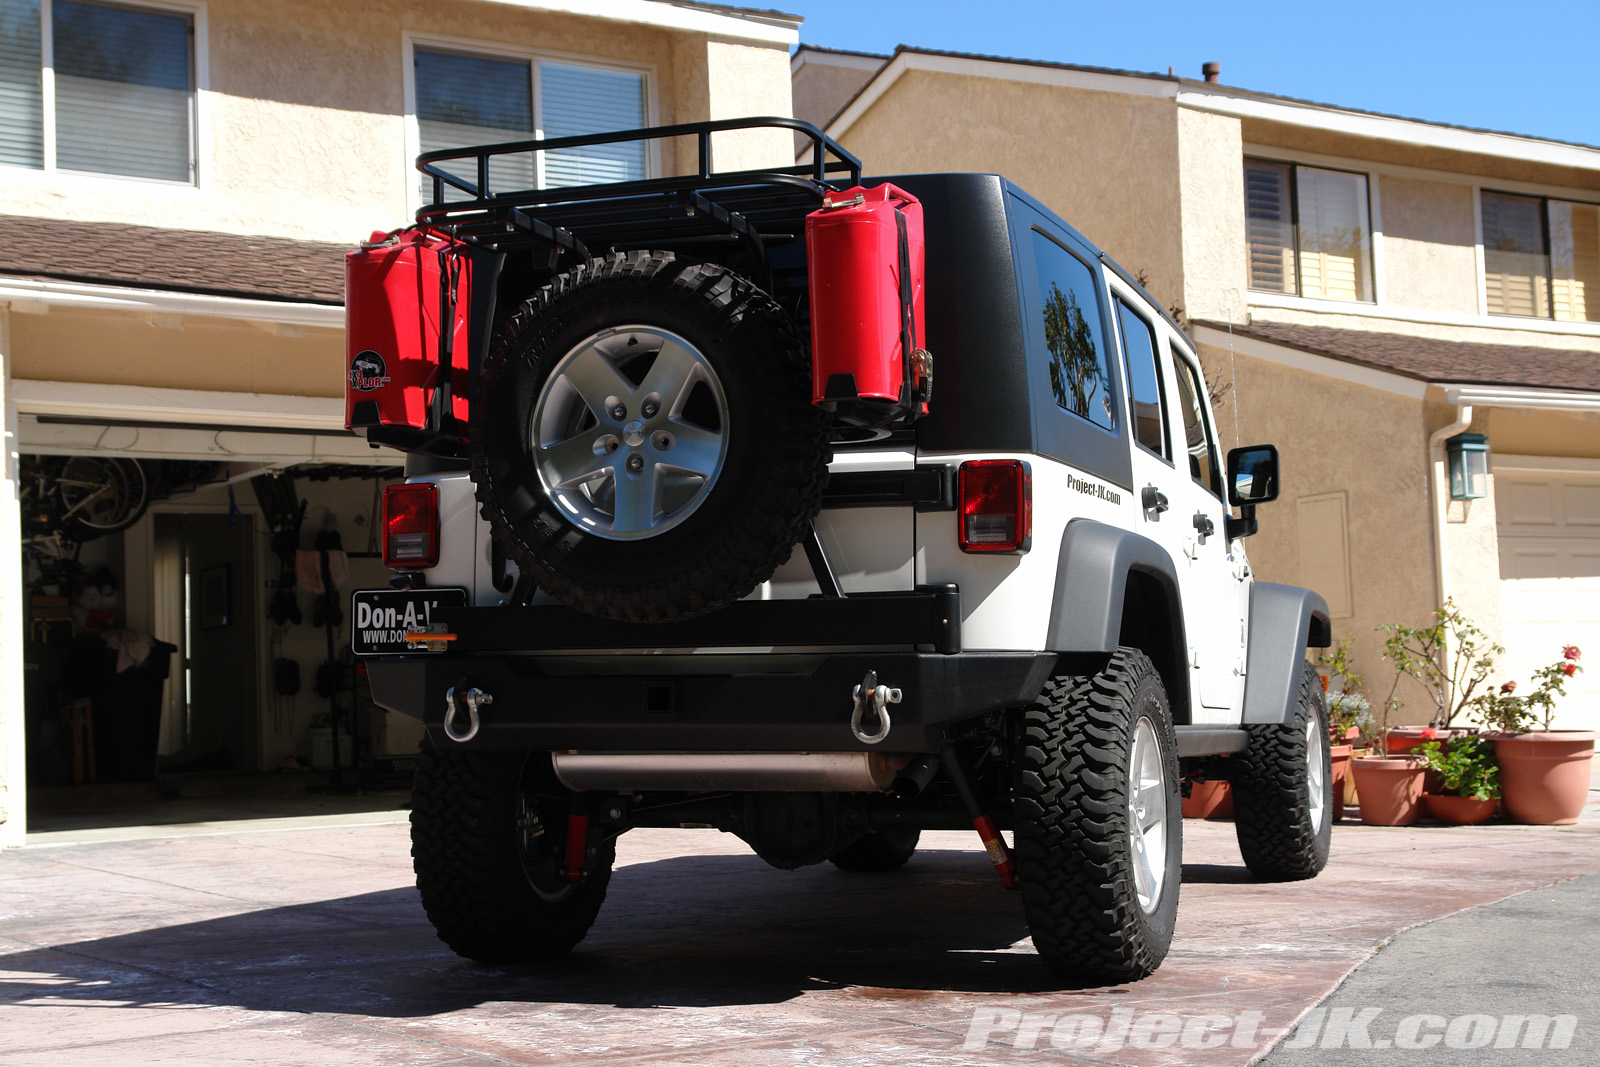
Congratulations, you now have a Jeep JK Wrangler that’s sitting on top of Old Man Emu 2″ Jeep JK Wrangler suspension lift. And, from what I have seen, this kit sits closer to 3″-3.5″ lift and would imagine it would clear 35″ tires with ease. Certainly, John’s JK already had 33’s on and as you can see in the after pics below, there is more than enough room to fit more. Give your Jeep a thorough test drive and after about 100 miles, give your nuts and bolts another check with the torque wrench just to make sure nothing has come loose.
Please let me know if you have any questions. |
Additional Photos
|
| Before |
 |
 |
 |
 |
 |
 |
| After |
 |
 |
 |
 |
 |
 |
 |
 |
 |
| Click on the link below to see all the Old Man Emu 2″ Jeep JK Wrangler suspension lift pics: Old Man Emu 2″ Jeep JK Wrangler Lift Pics |
IS POSSIBLE USE A 35X12.5X17 TIRES
Yes. In fact, it is what ARB had on their JK at SEMA.
I’m surprised that the kit does not include a rear track bar relocation bracket. Does OME not feel this is needed???
The shift in your axles is minor and minor enough that a rear track bar relocation bracket or adjustable front track bar are not needed. However, I personally would recommend that you get both a front and rear adjustable track bar to recenter your axles. While a relocation bracket will help to correct for a shift, if it is not designed for the amount of lift you have, it will not correct it 100%.
Eddie
I have an OME lift on my Cherokee and love it. So what I want to know is, how’s the ride? Is it as good or better than stock?
At least as good as stock and in my opinion, better than a stock X or Sahara.
Eddie
Do the rear brakelines need extensions?
I’m very interested in this lift but have a couple of questions. Is it necessary to do an alignment after installing this lift? Is the idea to install the lift completely and then see how much the axles have moved and then install adjustable track bars? I have also heard that this lift will settle after some time, will you then have to re-adjust the track bars?
Brian, no, brake line extensions are not needed as the rear shocks have designed to give you just the right amount of droop and act as limiting straps to prevent the over extension of your brake lines.
Crownline202, No, you will not need to do an alignment after installing this lift as the steering on the JK is set up in such a way that your toe-in will not change. You may find it necessary to recenter your steering wheel but that’s all that is needed. If you get adjustable track bars, yes, you will need to set them after you can determine how much your axles are off by. Should be more than about 1/4″. As far as settling goes, it shouldn’t be more than about 1/4″… 1/2″ tops. That would bring you back closer to 2.5″ of lift when all is said and done.
Eddie
with this particular lift yielding more than 2″ on the 2 door… i know nothing was written about additional changes to drive shafts, but should that be changed as well or recommended?
No, it won’t be necessary but it is something that you will need to replace eventually as the rear shaft will be at a steep angle and will eventually cause the CV boots to wear out. But, I don’t think that would happen very quickly. Up front, if you have an automatic, your drive shaft may come in contact with the auto skid at a full droop but that can be trimmed.
Eddie
Hey Eddie, How yah been? This lift appeals to me price wise as well as quality. I noticed in these post though that you still reccomend additional changes. If I don’t plan on lifting past 2 or 3 inchs what other kits might be better all around. say with sway bar disconects,trac bar mounts or relocation brackets. I have a stock 4 door X with 33s on stock rims. Almost all the companies have similar priced kits be being a newbie it is hard to decide where to spend this one time chunk of change I have to squeeze from my better half.God love her she keeps me moving forward. 🙂 In peticular the Rock Krawler looks complete. Any info would be appreciated. Also the mopar dana 44 axles come with e locker. so for 14 hundred that seems like a very cost effective up grade from what a stock X comes with up front. Your thoughts.
I also just read up on the full traction 3″ and again similar in price but seems to offer more. Is this what you ran on your rig?
It seems to have delivered. your outtings don’t show too much problems with it, and you seem to be putting it through its paces. I don’t want to pest anyone, but 5,6,8 hundred bones is real money.
Thanks Coy
Hi Coy, I had been running a Full Traction 3″ Ultimate Lift on my JK for a little over a year now and have put on over 23,000 miles on it. It is a great kit as it is very complete but it is also a lot more expensive than this kit. The recommended addition that I mentioned are only mentioned because I am anal about my Jeep and like to have it dialed in. However, they are not required with this lift and I think you will find that what you get is adequate and your ride will be great. Also, you can always upgrade as needed or as finances allow. Regarding the Mopar D44, yes, it is a great upgrade and one that is very affordable.
Eddie
Right on Eddie. Thanks for the info. It is hard to decide what to pick with all thats out there. Getting feed back from you and other wheelers helps me not waste time and money. I like the write ups and picks that go with them. Still looking for your bunch to make a run up here. Man death valley or mojave is just a long trek for us. Funny just like any other hobby or pastime. dirtbikes,harley’s,boats,hotrods whatever, once you get into it you find a whole world. I get suprised daily at just how many people are serious offroaders, with buggies, crawlers whatnot. But I have been wrenching for fun and a living for as long as I can remember. I like the way you and the others roll. You are out to have a good time not just thrash. I used to live in the Ozarks and if you break down your walking. I am also thinking of relocating my family up north around the Portola area. Lots of good open country. anyway take it easy.
Coy williams
Have you compare the new REVTEK 2 inch lift against this lift kit; with front shocks, no coils, spacers and a front track bar. They recommnend the front track bar to prevent bump stops.
Hi Jorge, no, I have no experience with Revtek products but being that it has NO coils, it is not in the same league as the OME kit as it is essentially a budget boost (coil spacer kit). As far as ‘bump stops’ go, did you mean to say bump steer? Because, bump stop and extensions for them will be needed with a budget boost kit to prevent the over compression of your factory coils.
Eddie
I would LOVE to know what kind of ride & lift height the MEDIUM FRONT and rear springs give on a 2 door JK?!?!?!?!?!? I DO not want a harsher than stock ride on my 07 2 door Rubicon
THANKS FOR ANY FEEDBACK! ! !
So long as you are not planning to install heavy bumpers and a winch, I’m sure it will provide an outstanding ride. If you add heavy bumpers and a winch, you will most likely loose lift height.
Eddie
I just installed this suspension on my 2008 4Dr Rubicon. I’ll add a couple of notes. On my vehicle, contrary to what is stated above, I do need rear brake line extensions as the rear brake lines are very tight at full droop (yes, the shocks were installed). In the front, things are OK.
Other points of interest, when you are stripping things for the spring install, anywhere you can detach the ABS sensor wires from their fixing points on the frame, do it.
For my rig, setting the adjustable track bars I installed at 1/4″ longer than stock was perfect.
A trick I have used for quite some time when dealing with 5 link suspensions for determining if axle is back to stock location transversely under the Jeep is to choose a fixed point on the frame (or engine front cover). Then hang a plumb bob from that point and put a zip tie around the axle where the plub bob hits. Go install the lift, then repeat to see how far the axle is offset left to right.
The front sway bar links are OK since the shocks limit down travel … but they are just barely OK. If you can find a set that are 2″ longer, That’d be perfect.
Overall, I am super pleased with the results of this lift.
I’m a total jeep newbie…at the moment. But after a few years of off roading, will I wish for a higher suspension? Are there advantages to 2″ versus higher (say, city driving/comfort)?
Hi Steve, yes, a 2″ lift coil like the kind OME makes will offer a more comfortable ride than a taller lift. Also, the higher you go, the more you will need to address such as control arm lenght, trackbars, etc. But, if you plan on going taller, I would recommend that you get a budget boost as it is cheap.
Eddie
So with this kit, without replacing with a longer driveshaft there really is no way of telling how long it will last? I guess that is the only thing that scares me at this point…
Actually, that would be the case with any kit on a 2-door as the rear drive shaft is so short.
Eddie
Hello Eddie
I have a 2007 Sahara Unlimited JK. I have installed Warn front and rear bumpers with tire carrier, front tube, skid plate, winch mount and Powerplant winch. Olympic 4×4 Products X-Treme Reversa-Bars.
I installed TF 3/4″ spacers in front to compensate for the extra weight. I am very much interested in the OME lift kit. With the additional weight added to my JK and wanting to lift my JK moderately, can you say the OME would be a good fit?
I just completed the OME 2″ lift on my 2 day old Rubocon (less than 100 miles). This write way really helpful and made the whole project pretty painless and fast (3-4 hours). The only alteration from the write up was the ommission of the front 1/2″ OME coil spacers – these were left out at the recommendation of Northridge 4×4. Even without these I still saw way more than 2″ lift – more like 3-4″ by my crude calculations.
Also, there is a rubber hose attached to a nipple on the rear-axle that pops off when I dropped the real axle. You may want to add a note to re-attach when the projet is complete – not sure what this is – anyone tell me? Other than that I found no major problems with the write-up but I woudl echo Sam’s comment above about removing any one of the clips where the rear ABS lines are attched to the frame – I found I had to take out the upper frame attachment as well as the first attachment on the hub.
Thanks again – great write-up.
Colin
P.S. – the ride is pretty sweet too so far 🙂
Hi James, yes, the OME will be a good fit for you but you might want to hang on to the spacers you already have as they may still be needed to help compensate for the weight of your bumper and winch.
Hi Colin, the hose you are refering to is the axle breather and yes, if it comes off, you need to reinstall it.
Eddie
I am sold on this kit, one last question. If I install this with the stock X rims and tires will I have any clearance issues with the sway bar links in the rear?
Not exactly and it depends on the size tires you plan on running. If you run stock tires or stock width tires, you will not have any problems. If you run 12.50 wide tires on your stock wheels, you will have rubbing issues but not necessarily on the links.
Eddie
Hey Eddie, awhile back you refered me to a link for you outings. For some reason it no longer works. I still would like to tag along with your group if I can swing the time off and it is up this way some.Say Garcia’s. Dude you must be a typing fool I see all the Emails you return. I don’t think the two index fingers I use to type could take it. Hunt and peck. 🙂
Hey coyot’e, we post most of our outting in the SoCal staging area on JK-Forum: http://www.jk-forum.com/forumdisplay.php?f=45
Eddie 🙂
Thanks for the great write up. I have a 2007 JK Sahara and I’m going to purchase the OME 2 inch lift. My question is based on tire size. If I keep my stock rims, will 33 inch tires rub? Any feedback on appropriate size or recommended brand of tire would be greatly appreciated. Thanks for your help…
With this kit you can easily fit 35″ tires with out rubbing at a flex but you might see some rubbing at a full turn with stock wheels. With 33’s, so long as you get them only 10.50 wide, you should be okay but if you go 12.50, you should get some wheel spacers to give you a bit more clearance for your sidewalls.
Thank you so much for this write-up. I’ve heard so many good things about OME lifts and I’m looking forward to installing it on my JK Unlimited. I wanted to inquire about the instructions. I just noticed that 13-17 is missing. I wanted to double check if this was just a mistype.
Thanks again!
Hi Tess, yes, it was just a mistype and I have since fixed it.
Eddie
Thanks for the feedback. Please pardon the simplicity of this question. Prior to lifting the jeep, where the 33’s an issue without the lift? Did they rub when (and if) you hit the trails? I’m probably going to purchase tires first (budget constraints) and then add the lift at a future date. Just want to make sure that the progression is appropriate. Thanks in advance.
Hi Albert, for the most part, you’ll be fine running 33’s and no lift but you will see some rubbing when disconnected and on the trail.
Eddie
As far as eventually replacing with longer driveshafts, does this also mean that one would have to purchase control arms at the same time?
Jeeper, you’re not replacing your factory driveshaft with a longer one but rather one with u-joints and a double cardin. For the rear, you will need adjustable upper control arms to dial in your pinion angle.
Eddie
Thanks for the writeup. I have a question on the 1/2″ spacers. Do you need those for the front as well and if not how come? Does it matter if I plan to add a rear bumper with tire carrier eventually?
Sorry I meant “rear” as well in my previous post. Thanks.
I installed this with the heavy springs. I measured before and after. Looks like 2 3/4 ” in the rear and 3″ in the front. 07 unlimited X 4 dr. Dave at Northridge 4×4 Thanks for your patience and outstanding customer service. No kidding people I ordered the parts over the phone and I think they arrived before I hung up:). The kit doesnot come with ajustable track bars and in conversation with Eddie I felt the need to be able to dial it perfect, so I ordered the full traction front bar and a teraflex rear relocation bracket. Dave price front and rear bars but my funds are tight.So this is why rear bracket. I should have listened to Dave. After testing I found the shock tube nailed the relocation bracket under compression. Now this is where a good company stands out. Dave listened to my plight and we worked out a fair deal. The parts are on the way and we will be wheeling again. Also many thanks to John and Eddie for the instructions.This kit really rides well. Handling is as good ( I think better ) than stock.
Coy Williams
Silver Unlimited X 4 dr soft top
Warrior rack
Radio shack cb custom mount
Cooper STT 33″ on Moab 17s
True Flow XDI air intake
Gibson dual split rear cat back
Hypertech Max energy power programmer
Soon to have Smittybilt XRC 10 winch and matching XRC bumper.
Rubicon 2dr 08, installing shrockworks midwidth bumper,rear full bumper, plus the powerplant HP. Will the OME lift compensate for the front end drop, (removing cable, using Synthetic rope).Will I have to add front and rear adjustable track bar to recenter my axles, or might the CV boot still rub?
if you did not get the 1/2″ spacers with your kit, you will want to as they will help compensate for the drop. adjustable track bars aren’t needed per se but if you want to recenter your axles, they will be your best bet. your rear cv boots will be pinching but it will take some time before they fail.
Eddie
Your saying that I only need a 1/2 inch spacer(fron and rear) (no spacers with the shrockworks bumper), I will not need the old man EMU lift kit? what will be the draw backs not spacing at all?
Thanks Eddie
No, what I’m saying is that the bumpers you want will cause your Jeep to sag a bit. 1/2″ coil spacers in addition to your OME lift will help correct for the lift hight loss.
A unexpected plus. We have gained aprox 3 mile to the gal that was lost with the rack an tire changes. The XDI,Hypertech and,Gibson improved the mileage. Although the radio is at 3/4 on the freeway. Oh well now it matches the tv volume. 🙂
Eddie
OME lift kit. I looked at several sites that carry the OME lift kit, they do not have all the material shown in your write up missing the spacers, and possible some brackets. could you direct me to a site that has the all the material shown in your write up.
Thanks again
Jeff