Instructions
|
 |
The IPF 900XS come with pretty much everything you need to install them including the wiring harness, relays, switch, fuses, wire connectors and even zip ties. However, you will need to have brackets that you can mount them to on your Jeep JK Wrangler bumper, windshield or light bar. |
 |
 |
 |
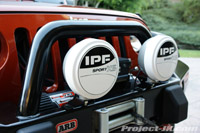
| 1. The IPF 900XS lights come with a single mounting stud that measure about 1/2″. You will need an appropriate bracket on your bumper, windshield or overhead bar to mount them onto. You will need a 19mm wrench to secure them in place. |
2. Pop open the hood of your your Jeep JK Wrangler and route the long wiring harness to wherever you need it to go. Being that I mounted my IPF 900XS lights to the bumper, I ran the wiring harness along the fender and down behind the grille. |
3. Route the 2 plugs on the end of the wiring harness out to the IPF 900XS lights and plug them in. |
 |
 |
 |
| 4. Using a 10mm wrench, remove the nut attached to the inside of your Jeep JK Wrangler’s passenger side fender right next to the fuse box. |
5. Attach the pair of black ground leads with brown ticks extending from the IPF 900XS lights to the ground stud and secure them in place using the factory nut. A 10mm wrench will be needed for this job. |
6. Plug the relay that comes with the IPF 900XS lights into the wiring harness and mount it somewhere under the hood so that it’s pointing up and the wires are coming out from the bottom. |
 |
 |
 |
| 7. Using a 10mm wrench, remove the nut attached to the inside of your Jeep JK Wrangler’s passenger side fender just in behind of the fuse box. |
8. Attach the single black ground lead with brown ticks extending from the relay plug on to the ground stud and secure it in place using the factory nut. A 10mm wrench will be needed for this job. |
9. Using a 10mm wrench, remove the nut on top of the positive terminal lead on your Jeep JK Wrangler’s battery. |
 |
 |
 |
| 10. Attach your IPF 900XS yellow power lead to the positive mounting stud and secure it in place using the factory nut. A 10mm wrench will be needed for this job. |
11. Open the passenger side door and remove the air vent baffles by rotating it and pulling it out as shown. Set the baffles aside. |
12. Reach through the air vent hole and push out the side panel of your dash as shown. Remove the panel and set it aside. |
 |
 |
 |
| 13. Push a straightened out wire coat hanger all the way through the foam filled hole located on the firewall next to the door jam as shown in this pic. |
14. Outside your Jeep JK Wrangler, take the wire coat hanger now sticking out from under the cowl and tape the black pair of wires with weather proof terminals to it as shown. |
15. Back inside your Jeep JK Wrangler, slowly pull the wire hanger back through the firewall hole until the pair of black wires come all the way through. Remove the tape and coat hanger. |
 |
 |
 |
| 16. Take the short wiring harness that comes with the IPF 900XS lights and tape the yellow wire with red ticks to the black pair that you just pulled through the firewall hole. |
17. Back outside, slowy pull the pair of black wires going through the cowl just until the yellow wire with red ticks that you just taped to it in step #16 comes through. Remove the tape and separate the wires. |
18. Open up your Jeep JK Wrangler’s glove box and remove it by pushing in the sides until the stop pins clear the dash subframe frame and then rotate it downward. |
 |
19. Take the IPF mouse switch and plug it into the matching end on the short wiring harness. |
 |
 |
 |
| 20. Take the black pair of wires with weather proof terminals on the short wiring harness and plug them into the matching ends of the long wiring harness that you pulled though the firewall hole. Route all your wires behind the dash and reinstall your glove box, air vent baffles and side panel. |
21. Back outside your Jeep JK Wrangler, route the high-beam wire of your passenger side headlight through the open channel of the provided electro-tap. While it is not recommended by IPF, I decided to attach the electro-tap to the positive lead on the side marker light as shown. |
22. Route the yellow wire with red ticks that you pulled through from the inside of your Jeep JK Wrangler to the electro-tap. Then, route the wire into the closed end of the electro-tap, fold the ends shut and crimp using a pair of pliers. |
 |
23. Use the self-adhesive strip provided to install the IPF mouse switch to an appropriate location inside your Jeep JK Wrangler. As you can see here, I chose to attach it just in front of the transfer case shifter. That way, it’s easy to access and very little of the wire is visible as it can be routed behind the dash. |
 |
24. Last but not least, turn on your Jeep JK Wrangler’s headlights, set them to high-beam (or, if you tapped into the side marker light like I did, just turn them on) and then push the button on the IPF mouse switch to test out if your your IPF 900XS lights work. Take some time to adjust the beams to optimize their performance and you’re done. |
After Shots
|
 |
 |
 |
As you can see, there’s really nothing to this install. If you want to see all the photos for this write-up, simply click on the link below:
IPF 900XS Off Road Lights Photo GalleryPlease let me know if you have any questions. |
where did you pick up de power from the side marker light? Just behind the head light (the black and green white wires)
Thanks
Nils
Quick question,
Why did you tap into the side marker vs. the high beams?
thanks,
sean
to give me more options if needed.
Good write up. I appreciate the detailed pics.
These instructions made installing our IPF’s a breeze. Never would have found that firewall hole without the pointer mentioned above. I was more than disappointed with the lackluster instructions that came with these high quality lights so this site saved us a bunch of time.
Thanks again,
Steven
i don’t need/want my lights to turn on only with high beams (is not a law in my country and i want more control) that’s why you tap it to the side marker? or how do i do that?
Thank you
(i’ll be installing KC Daylighters, of course the lights instructions will be those that came with the lights… i am basically following the routing instructions, but i think u can help me with my question)
I did not install mine. how do you adjust the beams?
Hi Thanks for the instructions, my lights came with just a vague diagram and yours were pretty clear and i seem to have got it right except that the lights dont switch on with the high beams, you know what that might be? I routed the wires in the electro-tap as shown..
Thanks.
Anyone know how to wire up off road lights to turn off when the high-beams are turned on? Dumb question I know but here in VA they have to be set up like that or they get removed during inspection.
you need to attach your switch wire to something like your side marker lights as they are always on.
This is one of the best step by step how to’s that I have run across. Great job.
I do have a question however. I have an 06 TJ that I am replacing the factory driving lights with 900Sx lights, using the original location. I’ll have to enlarge the mounting holes slightly, but that’s no big deal. I wondering however, if I can use the original jeep wiring. The jeep lights have a 55 watt bulb and the 900sx have a 65 watt bumb. The wiring is slightly larger gauge on the 900’s. Will I be over taxing the original wiring if I use it?
If I tap into the side marker wire vs the high-beam wire, will I be able to turn the driving lights on & off at my discretion as long as i have the side marker/ running lights powered on?
Thanks so much for this writeup! Installed IPFs on my windshield and used this DIY posting…only took 2 hours and I do not consider myself an electrician. Great recommendation on using the side marker lights. I couldn’t necessarily tell where exactly you tapped into the wiring for them so I just ran the wire through a little window in the fender to the direct plug. Thanks again!
how do you change out bulbs can’t figure out how to open. don’t want to tear them up
I cannot figure out how to take the light grill off so that I can change the bulb. Has anyone changed the bulb on a IPF 900XS off road light with the grill cover? Thanks!