Instructions
|
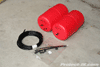 |
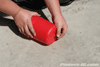
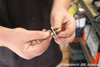
This is a pic of all the things you will get out of your AIR LIFT 1000 air springs kit (2-air bags, hose, hardware kit). The rest of the parts that come with the kit are intended for use on another vehicle and will not be needed. |
|
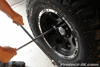
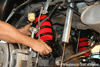
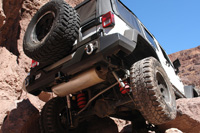
1. Loosen but do not remove the lug nuts on the rear wheels. Then, lift the rear end of your Jeep JK Wrangler from the differential using a tall floor jack and then set it back down onto (2) jack stands, each placed just behind the lower control arm frame mounts. Remove the wheels using a 19mm lug wrench or socket and set them under the frame rails for added protection. Leave the floor jack under front the axle to help support it. |
 |
 |
 |
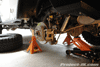
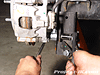
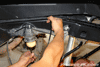
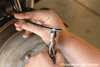
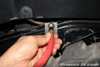
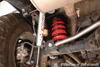
| 2. Using an 18mm socket and wrench, remove the bolt and nut securing your Jeep JK Wrangler’s rear shocks to the lower axle mounts. |
3. Using an 18mm socket and wrench, remove the bolt and nut securing your Jeep JK Wrangler’s rear sway bar links to the lower axle mounts. |
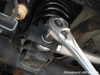
4. Remove the rear track bar bolt and nut from your Jeep JK Wrangler’s lower axle mount using a 21mm socket and a breaker bar. |
 |
 |
 |
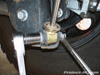
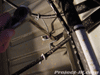
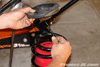
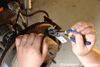
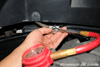
| 5. Using a 10mm deep well socket and extension, remove the 2 nuts securing your Jeep JK Wrangler’s emergency brake cables to the bottom of the tub. This is necessary in order for you to get your rear axle to droop enough to remove your coils. |
6. Using a 10mm socket, unbolt the rear brake line brackets which are fastened to the outside frame rails of your Jeep JK Wrangler. Leave them dangling at this time. |
7. Slowly lower your Jeep JK Wrangler’s rear axle being mindful of the ESP wiring. Once your axle is dropped low enough, your coils should just about fall out and can be removed with ease. Set aside the upper rubber isolators as they will be reused. |
 |
 |
 |
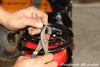
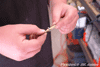
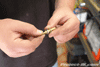
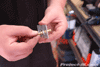
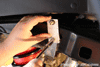
| 8. Take your Air Lift 1000 air springs and remove the black vinyl plugs from the brass nipples. |
9. Press on and fold the ends of your Air Lift 1000 air spring to evacuate as much air from them as possible |
10. Keep holding your Air Lift 1000 air springs down and then reinsert the black vinyl plugs so that no air can come back into them. |
 |
 |
 |
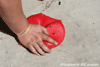
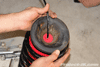
| 11. Shove the Air Lift 1000 air springs through the sides of your Jeep JK Wrangler’s rear coils as shown in this pic. Make sure that the brass nipple is pointing toward the top of the coil which is wider in diameter than the bottom. |
12. Pull the black vinyl plug from the brass nipple on your Air Lift 1000 air springs and allow them to re-inflate in your Jeep JK Wrangler rear coils. |
13. Take the black air hose that came with your Air Lift 1000 and feed it in between your Jeep JK Wrangler’s body and frame rail next to the rear bump stops as shown in this pic. |
 |
 |
 |
| 14. Fish the black air hose that came with your Air Lift 1000 air springs through the center of your Jeep JK Wrangler’s upper spring perch and then pull it through as shown in this pic. |
15. Measure out about 2′ of air hose, cut it and then slip it through the center of your Jeep JK Wrangler’s rear coil rubber isolators. |
16. Take one of the hose clamps that came with your Air Lift 1000 air springs, hold it open with a pair of pliers and then slip it on to end of your black air hose as shown in this pic. |
 |
 |
 |
| 17. Push on the black air hose into the brass nipple on your Air Lift 1000 air springs. Then, use a pair of pliers to hold open the hose clamps and slide on to the end of the hose. |
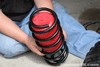
18. Place the rear coil rubber isolator on top of your Jeep JK Wrangler’s rear coils as shown in this pic. |
19. Carefully reinstall your Jeep JK Wrangler’s coils making sure that the rubber isolator stays in place and that the black air hose feeds up and through the center of the upper perch without getting pinched. |
 |
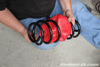
20. Until I can come up with a better solution, I made a couple of homemade brackets to secure the Air Lift 1000 air spring schrader valves out of 1/8″x1″ aluminum bar stock. Essentially, I cut down a longer piece of bar stock to 2 separate 3″ lengths and then drilled out a 3/8″ hole on either end of them as shown in this pic. |
 |
 |
 |
| 20. Begin assembling the Air Lift 1000 air spring schrader valves by installing the jam nut all the way to the end. |
21. Next, slip the spoke washer on the schrader valve and put it up against the jam nut. |
22. Now, insert the Air Lift 1000 air spring schrader valve with jam nut and spoke washer on through your mounting bracket as shown here. |
 |
 |
 |
| 22. Slide on the rubber washer over the Air Lift 1000 air spring schrader valve and push it up against your mounting bracket. |
23. Install the 2nd jam nut onto the Air Lift 1000 air spring schrader valve to hold everything in place. |
24. Use a 1/2″ wrench to tighten up the jam nuts and secure everything in place on your mounting bracket. |
 |
 |
 |
| 25. Take one of the hose clamps that came with your Air Lift 1000 air springs, hold it open with a pair of pliers and then slip it on to end of your black air hose as shown in this pic. |
26. Push on the black air hose into the nipple end of your Air Lift 1000 air springs schrader valves. Then, use a pair of pliers to hold open the hose clamps and slide on to the end of the hose. |
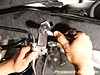
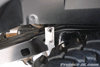
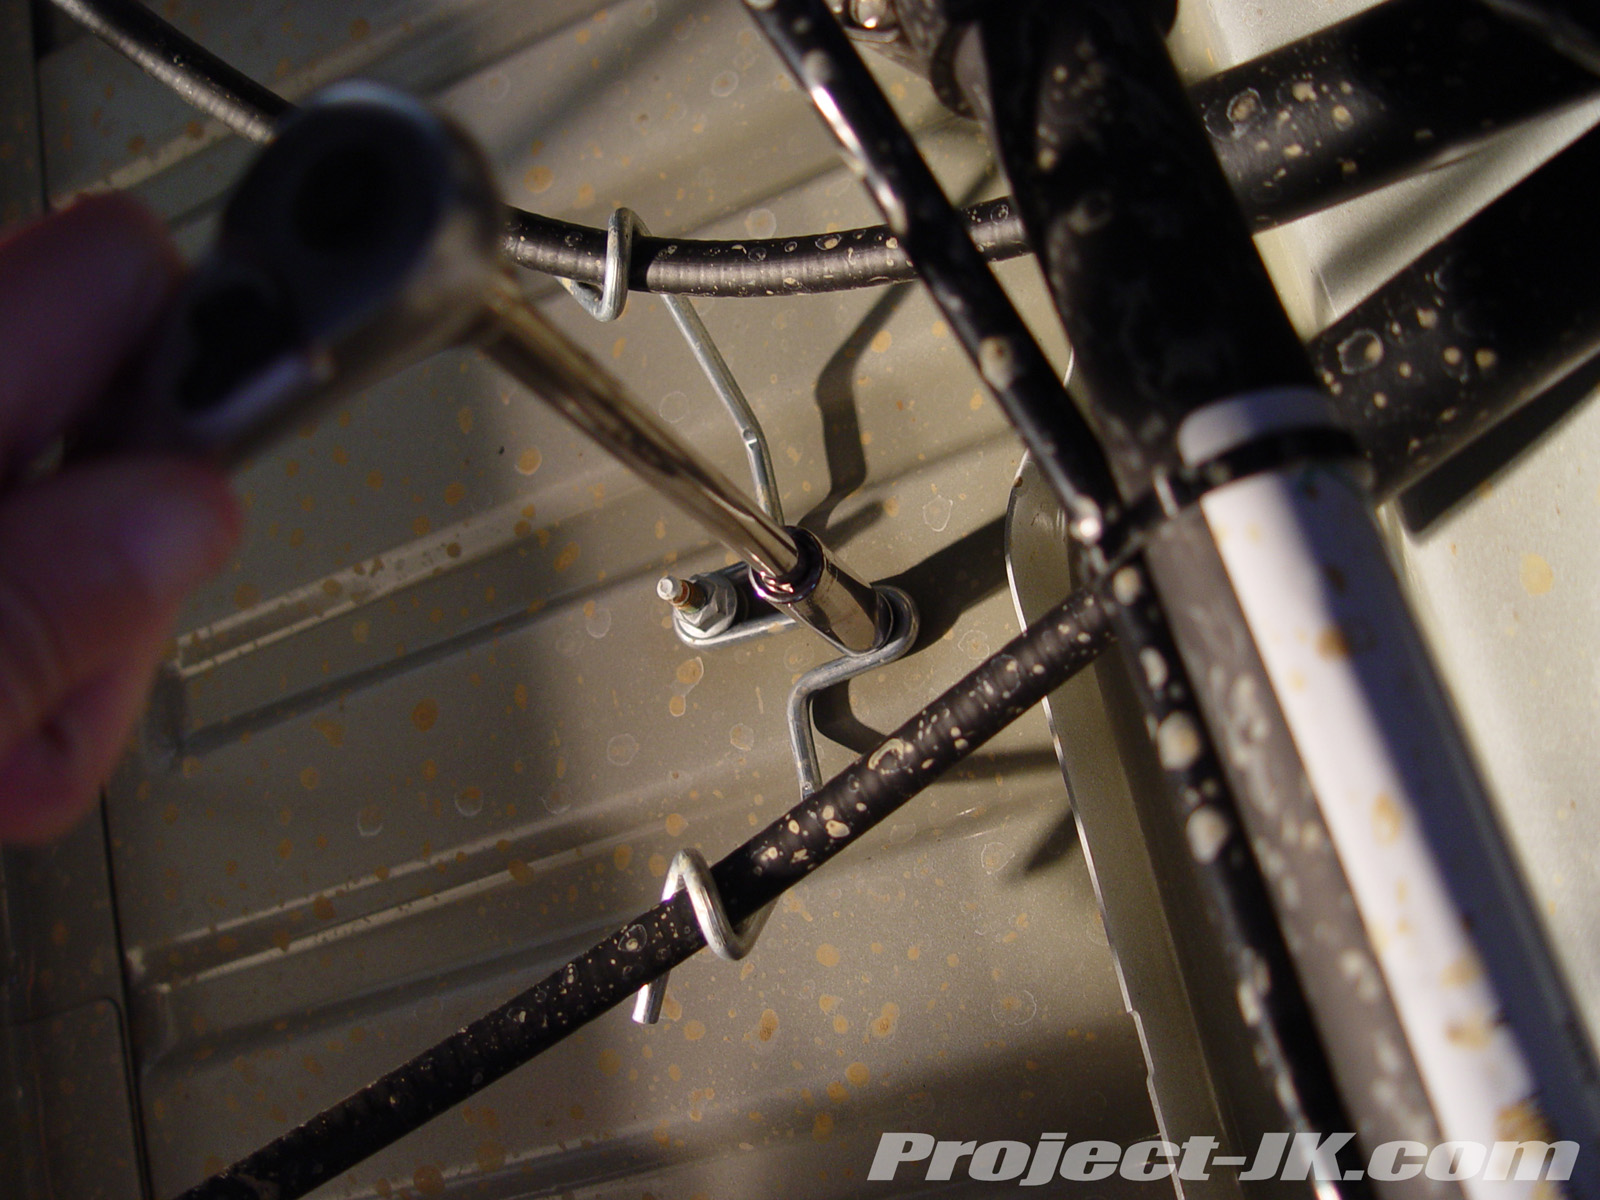
27. Use a 10mm socket to remove your rear brake line mounting bolt. Then secure your new Air Lift 1000 air spring schrader valve mounting brackets on top of the brake line bracket using the factory bolt. |
|
|
|
| 28. Using an 18mm socket and wrench, secure your Jeep JK Wrangler’s rear sway bar links to the lower axle mounts using the factory hardware. |
29. Using an 18mm socket and wrench, re-install your rear shocks onto your Jeep JK Wrangler’s lower axle mounts using the factory hardware. Tighten these bolts to 56 ft. lbs. of torque. |
30. Reinstall your Jeep JK Wrangler’s rear wheels, lower it back down on the ground and then tighten the lug nuts to 95 ft. lbs. of torque. |
|
31. Using a 21mm socket, reinstall your Jeep JK Wrangler’s rear track bar on to the axle mount using the factory hardware. Then, tighten the track bar bolt to 125 ft. lbs. of torque. |
|
32. Using a 10mm socket, re-secure your Jeep JK Wrangler’s emergency brake cables hanger to the bottom of the tub using the factory nuts. |
 |
33. Slowly inflate your Air Lift 1000 air springs using a standard tire pump to 35 psi (DO NOT exceed 35psi) and then check for leaks along all the connection points using soapy water. |
 |
34. Deflate your Air Lift 1000 air springs in 5psi intervals and take your Jeep for a spin between each one to determine what gives you the best ride. DO NOT let your air bags fall below 5psi at anytime. For my purposes, I ended up bringing my air springs all the way down to 5 psi on the driver side and about 8 psi on the passenger side to help level out the sag I see whenever I have a full tank of gas. |
 |
35. Install the plastic schrader valve caps and then recheck the air Pressure in your Air Lift 1000 air springs after 24 hours. A 2-4 psi drop is normal after installation but if you see more than a 5psi drop, repeat step 33. |
Air Lift 1000 Air Spring Operation
|
| To operate your Air Lift 1000 air springs, simply inflate the air bags to 35psi before you load up your Jeep. Then, deflate them until you have achieved a desired height or comfort in ride. |
Air Lift 1000 Air Spring Maintenance
|
| Unless you’ve installed an Air Lift 1000 air spring kit that comes with a self regulating compressor and always maintains a constant psi, it is important to check the pressure of your air spring on a regular basis to make sure it doesn’t fall below 5psi (as is indicated in the instructions provided by Air Lift). |
Additional Photos
|
 |
 |
 |
| |
|
|
Congratulations! Your Jeep JK Wrangler is now equipped with a set of Air Lift 1000 air springs and you can now keep its rear end from sagging when loaded up. If you would like to see more pics from this install, click on the link below:
Air Lift 1000 Air Springs Installation Photos
Please let me know if you have any questions. |
| |
This is very good write up. It breaks down the install so there’s no guess work. And it has lots of pictures to help you out too!
I’ll me installing mine in a couple of days. I appricate the help.
Thanks Eddie.
Trail Bud
Hey Trail Bud, glad to be of help and with all the gear you carry, it should really help out on the trail 🙂
Eddie
Just finised the install. It was very easy. It took 2hrs.
I like the way it sits now, and I know it will do better on the trail loaded with gear.
Thanks again!
Trail Bud
Hey Trail Bud, glad to know you got them on and that my write-up was able to help you out 🙂
Eddie
Very interresting what you have done, and thanks for the photos.
Just a question, if your car is not “overloaded”, is it higher ?
I’m looking for such a system for my Mitsubishi Pajero (Montero in US) for the 4 wheels, to lift the body.
In any case, I will have to import the air lift 1000 from US to France.
Regards
When you had them on a tj what did you do about the bump stops that are in the mid of the spring?
Nothing, I just left them there. If you are asking because of the air line, I had to drill a hole in the lower spring perch and ran it the line through it.
I am thanking of doing this to my JK and my dad is thanking of doing it to his TJ also. When the TJ articulated did it crush the bag? If so did it damage the bag?
Thanks
The bags are very strong and on the TJ, the bump stop will just push into the bag. It will not get damaged.
Cool Thanks
Can you put these on with spacers already installed?
thx
Depends on the kind of spacers you have but yes, you can and I have.
Eddie
I have a 2.5 TF BB. On the spacer TF uses does it have a hole to thread the air line through? Will I have to drill? Are you still running this kit Eddie? I did not notice it in your pics from Moab this year. Thanks dude
you will not need to drill a hole as the TF BB does have a hole in it that you can use. but, you will need to make sure that you get air bags that will fit your needs. i do not have air bags now as i have new coils that will not work with the bags that i have.
Hey WOL! Thanks for the write up! Just wanted to let you know that they make a JK specific version of the Air Lift 1000 kit!! I just ordered it for my rig. If I learn anything new during my install I’ll post it up!
Will this work if you installed a 3 inch lift where the springs were changed out?
that’s what i installed mine on. you just need to make sure that you get the right size bags.
I’m putting these on my ’07 2 door with a 4″ lift, and have to order different bags as well. How did you measure the ID of the coil (top, bottom, middle?) and when you measure the length, did you do it from perch to perch, or from the last twist of the coil? (My trailer is making my super soft suspension sag, so any help would be great!)
Thanks, Jayson
measure from perch to perch.
Will this work with the teraflex 2.5 BB? i looked at the spacer in the rear and it comes to a point. it seems like it would be bad for the air balloon or maybe even not work at all. Should i cut the point off?
Thanks
Josh
yes, it will but only if you get an air bag that will fit the space between the axle and the peg. also, i would recommend that you run the air line thought the bottom of the axle perch as oppposed to up through the spacer.
Just did this lift on my stock 2 door. Bought it from Jeggs and I am very happy with it. I did not pull the spring out. Just put the frame on some jacks and then lowered the rear axle to stretch the spring out enough to shove the air bag in there. Ran the air hoses through the frame. Clean and good looking install!!
WOL, you had the nipple pointing up in the spring, which I think allows a nicer routing of the air line, but their instructions have the nipple at the bottom. Is there any significance to installing it differently?
Just ordered my kit…I have a 2011 4 door rubi with Tereflex 2.5 spring lift, steel rear bumper and tire swing. Unloaded measurements were 5.125 inner spring diameter and 8.5 top perch to bottom perch. I called Air Lift and they quoted me kit number: 60742.
Cheers.
Has anyone ever put them on a rusty’s 2″ spring lift. the hight from my top perch to bottom is 10″. Am I measuring wrong, Contacted air lift for 11″ bag because springs are sagging with my ruggid ridge bumper.
This write up got me looking into the Airlift bags for my BB spacer lifted 2010 JKU. They now have a kit for stock JKs and their instructions worked without taking the suspension apart. They show the air lines coming out the bottom, but I liked your way of having them come out the top for simpler routing of the lines. Installation was easy and am looking forward to loading the JK up and trying them out.
On the JKU, you don’t have to take the springs off, just push them through the spring. Makes it much easier..
awesome write up! thank you.. can you make a write up for the front… I have a bit of sagging from my winch and bumper… 2010 Rubicon 2 door
How long did this product last for you? Did you get rid of them when you switched to coil overs or did you get rid of them sooner? I’m going on a multi day jeep trip and gonna have the Jeep loaded up and going on trails and I think this could be a good option to level out the rear of the jeep. Do you still recommend using these?
I just ordered the kit for my 07 JKU. Is it okay to leave the bump stop? I also would like to run the airlines out the top for a cleaner look.